The navigation pane in Outlook 2010 let you quickly switch between essential features of the program. Many users may only use some of those features so displaying all of them is unnecessary. This tutorial provides a step by step guide to hide specific buttons in the navigation pane and to better let you focus on the ones you need.
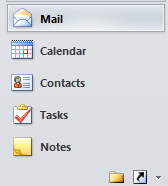
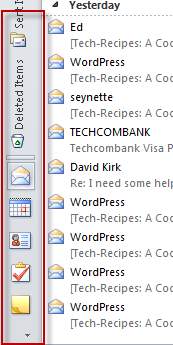
Below is the screen shot of the default navigation pane in Outlook 2010. If you find some of these buttons unimportant, follow the guide to free up the space and display more emails.
1. Launch Outlook 2010.
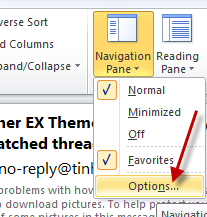
2. Switch to the View tab at the top of window.

3. In the View section, click Navigation Pane to show its menu and choose Options. The visible options in the menu will be explained later.
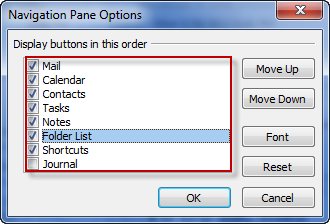
4. The Navigation Pane Options window appears. This window lets you customize the Navigation Pane to fit your needs. If you find some buttons unnecessary, just uncheck to hide them. You can also re-arrange the buttons by highlighting it and click Move Up or Move Down. When you are done, click OK to save the settings.
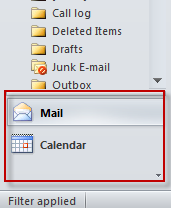
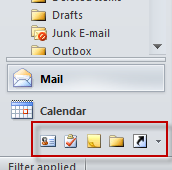
5. After tweaking the Navigation pane, it should appear a lot cleaner.
6. If you wish not to hide any buttons but minimize them, you can come back to the Navigation Pane settings and choose Minimized. After that, the buttons will be display as icons on the left side.
7. If you choose the Turn off option, the navigation pane will be hidden.
8. Alternatively, you can move the mouse the the top edge of the navigation page, and then hold and drag the mouse to resize the pane.

