
Unwrapping the packaging of a brand-new iPhone is an experience that sparks unparalleled excitement. The sleek design, the promise of cutting-edge technology, and the anticipation of exploring new features create a moment of sheer delight. However, beyond the initial thrill of unboxing lies a critical juncture in the iPhone journey – the setup process.
Pre-Setup Checklist
Setting up a new iPhone is indeed a thrilling experience. However, before diving into the excitement, a prudent user knows the importance of a pre-setup checklist. This checklist serves as a guide to ensure that the stage is perfectly set for the smooth configuration of the new device. From checking specifications to safeguarding precious data and ensuring a fully charged battery, these preliminary steps pave the way for a seamless and enjoyable iPhone setup process. Let’s delve into the key aspects of the pre-setup checklist to make your initiation into the world of the new iPhone truly gratifying.
Checking Requirements
Before embarking on the exciting journey of setting up a new iPhone, users should conduct a brief but essential pre-setup checklist. It begins with ensuring that the iPhone and the associated iCloud account meet the necessary specifications. This ensures that the device is ready to seamlessly integrate with the user’s preferences and needs.
Back Up Your Old iPhone
One crucial step in the pre-setup process is safeguarding your precious data. Users are advised to back up their old iPhone using iCloud or iTunes. This not only preserves valuable information but also ensures a smooth transition from the old device to the new one. It’s a prudent measure, especially considering the sentimental and functional value of personal data.
Charge Your iPhone
A fully charged battery is imperative for a hiccup-free setup process. To avoid interruptions, it is recommended to charge the iPhone adequately before initiating the setup. Opting for an official Apple charger is emphasized for optimal results. A charged device ensures that users can delve into the setup process without any unwarranted disruptions, setting the stage for a delightful iPhone experience.
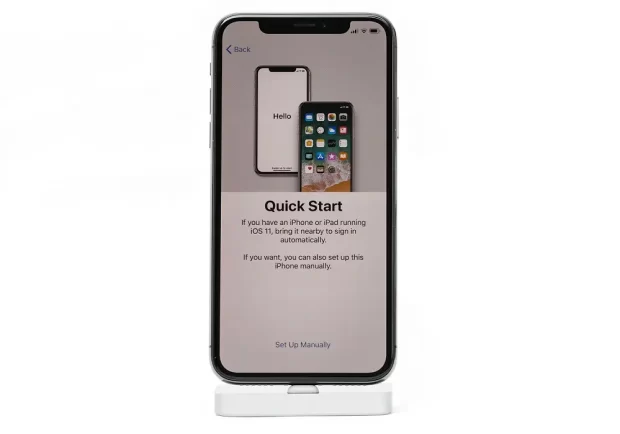
Power On and Initial Setup
Embarking on the exciting journey of setting up your new iPhone is akin to unlocking a portal to a world of possibilities. Before you delve into the myriad features and functionalities, the initial steps are crucial. The sequence of actions starting with turning on your iPhone marks the beginning of a seamless integration of technology into your daily life. In this section, we guide you through the nuanced process, ensuring that your iPhone is not just a device but a personalized and powerful extension of your digital world. Let’s explore the intricacies of turning on your iPhone, selecting language and region, and establishing a secure Wi-Fi connection for a holistic and optimized initial setup experience.
Turning On Your iPhone
As you embark on the journey of setting up your new iPhone, the initial step is turning it on. For the latest iPhone models, this involves a specific process that ensures smooth activation. Hold down the power button until the iconic Apple logo graces the screen, signaling the awakening of your powerful new device. This simple yet significant action initiates the intricate ballet of technologies within.
Selecting Language and Region
Once your iPhone is awakened, the next crucial steps involve selecting your preferred language and region. This seemingly straightforward choice holds more significance than meets the eye. The chosen language not only becomes the default for your device but also influences the functionalities of Siri, Apple’s intelligent virtual assistant. Simultaneously, selecting your region impacts the availability of certain services tailored to specific geographic locations.
Connecting to Wi-Fi
An integral facet of the initial setup revolves around connecting your iPhone to a Wi-Fi network. This step is pivotal as it facilitates a rapid and stable setup process, allowing your iPhone to access essential data for configuration. The process is generally straightforward, but for those encountering connectivity issues, troubleshooting tips are available:
- Check Router Settings: Ensure that your router is configured correctly to support your iPhone’s connection. Verify that the router is broadcasting the Wi-Fi signal, and check for any potential interference or signal strength issues.
- Verify Wi-Fi Password: A common issue is an incorrect Wi-Fi password. Double-check the entered password to ensure accuracy. Remember that passwords are case-sensitive.
- Restart the Router: Sometimes, a straightforward restart of the router is enough to fix connectivity Power off your router, wait for a few seconds, and then turn it back on.
- Reset Network Settings on iPhone: In your iPhone’s settings, navigate to “General” > “Reset” > “Reset Network Settings.” This can clear any misconfigurations that might be hindering the Wi-Fi connection.
- Update Router Firmware: Check if there’s a firmware update available for your router. Outdated firmware can sometimes cause compatibility issues.
These troubleshooting tips aim to address common hurdles, ensuring a seamless transition into the realms of your new iPhone. By following these steps, users can often resolve connectivity issues and establish a robust foundation for a smooth and gratifying iPhone experience.
Apple ID and iCloud Setup
Establishing your Apple ID and iCloud is a fundamental and pivotal step that lays the groundwork for maximizing the functionality and ensuring the utmost security of your iPhone. This integral process not only enhances the device’s capabilities but also safeguards your data and facilitates seamless synchronization across Apple’s ecosystem.
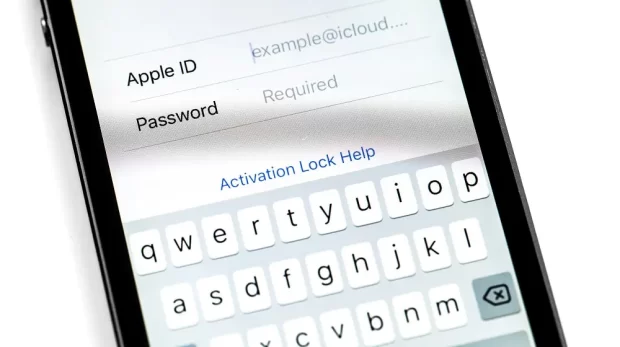
Sign in or Create an Apple ID
The Apple ID serves as your digital passport in the Apple ecosystem, connecting your devices and services seamlessly. For those new to the Apple world, creating an Apple ID is a simple process. This unique identifier not only facilitates access to the App Store and iCloud but also ensures a personalized and interconnected experience across your Apple devices.
Setting Up iCloud
iCloud is the backbone of Apple’s data synchronization. Beyond seamless device backup, it offers an array of benefits, from photo storage to document sharing. Users can tailor their iCloud settings, choosing what data to sync and what to keep private. This step ensures that iCloud works for you, meeting your individual needs and preferences.
Enabling Two-Factor Authentication
Security is paramount in the digital realm, and Apple recognizes this with Two-Factor Authentication (2FA). This extra layer of protection fortifies your account against unauthorized access. The activation process is user-friendly, with step-by-step instructions guiding users through the setup. By enabling 2FA, users enhance the security of their Apple ID, safeguarding personal information and ensuring a more robust defense against potential threats.
Restoring from Backup
Restoring your iPhone from a backup is an essential step, ensuring a seamless transition to your new device by replicating the familiar digital landscape of your old one. This process safeguards your data, preferences, and settings, maintaining a continuity of experience across devices.
Choosing a Backup Method
When embarking on the restoration journey, users encounter the choice between two efficient methods: iCloud or iTunes. The iCloud option allows for wireless and automatic backups, eliminating the need for a physical connection. On the other hand, iTunes provides a more traditional approach, relying on a USB connection to your computer. Each method has its merits; iCloud is convenient for regular, hassle-free backups, while iTunes appeals to those who prefer a tangible connection and perhaps a quicker restoration process. Understanding these options empowers users to make an informed decision based on their preferences and circumstances.
Transferring Data
As users navigate through the restoration process, the pivotal stage of transferring data arises. Contacts, photos, apps, and settings—all can be seamlessly moved to the new device. While the process is generally smooth, occasional hiccups may occur. Users are advised to double-check their settings and ensure a stable internet connection for iCloud transfers. For iTunes, having the latest software version is key. Troubleshooting tips for common transfer issues provide an additional layer of support, ensuring a successful migration of data.
Completing Setup Assistant
The culmination of the restoration process involves completing the Setup Assistant. This seemingly straightforward step is, in fact, of paramount importance. The assistant serves as a guide, ensuring that no vital detail is overlooked. Addressing questions related to language preferences, Siri settings, and Apple ID confirmation, the Setup Assistant brings the iPhone to life. Users are encouraged to pay meticulous attention during this phase, as it sets the stage for an optimized and personalized iPhone experience. Common post-setup questions find resolution during this stage, establishing a strong foundation for the user’s iPhone journey.
Customizing Settings
Exploring the realm of customization elevates the iPhone experience to unparalleled heights, providing users with the power to tailor their device precisely to their preferences and needs. From privacy settings to display preferences, this journey into customization transforms the iPhone into a personalized digital haven.
Reviewing and Adjusting Settings
Customization begins with a thorough review and adjustment of settings. Users are encouraged to explore the intricacies of their iPhone settings, paying special attention to privacy preferences, notification configurations, and display settings. Adjusting these settings not only enhances the user experience but also ensures a more personalized and efficient use of the device. The ability to control what information is shared, how notifications are received, and the overall appearance of the device empowers users to create a digital environment that aligns with their individual preferences.
Setting Up Face ID/Touch ID
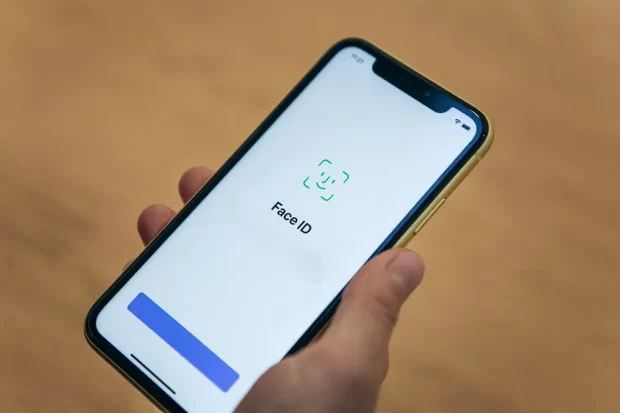
Biometric authentication, offered in the form of Face ID or Touch ID, presents users with a sophisticated layer of security and unparalleled convenience. While the initial setup of these features is a straightforward process, fine-tuning their performance can significantly elevate the overall user experience.
Setting Up Face ID or Touch ID:
- Quick Recognition of Facial Features: During the setup process for Face ID, ensure that your face is well-illuminated and that you follow the on-screen prompts for different angles. For Touch ID, make sure your fingerprints are scanned from various angles to enhance accuracy.
- Adjusting Settings for Ambient Conditions: Explore the settings related to Face ID or Touch ID and consider adjusting them based on different ambient conditions. For instance, in low-light environments, Face ID can be optimized by allowing the use of the screen brightness to assist recognition.
- Enabling Alternate Appearances: Face ID allows users to set up an alternate appearance. This can be beneficial if your facial features undergo significant changes, such as growing a beard or wearing glasses. Similarly, Touch ID allows multiple fingerprints to be registered.
- Regularly Update Facial Data or Fingerprints: As your appearance may change over time or your fingerprint might be subject to wear, it’s advisable to update the biometric data. This ensures that the system continually adapts to your current features, maintaining high accuracy.
- Avoid Blocking Facial Recognition Sensors: Ensure that there are no obstructions, such as fingers or accessories, blocking the facial recognition sensors during the unlocking process. For Touch ID, keep the home button and your fingerprints clean for optimal performance.
Exploring Accessibility Options
Apple is committed to inclusivity, and the iPhone reflects this commitment through its accessibility options. Users are encouraged to explore these features, including VoiceOver for auditory guidance, Magnifier for closer inspection, and Dark Mode for reduced eye strain in low-light conditions. Navigating to the accessibility settings opens a world of possibilities for users with different needs and preferences. By promoting the exploration of these options, the iPhone becomes a device that caters to a diverse user base, ensuring that everyone can fully enjoy and utilize its features.
Installing Essential Apps
Unlocking an iPhone’s full potential relies on installing essential apps. From productivity to entertainment, the App Store, linked to your Apple ID, is the gateway. These apps transform the device into a personalized hub, offering efficiency, connectivity, and tailored experiences through strategic organization on the home screen.
Accessing the App Store
To begin the app installation journey, users need to navigate through the App Store. This involves a seamless connection with their Apple ID.
Navigating the App Store:
- Getting into the App Store: From the home screen of your iPhone, open the App Store. The iconic blue icon with a white “A” is your portal to a multitude of apps catering to various needs and desires.
- Apple ID Connection: A seamless connection with your Apple ID is crucial. This ensures that the apps you download are linked to your account, allowing for easy reinstallation on other Apple devices.
- Browsing Apps: Once inside the App Store, users can browse through categories, featured apps, or use the search function to find specific applications. Each app comes with a detailed page showcasing its features, user reviews, and screenshots.
- Downloading Apps: With a tap on the “Get” button, free apps can be downloaded instantly. For paid apps, a secure and straightforward payment process ensures a hassle-free acquisition.
This step-by-step guidance ensures users can effortlessly explore the vast array of apps available, tied to their unique Apple ecosystem. The App Store becomes a gateway to a world of possibilities, reflecting individual preferences and requirements.
Installing Must-Have Apps
Productivity, communication, and entertainment are the pillars of a well-rounded iPhone experience. This section suggests a curated list of must-have apps that span these categories. From free apps that offer essential functionalities to paid apps that provide a premium experience, users are guided by the diverse options available. This ensures that users not only have the tools they need for daily tasks but also entertainment options tailored to their preferences.
Organizing Apps on the Home Screen
Efficiency in app usage is a hallmark of a well-organized iPhone, and achieving this requires thoughtful planning on the home screen. Tips are provided not only to create a visually appealing layout but also to enhance accessibility, ensuring a seamless navigation experience for users.
Creating a Layout for Accessibility:
- Prioritize Most-Used Apps: Place your most-used apps on the home screen for quick access. This might include messaging apps, email, or productivity tools that you use frequently.
- Utilize Folders: One of the most effective strategies for organization is the use of folders. Group similar apps together to reduce clutter and make it easier to find what you need. For instance, you can create a folder labeled “Utilities” for apps like Calculator, Clock, and Notes.
- Arrange by Functionality: Consider organizing apps based on their functionality. For example, have a folder for social media apps, another for productivity, and a separate one for entertainment. This logical arrangement streamlines the search process.
- Place Widgets Strategically: iOS offers widgets that provide quick glances at information without opening the app. Utilize these widgets to display relevant data on your home screen, enhancing its functionality.
- Customize App Icons: Some apps allow customization of their icons. Take advantage of this feature to personalize your home screen further. This not only adds a touch of creativity but also makes apps easily distinguishable.
By adopting these tips and customizing your home screen, you create a tailored environment that aligns with your usage patterns. This not only makes your most-used apps easily accessible but also streamlines the overall iPhone experience, turning your device into a personalized digital space that enhances both efficiency and aesthetic appeal.
Syncing Media and Content
Synchronizing media and content is a pivotal step in personalizing the iPhone experience. Understanding the nuanced process of syncing ensures that users can enjoy their favorite music, podcasts, photos, and videos seamlessly on their new device.
Syncing Music and Podcasts
For a harmonious musical experience, users can employ iTunes or Apple Music to sync their preferred playlists and podcasts. This straightforward process involves connecting the iPhone to a computer and selecting the desired content, ensuring that the device becomes a portable entertainment hub.
Managing Photos and Videos
Effortless management of photos and videos is facilitated through syncing options, with iCloud Photos taking center stage. Users can seamlessly access their entire photo library, with the added benefit of space optimization through iCloud storage.
Setting Up Apple Pay
To enhance convenience, users are encouraged to set up Apple Pay for secure and efficient transactions. This feature allows users to add their credit or debit cards, transforming their iPhone into a digital wallet. Detailed instructions on secure usage ensure a smooth and protected financial experience.
Troubleshooting and Additional Tips
In the journey of setting up an iPhone, encountering challenges is not uncommon. Addressing common setup issues and providing effective solutions is crucial. Users are guided through potential problems, and for more complex issues, Apple support resources become a valuable aid.
Common Setup Issues and Solutions
Despite the generally user-friendly setup process, it’s not uncommon to encounter hiccups along the way. This section is dedicated to addressing common setup issues and providing practical solutions to ensure a smooth and hassle-free experience.
Connectivity Glitches:
- Router Settings Check: Verify that your router settings are configured correctly. Sometimes, minor adjustments to the router settings can resolve connectivity issues.
- Signal Strength Assessment: Check the Wi-Fi signal strength on your iPhone. If it’s weak, consider moving closer to the router for a more stable connection.
Authentication Problems:
- Correct Wi-Fi Password: Double-check that you’ve entered the correct Wi-Fi password. Authentication issues often arise from typos or inaccuracies in the password entry.
- Network Security Protocols: Ensure that your Wi-Fi network’s security protocols (WEP, WPA, WPA2) match the requirements of your iPhone. Mismatched security settings can lead to authentication failures.
Incomplete Setup Assistant:
- Restart the Setup Process: If the Setup Assistant seems stuck or incomplete, restart the setup process. Sometimes, a simple reboot can resolve temporary glitches.
- Update iOS: Ensure that your iPhone is running the latest iOS version. Updating the operating system can patch potential bugs that might affect the setup assistant.
Device Recognition Issues:
- USB Connection Check: For users opting for iTunes backup and restore, ensure a stable USB connection between your iPhone and the computer. Sometimes, connectivity issues can arise from faulty cables or ports.
- iCloud Account Verification: If restoring from iCloud, make sure your iCloud account is properly verified. Incomplete verification can impede the restoration process.
App Installation Failures:
- App Store Relogin: If encountering issues with app installations, try logging out and back into the App Store. This action can refresh your account connection and resolve potential authentication problems.
- Check Storage Availability: Ensure that your iPhone has sufficient storage space for app installations. Insufficient storage can lead to installation failures.
Optimizing Battery Life
Efficiently managing your iPhone’s battery is essential for a seamless user experience. Here are practical tips to maximize your device’s battery life:
Manage Background App Refresh:
- Limit Background Activity: Disable background refresh for non-essential apps to prevent unnecessary processes.
- Prioritize Essential Apps: Choose specific apps that genuinely need real-time updates for background refresh.
Optimize Location Services:
- Selective App Permissions: Customize location access for each app, granting it only when necessary.
- Use Low Power Mode: Activate Low Power Mode to automatically adjust settings, including location services, during low battery levels.
Adjust Display Settings:
- Optimal Brightness Levels: Balance screen brightness to conserve energy, considering lower brightness or enabling auto-brightness.
- Shorten Auto-Lock Duration: Set a shorter auto-lock duration to save battery by turning off the screen quicker when not in use.
Update iOS and Apps:
- Keep Software Updated: Regularly update your iPhone’s operating system to benefit from battery optimization features.
- App Updates: Ensure all apps are updated, as developers frequently release improvements for better performance.
Monitor Battery Usage:
- Check Battery Usage Stats: Review the Battery Usage section to identify and manage resource-intensive apps.
- Background Activity Awareness: Be mindful of apps running in the background, adjusting settings for efficient resource use.
Disable Unnecessary Features:
- Turn Off Push Email: Switch to manual or less frequent email fetching to reduce constant background activity.
- Limit Widgets: Minimize widget use on the home screen as they contribute to ongoing background processes.
Implementing these practices into your iPhone usage habits ensures extended battery life, reducing the need for frequent recharging. By adopting proactive battery optimization, you can enjoy an enhanced overall iPhone experience with fewer interruptions.
Exploring Advanced Features
The iPhone is more than a device; it’s a treasure trove of advanced features designed to revolutionize user interaction. This section introduces users to the fascinating world of Shortcuts and augmented reality (AR), inviting them to unlock a realm of innovation.

- Shortcuts: Shortcuts are the key to efficiency. They allow users to create personalized automation for routine tasks, simplifying complex processes with a single tap. Whether sending predefined messages or triggering specific app interactions, Shortcuts transform the iPhone into a personalized digital assistant, adding a layer of customization that enhances daily interactions.
- Augmented Reality (AR): AR takes the iPhone beyond the ordinary by seamlessly blending the digital and physical worlds. This feature enhances gaming, education, and practical applications by overlaying digital content onto the real environment. From exploring constellations to visualizing furniture placements through AR apps, the possibilities are vast. This immersive technology invites users to engage with their surroundings in novel ways, offering a captivating and interactive experience.
Beyond practical benefits, exploring these advanced features enriches the overall user experience. Shortcuts and AR aren’t just features; they are gateways to a more personalized, efficient, and immersive iPhone experience. By venturing into this realm, users can transform their device into a dynamic and personalized tool that adapts to their unique preferences.
Conclusion
As the setup journey unfolds, users traverse through the intricate processes of turning on the iPhone, selecting language and region, connecting to Wi-Fi, establishing Apple ID and iCloud credentials, restoring from backup, customizing settings, installing essential apps, and syncing media. Each step is carefully crafted to ensure a personalized and secure iPhone experience. Troubleshooting common issues, optimizing battery life, and exploring advanced features add depth to this comprehensive guide. With the pre-setup checklist as a solid foundation, users are now equipped to not only embrace their new iPhone but to unlock its full potential, turning it into a seamless extension of their digital lifestyle. Happy exploring!
FAQs
A pre-setup checklist ensures a smooth configuration process by checking specifications, safeguarding data, and ensuring a fully charged battery.
While setting up your iPhone, navigate to Settings > Wi-Fi, choose your Wi-Fi network, and enter the password.
To establish an Apple ID, either sign in if you have one or create a new one. Setting up iCloud involves choosing what data to sync.
Maximize battery life by managing background app refresh, optimizing location services, adjusting display settings, keeping iOS and apps updated, monitoring battery usage, and disabling unnecessary features like push email and excessive widgets.
Explore Shortcuts for personalized automation of routine tasks, and dive into augmented reality (AR) for an immersive blend of the digital and physical worlds.
If you liked this guide, you might want to look at some of our other guides on similar topics:
How to Use Android’s Split-Screen Mode for Multitasking
How to Set Up and Verify a New WhatsApp Account

