
Syncing your Mac with your iPhone has a plenty of advantages that you can’t afford to miss if you own both devices. Its benefits include more than just transferring files and internet sharing. If you know how to take full advantages of synchronization capabilities and features these devices (Mac & iPhone) have to offer you, it can help you in various ways that you can ever imagine. In our today’s “How to” guide, we will teach you how to sync your Mac with iPhone.
So, let’s start this guide.
Syncing Mac with iPhone Through Cable
If we talk about one of the easiest ways to sync your Mac with iPhone, you would not find a better way than via a cable that comes with your iPhone. Connect this cable to your Mac and iPhone and launch iTunes, a media library and mobile device management application for Apple devices.
Though iTunes gets launched automatically, if it doesn’t, you can launch it manually.
iTunes not only lets you sync your media but also Mac calendar, iMessages, contacts, and many other things. These are exceptionally easy to sync in iTunes or via turning on iCloud sync.
Syncing Mac with iPhone Wirelessly
In the beginning, the only way to sync your Mac with iPhone was to connect them via a USB cable. It is still an option as we mentioned above. However, if you have an iPhone that runs on iOS 5 or later and a Mac with iTunes 10.5 or later, you can sync your Mac with iPhone wirelessly. For that, you just need to follow the steps given below.
1. Open iTunes application on your Mac.

2. Connect your iPhone to your Mac via USB (This is the last time you will have to connect your iPhone to Mac with USB).
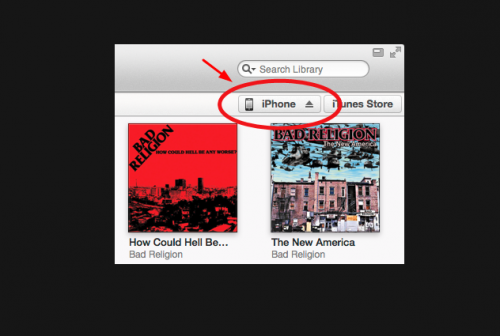
3. Click on the iPhone button in iTunes as you can see in the following screenshot.
4. Next, choose the option that reads “Sync with this iPhone over Wi-Fi”. It will let you sync your iPhone with your Mac if both devices are connected to the similar wireless network.
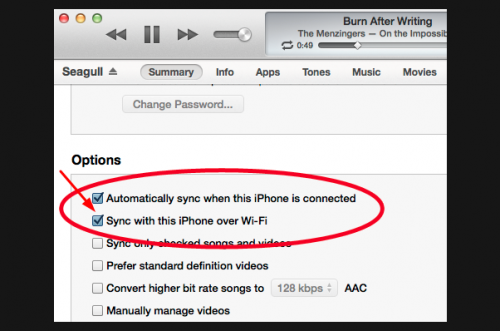
5. Now click on the checkbox available in front of option “Automatically sync when this iPhone is connected”. Now you don’t need to start synchronization manually.
6. In order to save these settings, hit the Apply button available in the bottom right corner.
Congratulations! You have enabled wireless syncing.
If you choose the option “Automatically sync when this iPhone is connected”, you don’t need to be worried about manually syncing as everything will happen automatically. If you don’t, check out the following steps for manual syncing.
Syncing From Your Mac
1. Open the iTunes application and click on the iPhone button available on the top-right corner.
2. Next, click the Apply button available on the bottom right corner. Now your phone will start syncing with your Mac automatically.
Syncing From your iPhone
1. Tap on “Settings”.
2. Click on the option “General”.
3. Click on iTunes Wi-Fi Sync.
4. Now tap Sync Now. It will start syncing with your Mac.
Now you know how to sync your Mac with iPhone, let’s find what you can do after synching these two devices.
Getting Calls On Mac
The ability to answer an incoming call via Mac is one of the most appreciated advantages of syncing Mac with iPhone. Also, you can start a call from your Mac to other people. It will look like it is coming to your phone, but you will be interacting via your Mac’s built-in Microphone and speakers. Isn’t it great?
Let’s find out how to do that.
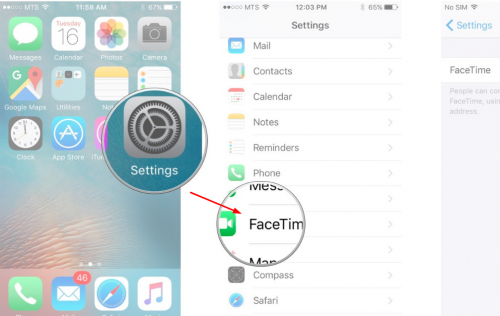
On your iPhone, go to Settings then FaceTime. Now On the iPhone Cellular Calls option. This feature will allow you to receive and make calls on devices signed into your iCloud account when they are on Wi-Fi network.
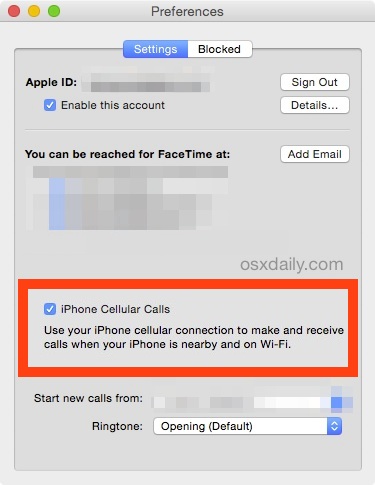
Now on your Mac, launch FaceTime app. Go to its Preferences, and enable the option says “iPhone Cellular Calls option”.
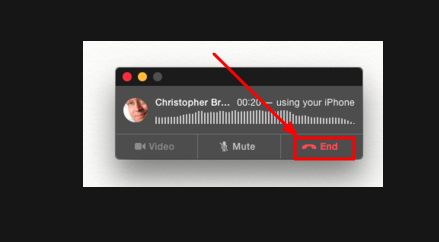
Now whenever you will receive a call, it will be routed from your iPhone to your Mac. On your Mac, you will see an option to accept or reject the call. Still, you can answer the call via your iPhone.
Not only you can receive phone calls on your Mac but also make calls. In order to do so, you will need to launch FaceTime again, choose the Audio tab, enter a name, email address and phone number of a contact you want to make a call to.
You will see a phone icon next to the name of the contact you are calling.
Syncing Outlook Calendar with iPhone
Earlier, Outlook had some issues syncing with iTunes but it seems to have been resolved now. Follow the steps given below in order to sync outlook with your iPhone.
1. Ensure that the iTunes plugin is added to the Outlook plugin.
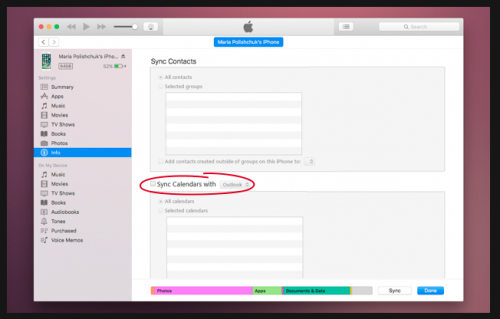
2. Connect your Mac with your iPhone and launch iTunes. Next, on iTunes, click on iPhones name and click on the Info tab. Now go down to the Calendars and select the calendars you want to sync.
3. hit the “Apply” button.
That’s all, you are done!
Setting up iMessage on Your Mac
Setting up iMessage on your Mac lets you communicate with your co-workers, friends, and family across different platforms. Even you can communicate through SMS service from Google, Yahoo, and AOL.
Follow the steps given below to set up iMessage on your Mac.
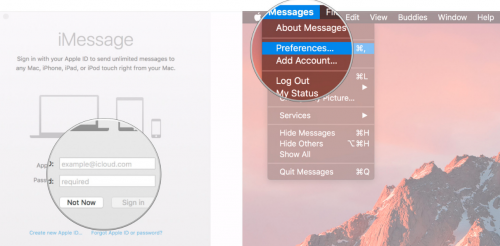
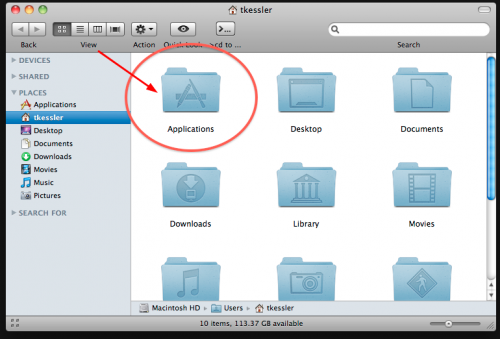
1. Launch Messages straight from your desktop or Applications folder.
2. Now put your email address & password (Apple ID). You will need to enter a verification code, in case you have enabled two-factor authentication.
3. Now go to the option Messages, available in the Menu bar and then select Preferences.
4. Next, choose the Accounts tab.
5. Now, select the email addresses and phone numbers that you want to contact.
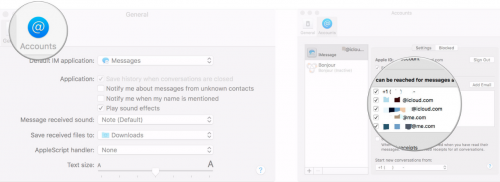
6. Select the phone number and email address that you want people to see when you initiate a new conversation.
Syncing Reminders
Creating a list of reminders is a good way to be sure that you are getting things done at the right time. A reminder is an important feature in iPhone that helps you do all your important jobs on time. But do you know you can transfer your reminders from iPhone to Mac? If no, let’s find out how to do that.
Transferring Reminders from iPhone to Mac Using iCloud
1. Go to Application folder on your Mac and hit iCal.
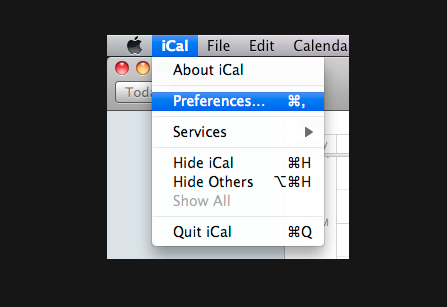
2. Click on iCal menu and choose Preferences.
3. In the Accounts pane, add a new account and choose iCloud from the drop-down menu.
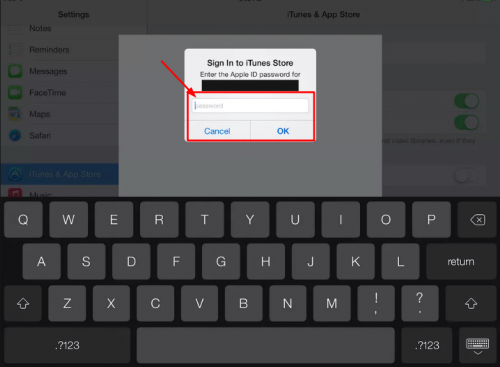
4. Now you will need to supply iTunes ID & password when prompted. Don’t forget to check if the account is enabled.
5. In order to set up your activity volume, set the refresh rate.
6. Once you have enabled reminder, go to your iPhone and enable iCloud.
7. On your iPhone, Go to the Settings app and launch iCloud.
8. Now click on iCloud and use the old iTunes account for iCloud.
9. Next, put on your Reminder, it will automatically be synced to your Mac now.
Congratulation! Now you are able to transfer all your reminders on iPhone to Mac.
Backing up WhatsApp data from iPhone to Mac
We are going to use iPhone data backup tool to back up Whatsapp data from iPhone to Mac as it is the easiest way comparatively. Initially, the software was designed to help iPhone users get back their deleted or lost files. And now it can be used for taking WhatsApp backup as well.
Download this tool form their official website. Once it is installed, run it on your Mac.
You will find several iPhone tools on its home screen. In order to transfer WhatsApp chat to Mac, you will need to click on the Backup & Restore option. After that click on WhatsApp Backup & Restore option available on the left.
1. Now search and click on Backup WhatsApp Messages.
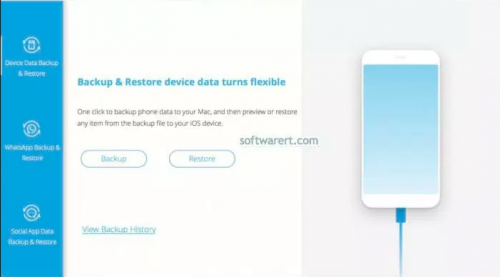
2. Next, connect your iPhone to your Mac using a USB. Now you will see the following screen.

3. If you want to instantly back up your WhatsApp chats, messages, videos, etc., hit the Backup button.
4. To preview your back data in the backup file, click on View Backup file option. Now you can export selected data to Mac.
Syncing iPhone Contacts to Mac Using iCloud
There are two major ways you can sync iPhone contacts to Mac: iTunes and iCloud.
Via iTunes
1. Connect your iPhone to Mac using a USB cable.
2. Launch iTunes and choose your device, once your iPhone is identified by iTunes.
3. Now click on the Info button and choose Sync Contacts.
4. Click on Apply. Now iTunes will start syncing iPhone contacts to Mac.
Via iCloud
Turn on Contact on iPhone. Go to Settings on iPhone, Click on your Name and then choose iCloud and then Turn on Contacts.
Steps to Sync Your iPhone Contacts to Mac:
1. On your Mac, click on Apple menu, and then select System Preferences->Go to iCloud.
2. Now sign in using your Apple ID or iCloud account.
3. Choose Contacts option and your iPhone contacts will automatically sync to your Mac.
You may also go to iCloud.com and download and export iPhone contacts to Mac.
Conclusion
Finally, we have come to the end of this post. We described how to sync different features and services between your iPhone and Mac such as SMS, Outlook calendar, reminder, contacts, etc. We hope you will find this post useful.
Don’t forget to share your thoughts on this post in the comments below. We would love to hear from you!

