
Enhancing the colors captured in digital photography is easy with the Windows 10 built-in Photos app. Photos has four color editing tools which give you a considerable amount of control over the coloring of your photos. Continue reading to learn more about how to use them.
The Windows 10 Photos app includes the following color editing tools:
Temperature: affects the overall tone of the photo by making it appear warmer (more red tones) or cooler (more blue tones)
Tint: fixes color cast (such as light reflected from grass and plants) by adding or removing green hues
Saturation: increases or decreases the vividness of all the colors in your image
Color Boost: targets one color and intensifies or dampens it
To use these tools to edit a photo, follow the steps below:
1.Open the picture you want to edit with Photos. Photos is the default app for viewing photos in Windows 10, so your picture will open in Photos when you double-click on it in File Explorer. Alternatively, open the Photos app from the Start menu, and scroll through your collection or albums to find your picture. I usually prefer the first method because Photos does not organize your pictures into folders, which means you have to scroll through all the images in your collection or find it in the albums that Photos generates.
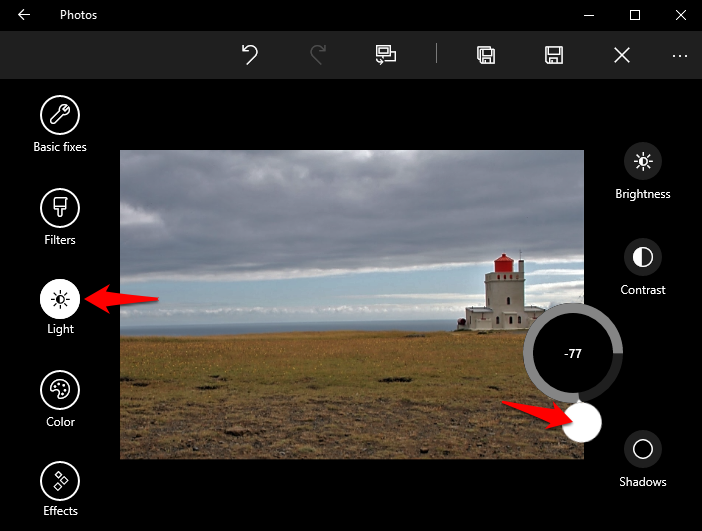
2.Click the Edit icon on the top menu bar. It looks like a pencil.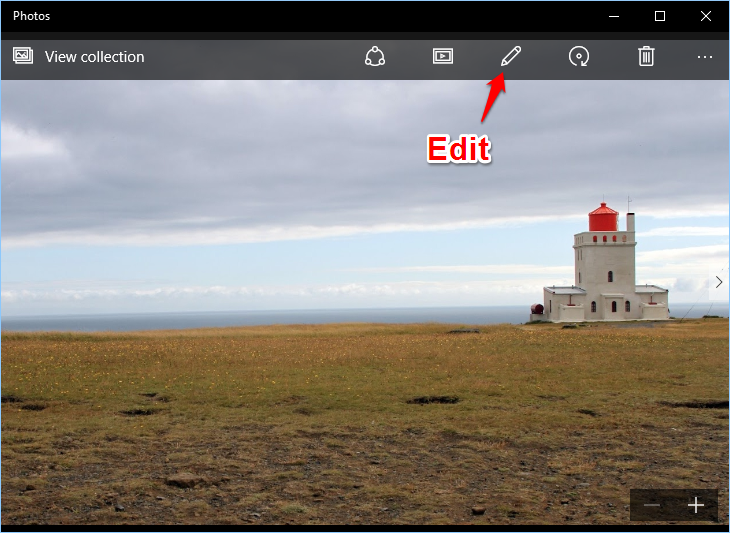
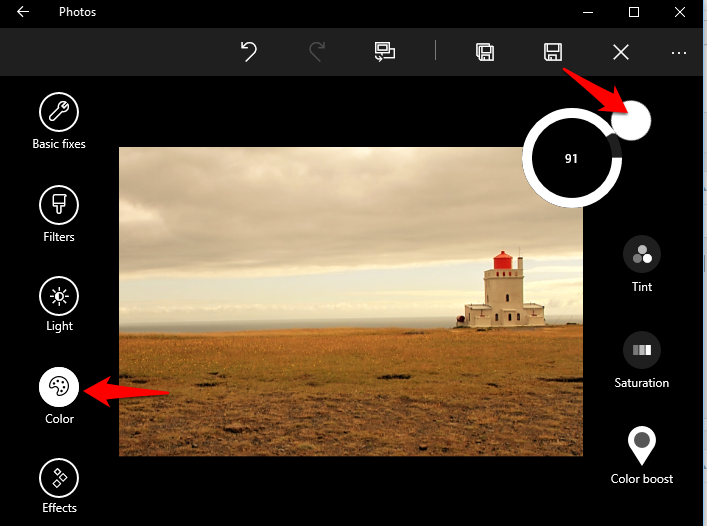
3.Select Color on the left side. The first three tools on the right (Temperature, Tint, and Saturation) all are operated the same way. When you click on the icon, it will turn into a wheel with a white indicator knob. Click and drag the knob around to adjust setting.
Temperature: Make the image appear warmer (more red tones) by rotating the knob clockwise. Make the image appear cooler (more blue tones) by rotating the knob counterclockwise.
Tint: Rotate the knob clockwise to remove green tones from the image. Rotate counterclockwise to add green tones.
Saturation: Make colors more vivid by rotating the knob clockwise. Rotating counterclockwise will dampen color, and a -100 saturation setting will make your image gray scale.
4.Now, let us explore the Color Boost tool. This tool lets you target one color and make it more vivid. Click the color boost icon on the bottom right of the window and drag the color selector onto your image. The color that the pointed bottom of the selector is on will show in the circle patch on the selector. Once you drop the selector somewhere on your image, the icon on the right will turn into a wheel like the one that the previous color tools used. Rotate clockwise to make the selected color more vibrant in your image, or rotate it counterclockwise to dampen or eliminate the selected color. You can create some really cool effects with this tool. 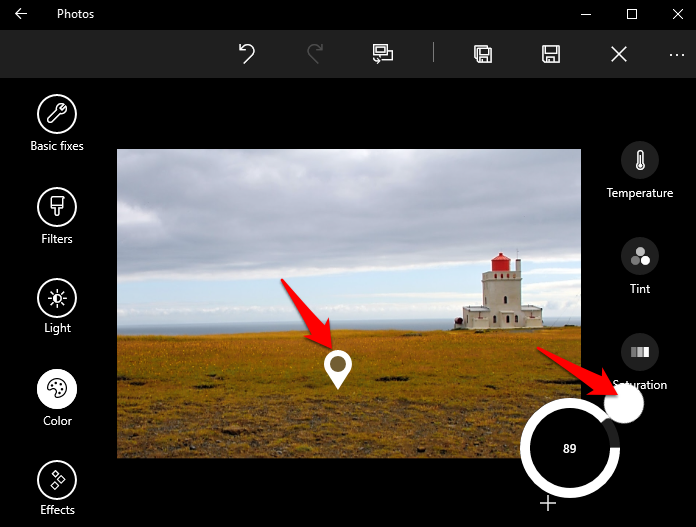
5.Once you are done with your image, you have two options to save your edited image. You can replace the original image by clicking the save icon (the floppy disk) to the left of the “x.” The icon to the left of that (the floppy disk with a shadow) will leave your original file alone and save your edited image as a new file.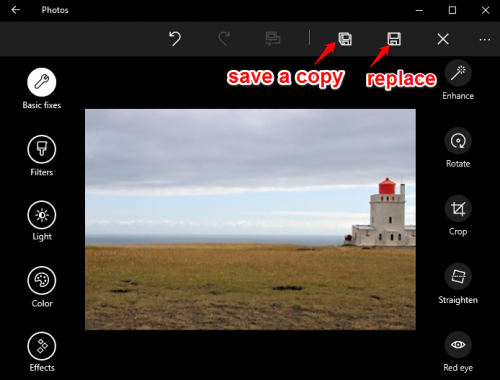

