
A graphic card, technically termed as graphic processing unit, or GPU, as the name implies, performs fast mathematical calculations behind your monitor screen and you see the result as creation and rendering of graphics. Be it gaming, videos, images or even 3D pieces, graphic cards are the arms and hands behind such visuals. There are different ways, all short, to know which graphics card or cards—as your Windows might have multiple cards installed—are built into your Windows system. So, read below to find out how to check graphics card configuration in Windows 10.
Why Should I Know Graphics Card Details?
Knowing which graphic card is built in your Windows can be helpful, as it direct you in created appropriate visuals. If a graphic card isn’t built to support 3D images, for instance, you won’t be able to make artsy 3D visuals in your Windows device.
There’s more than a single way to knowing the details about your Windows’ graphics card(s); there might even be more than one. The main ways to check this are described below, all of which are shortcuts, in a way:
How to Check Graphics Card Configuration via Windows Settings – Method 1
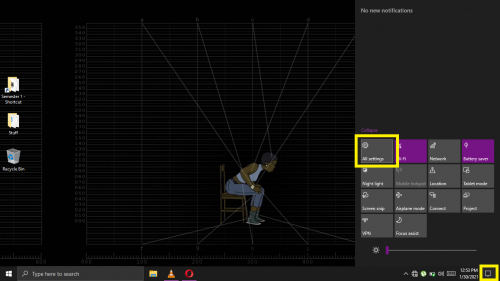
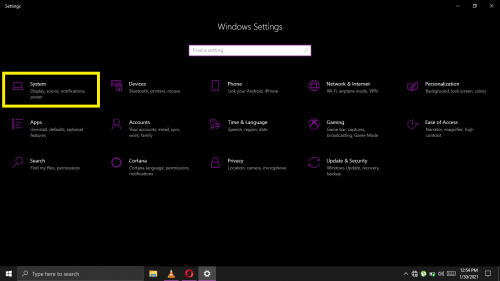
1. Open All settings> System > Display.
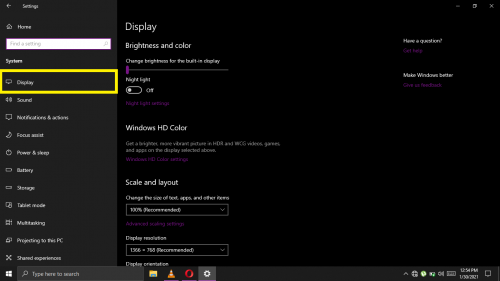
2. Scroll down to Advanced display settings.
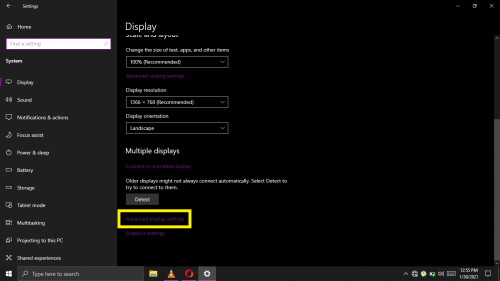
3. Go through the Display information, as shown below.
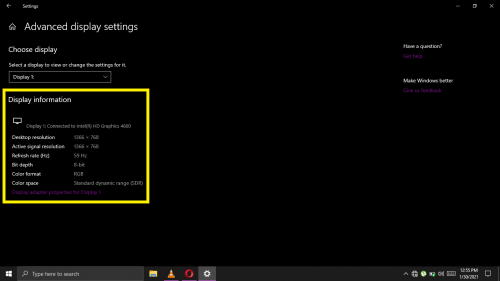
This is where you can find everything you need to know about the graphics card in your Windows 10.
How to Check Graphics Card Configuration via Device Manager –
Method 2
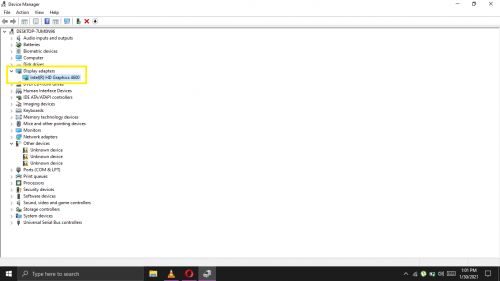
1. Open device manager from Start.
2. Expand Display Adapter.
3. Click on the item under it, which may be showing by another name (based on your graphics card).
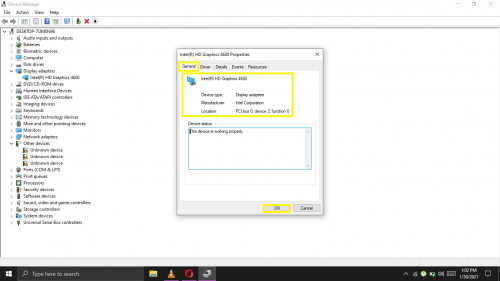
4. Under General is the graphics card configuration for your Windows 10.
5. After reviewing, click OK.
How to Check Graphics Card Configuration via Task Manager –
Method 3
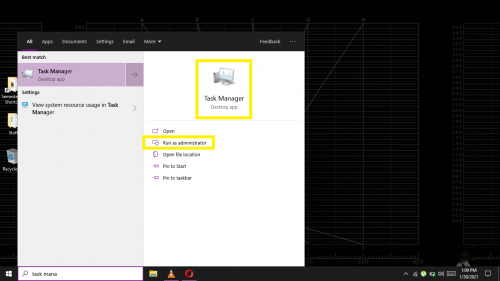
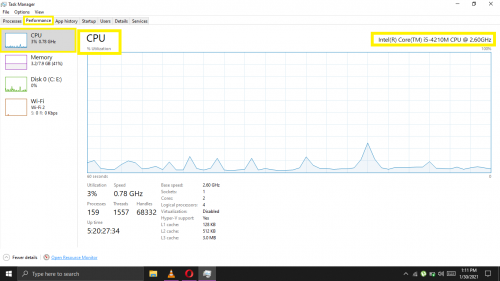
1. From Start, open task manager or use keyboard shortcut: Ctrl + Shift + Esc.
2. Run the app as administrator.
3. Click on CPU.
4. You can see the graphics card details as shown below.
How to Check Graphics Card Configuration via System Information –
Method 4
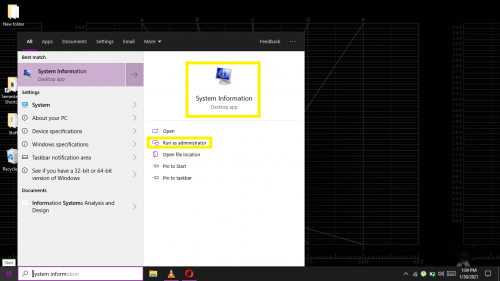
1. From Start, type system information.
2. Run the app that pops up as administrator.
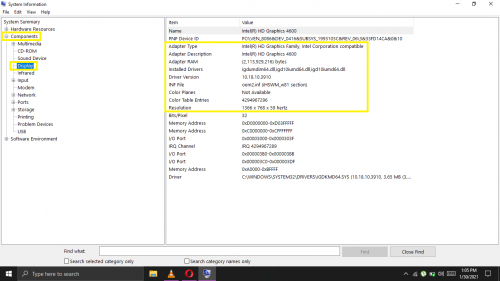
3. From System Summary on the left, expand Components
4. Click on Display under it.
5. You will now be shown your system’s graphics card details.
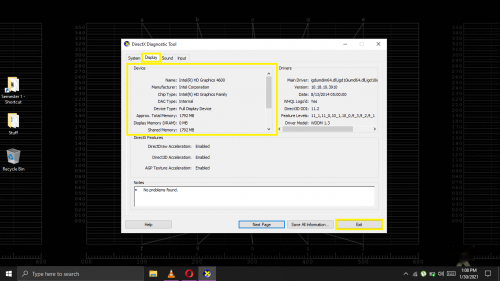
How to Check Graphics Card Configuration via DirectX Diagnostic Tool –
Method 5
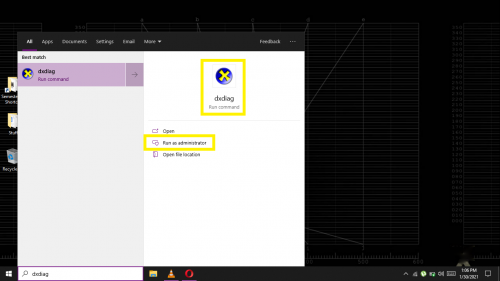
1. From Start, type in dxdiag.
2. Open the app that shows.
3. Click on the second tab, Display.
4. Under it is the graphics card information.
5. Exit the app once you’re done.
Lastly, note that for all methods mentioned above about how to check graphics card configuration in Windows 10, running afore-mentioned apps as administrator isn’t necessary. So, to view such information, you can run the app normally, too, without having administrator rights. Now you can view the graphics card configuration in Windows 10 using more than just one method, depending on whichever you find easier.
More on Windows 10
Check out the following features of Windows 10 that might come in handy for you some day:
Uninstall and Restore Built-In Apps in Windows 10
Disable Windows 10 Automatic Updates
Defragment and Optimize Drives in Windows 10