
Panoramic pictures are already pretty cool. With the ability to take panoramas from almost any smartphone, they are also becoming more popular. To make these pictures even more unique, follow these steps to create a miniature planet using the scenery of your photo.
For best results, I would recommend using a panorama with a distinctive skyline and a horizon. This does not necessarily have to be a cityscape, but they work well. Make sure the sky can easily be separated from the focus of your panorama. Likewise, an obvious foreground such as water, sand, or asphalt will make the effect more realistic.
1.First, open up PS CS6, and import your image into Photoshop. Remember that panorama images will work best. To import the image, go to File > Open, and navigate to the image. 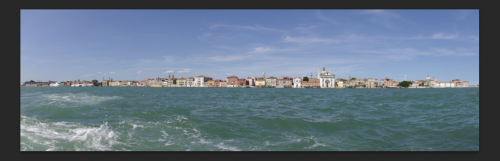
2.If your photograph has a lot of sky and water, you will want to crop much of it out. For example, in my example, the more water that is left, the larger the planet will appear. Play around with it, and see what looks best. To crop your image, you will need to select the Crop Tool from the tool palatte on the left-hand side. You can also simply press C. 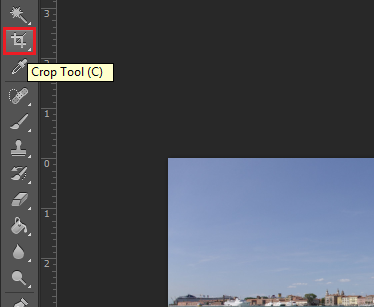
3.Crop your image. As you can see, I am only leaving about a quarter of the water and sky. 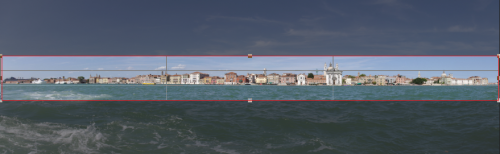
4.Now, unlock your background layer. This can be done by double-clicking on the layer and hitting either Enter or OK. 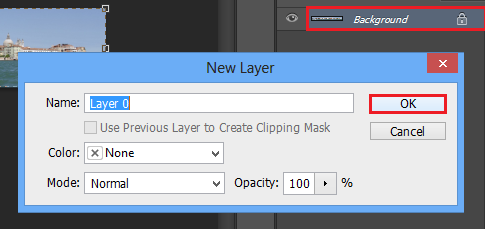
5.You will need to make your image into a square. To do so, follow Image > Image Size…, or simply press Alt+Ctrl+i. 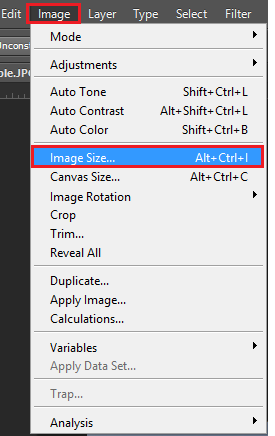
6.Under the Image Size window, set both Width and Height to the same number. For best results, I recommend using the lowest of the two values. Once you have set the width equal to the height, click OK. 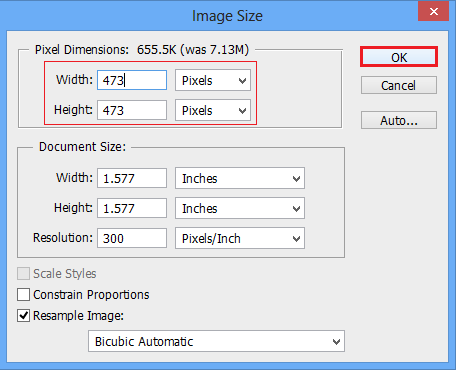
Your image will now look distorted. This is good. No need to worry.
7.Now, we have to rotate our square image. This can be done by following Edit > Transform > Rotate 180. We need to rotate our image to have the background and foreground (or sky and water in this example) in their appropriate places.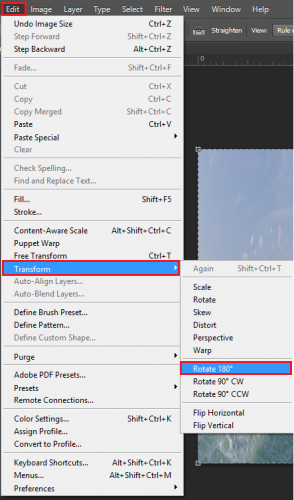
8.Now, bring up the Polar Coordinates. This can be done by following Filter > Distort > Polar Coordinates.
9.Under Polar Coordinates, make sure that the Rectangular to Polar option is selected, and then click OK. 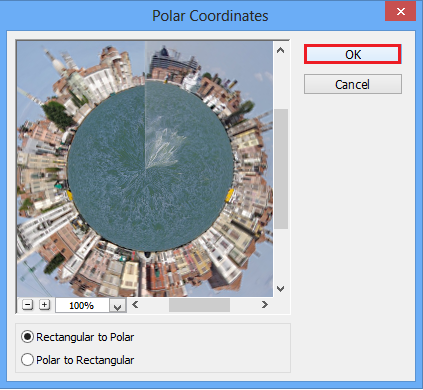
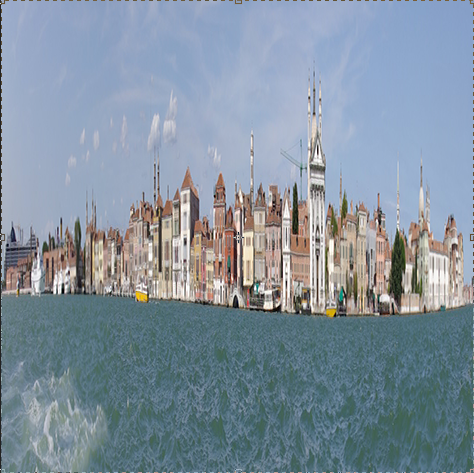
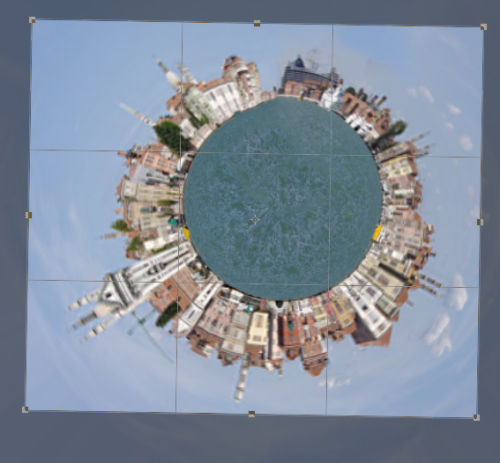
As you can see, your image is starting to look like a miniature planet. It is obviously not perfect and will take some tweaking to polish it. 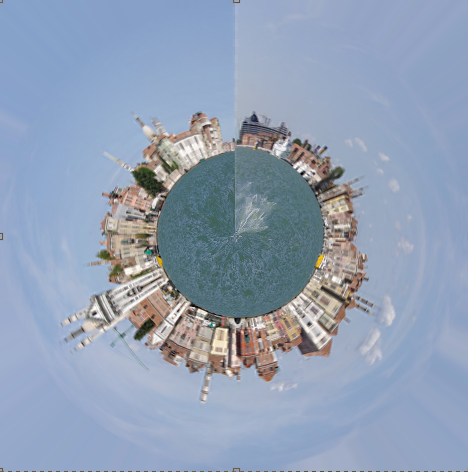
10.Fixing the stitching is easy within CS6. We will use the content aware tool to simplify this tutorial. First, using the lasso tool, select the center of your “planet” as this will be the messiest area on screen. Now, right-click the selection, and choose Fill… 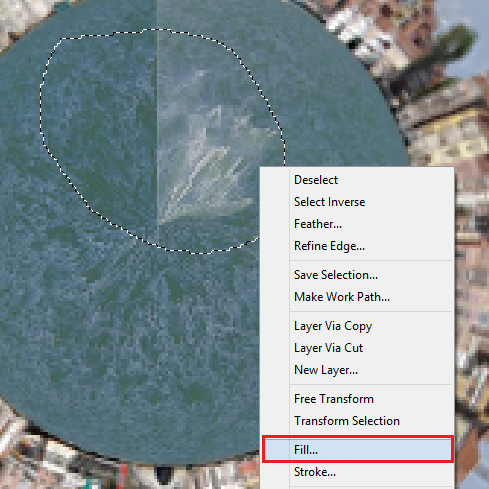
11.From the Fill option, change the Contents value to Content-Aware, and click OK.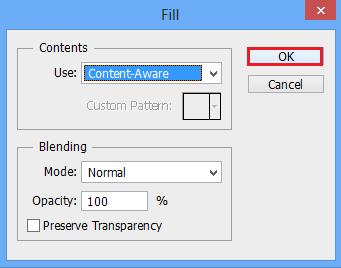
The ugly stitching should have been removed. Other minor stitching errors may exist. Repeat the step above until your little planet is perfect.
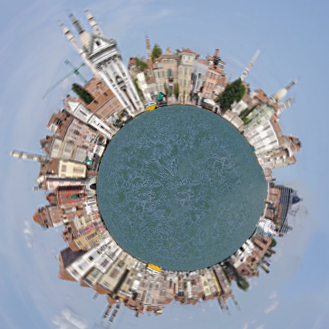
12.Finally, you can give your almost-finished product a crop. Select the crop tool (C) and crop around your planet.
13.Finally, give your image a 90 degree rotation for a different perspective. To do this, follow Edit > Transform > Rotate 90 CW.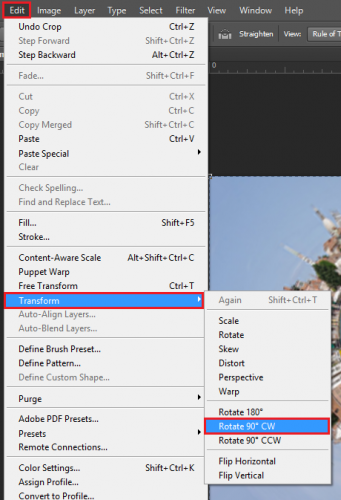
You should now have your very own little planet. Your results will vary with the amount of time you have spent perfecting the stitches. From the image below, you can see why cropping the sky and the water in the first couple of steps is important. If you have a lot of water, your planet will look a lot larger and the buildings or scenery will seem smaller. Play around, and find the perfect “planet” for you.
The time you spend perfecting your stitches and the quality of your initial photograph will ultimately determine the final quality of your image. Before long your images will look like the unbelievably beautiful top featured photograph created by Alexandre Duret-Lutz and used here thanks to the CC BY-SA 2.0 license.

