
A table of contents is just as important as the rest of your document; it allows the reader to navigate through your entire text to the desired page. But it does more than that, though. It is kind of like a map to the organized body of your text. Thankfully, you don’t have to go through the arduous process of typing in every heading, sub-heading and corresponding page numbers because Word lets you create a table of contents automatically; while at the same time allowing you to create it manually.
In any case, the end result is the same: a clean, professional guide to what comprises the body of your text.
Following are all the steps you need to know for creating an automatic and manual table of contents, as well as updating an already existing one.
How to Insert an Automatic Table of Contents
Here is how you insert an automatic table of contents in your Word document:
1. Open the page you wish to insert a table of contents onto.
2. Click on References.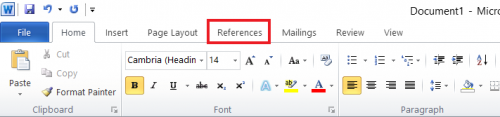
3. Click on Table of Contents.
4. Select the desired style of table of contents from the drop-down menu that appears.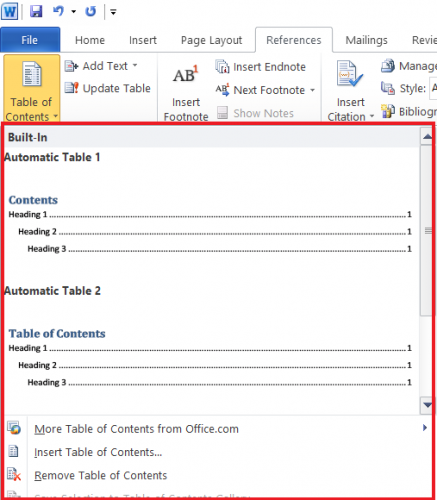
5. Click on it.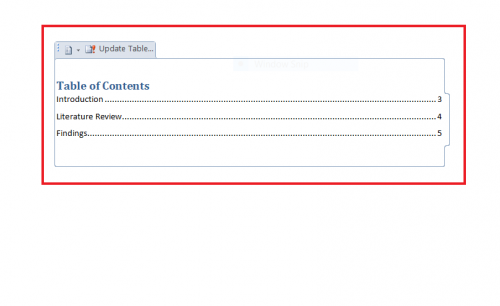
6. A table of contents in the chosen style appears on the page.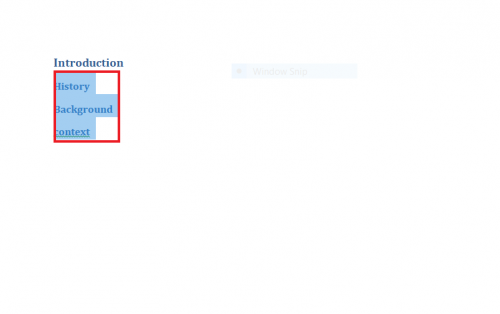
How to Update your Table of Contents
Each time you add a new heading and/or sub-heading in your Word document, you will need to mention it in the table of contents, obviously. But don’t worry about having to manually update your table of contents to include the new material – Word lets you do that automatically, too.
Here is how:
1. Select the subheading(s) inserted on page(s).
2. Format it to Heading 2 from Styles.
3. Click on the small arrow atop table of contents.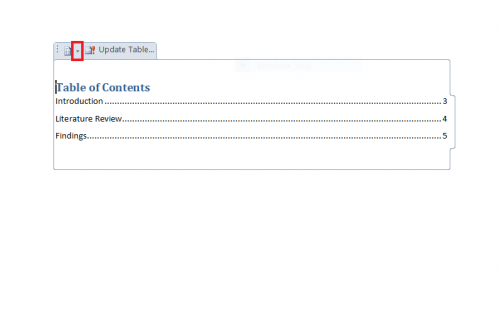
4. Select Update entire table from the dialog box that appears. Click OK.
5. New subheadings appear in the table.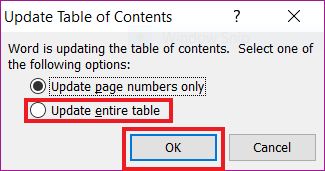
Your table of contents has been updated! It now contains the subheadings you typed in the body of your text.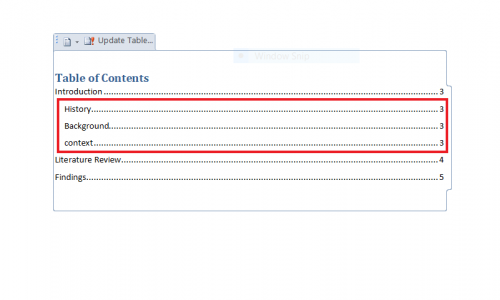
How to Insert a Table of Contents Manually
If you feel inserting a table of contents manually is the right way to go, here is how you can achieve that:
1. Go to References > Table of Contents.
- From the drop-down menu, select Manual Table.
2. Type in the titles, sub-titles and their corresponding page numbers in the table.
You have now successfully created a professional-looking table of contents in your document!
Why an Automatic Table of Contents is Recommended
It is generally recommended to go for an automatic table of contents. This saves you the hassle of typing in page numbers and titles in the table of contents each time you add something in your document.
However, prior to inserting an automatic table of contents, make sure to format the font of your document’s headings and/or sub-headings to Heading 1 from Styles. This is how Word detects the headings and/or sub-headings and their corresponding page numbers from the document to list them in the table.

