
Previously we talked about using Adobe’s express version of Photoshop that will help you improve the photos that you take with your outdated or budget phone. As promised, today we are going to go into greater detail outlining each option and what can you expect to get out of it.
Since the basic tools are already well known, crop and rotate, we will go straight to the good stuff. Adobe released the Photoshop Express application for Windows 10 as well, so we will use that one. Note: the settings work the same way on Android and iOS.
In the image correction section of Photoshop Express the settings are divided into four main categories: Light, Color, Effects and Details. Each setting gets a lower value by moving the slider to the left and higher value by moving it to the right.
Light
Exposure is for controlling the brightness of the photo. It is dependent on the original, if it’s too bright then you need to tune it down, otherwise if it’s too dark tune it up.
Contrast is the separation between the dark and bright areas of the photo. Increasing the contrast will increase the difference between those two and will pop out the photo.
Highlights and Shadows control the brightest and darkest parts of an image. Each of these controls separately, so by changing the whites will only change the brightest parts of the photo without editing the darkest parts. Same applies for the blacks, it only affects the darkest part of the photo.
Whites and Blacks work similarly to the highlights and shadows. They control the brightest and darkest parts of the photo separately. The difference with these two settings is that these have a wider tonal range than the highlights and shadows. Also, when modifying these you are overriding all changes that you previously made when fine tuning the highlights and shadows.
Color
Temperature is for modifying the temperature of a photo. Moving the slider to the left will give the photo a bluish look making it cool, while moving the slider to the right will give the photo a yellowish look and make it warm.
Tint is basically an overlay color of the picture. Imagine a color palette that ranges from green to magenta with all the variations in between. Moving the slider to the left gives a greenish tint, while moving to the right sets the tint to magenta.
Vibrance and saturation are similar in effect. Both are used for the colors. Moving the sliders to the left will desaturate the colors and on the far left you will basically get a black and white photo, going to the right will saturate and pop out the colors and you will get more vibrant colors.
Effects
Clarity is exactly what it sounds like. This setting changes the local contrast, similar to changing the contrast, but instead of changing the contract of the overall image, this setting makes changes on small scale. moving the slider to the right brings out the details of the photo.
Dehaze or defog is for reducing the haze from the photo. If your photo is fogy and you don’t intend on having it that way move the slider to the right. Otherwise leave it as it is, or if you with to intensify the foggy effect move the slider to the left.
Details
Sharpen is another setting that does what it says, sharpens the photo. Every single photo that I have corrected in Photoshop Express had the sharpen setting set to maximum. If gives a crisp look in situations where your camera failed to do so.
Reduce luminance noise is a setting that corrects certain disturbances in the colored pixels created by light. By adjusting the slider, you can remove the noise created by the light and further crisp up the photo.
Reduce color noise is the last setting in this section. It works similarly to the luminance noise reducer. Color noise appears in pixels with multiple colors where they get a flat look and the more flat looking pixels you have, the more your photo will look flat. This setting can correct that.
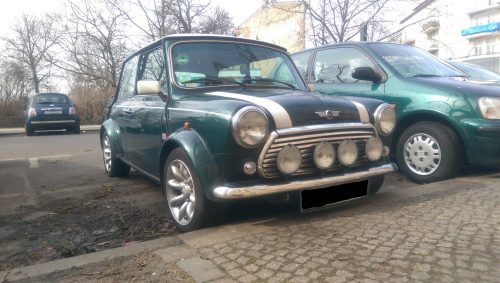
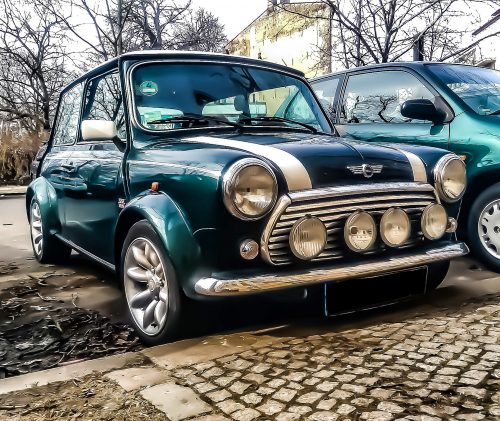
This article should help you produce better photos taken with your phone so that you proudly post them to your favorite social media. Even though we already posted a comparison, here is a reminder how improved a photo can get be when you are correcting it with Photoshop Express.

