
On different forums and blogs, I keep on reading about how scary the new version of Windows is. But, speaking about my experience with Windows 10, I think it is working well and I am really delighted so far.
Hello Face Login, Quick Access in File Explorer, Advanced automatic repair are the few features that really impressed me.
The best thing about this Windows version is, even if your computer crashes two times successively, its Automatic Repair option will run by default. When you will open your computer next time, this automatic repair feature will diagnose the issue and fix it automatically.
In today’s “How to” guide, I will show you how to use Windows 10 automatic repair.
To enable or disable automatic repair, you must be an administrator. If you are encountering an issue with safe boot or reboot loops, this is the first step you can try to fix them.
How to Use Windows 10 Automatic Repair
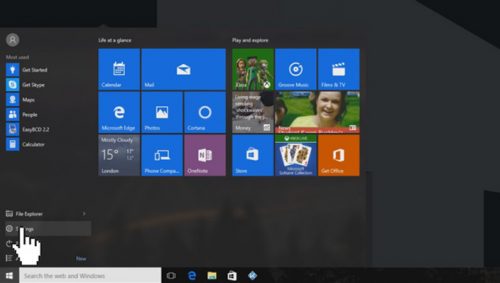
1. Navigate to the Start menu and then click on the Settings option.
2. Inside the Settings panel, you will find options such as Accounts, Time & Language, Ease of Access, Privacy and Updated & Security. Click on the last option i.e. Update & Security.
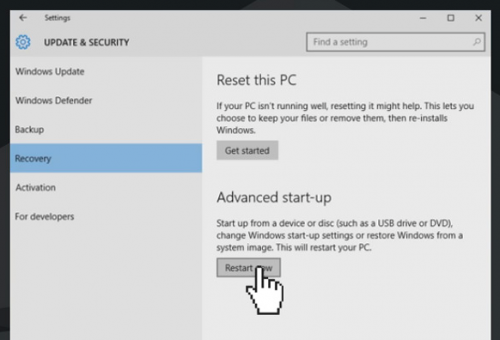
3. Now, you will be taken to another window (Update & Recovery) where you have to click on Restart now button, given below Advanced Startup. You may have to wait for a few seconds to get your system restarted.
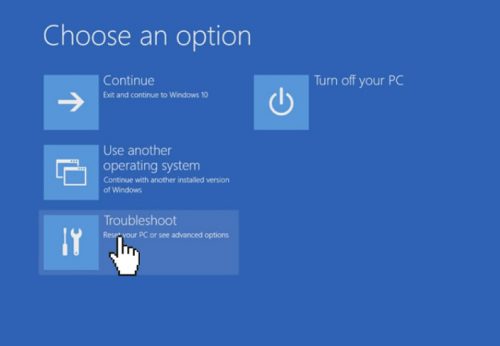
4. As soon as you restart your system, hit the Troubleshoot area available in Choose and Action Window.
5. In a new window, you will see a few options, you need to go to the Advanced Options.
6. Next, click on Startup Repair and wait for a few seconds.
7. As soon as you get into the Automatic Repair, the very first thing that you need to do is choose an account. If you have the password, enter it and then click on Continue button.
That’s all you need to do.
Alternative Way to Enable Auto Repair in Windows 10
1. Open command prompt at boot.
2. In the Command prompt, type BCDEdit and then hit Enter.
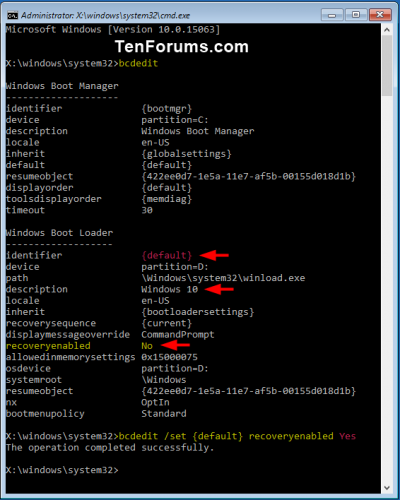
1.)Take a look at Windows 10 (Description), available under the Windows Boot Loader option. Note down its Identifier (ex:’{default}’)
2.) In the same section, make sure that recoveryenabled is set to “Yes”.
3. Now enter the command mentioned below in your command prompt at boot and again press Enter.
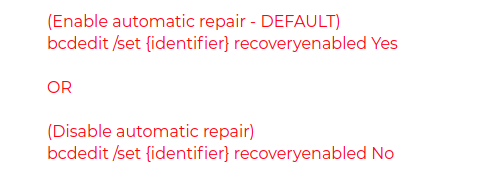
Replace Identifier in the command above with the actual identifier you saved in step 2.
4. When you are done, close the command prompt at boot.
5. Next, click on Continue to exit recovery. Start again your Windows 10.
Congratulations! you have done it!
Conclusion
In this “How to” post, we learned about using the Windows 10 Automatic Repair in the easiest manner. It is quite easy to enable an Automatic Repair. Still, if you get stuck somewhere, feel free to raise your query in the comments below. I will be happy to assist you.
Thanks for stopping by.
You can also take a look at;
How to Enable Windows 10 Auto Login

