
You didn’t like Windows 10, right? No problem at all, you can downgrade it easily.
There are many users like you who don’t find Windows 10 as great as previous versions. On different forums, we notice people are complaining about connectivity issues after upgrading to Windows 10. Some people are missing the old features and not comfortable with this new version.
No matter, what is your reason to downgrade Windows 10, our “How to” guide will help you do this without losing your stuff.
So, if you really want to go back to your old operating system, here is the step-by-step guide for you.
How to Downgrade Windows 10
Luckily, Windows 10 comes with an option that lets you roll back to your previous Windows version quite easily. However, you will have to use this option within 30 days, starting from the day you successfully installed Windows 10 on your PC.
Before you proceed with this guide, don’t forget to check whether or not the option to downgrade Windows 10 is available for you. Kindly note that this downgrading option will work on a computer that has been upgraded to Windows 10 from Windows 8.1,8 or 7. This option will not be available for you in the following conditions:
- If your computer was purchased with pre-installed Windows 10.
- You had formatted hard drive before the installation of Windows 10.
If you meet these conditions mentioned above, start with the steps given below.
Go to Windows 10 Settings page to find the option to downgrade Windows.
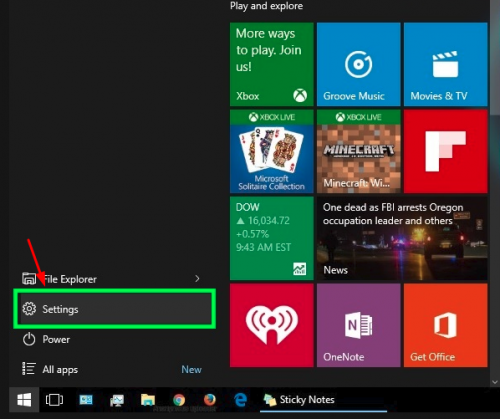
1. Click on Settings option after opening the Start menu.
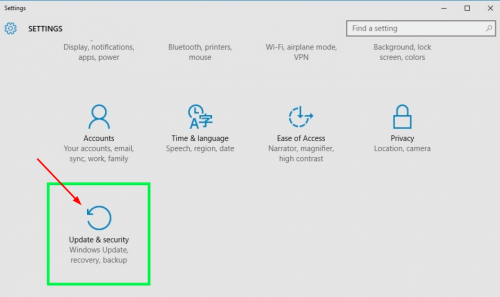
2. As soon as you will click on this option, the Settings window will pop up in front of you. Here you will see various options such as Accounts, Time & Language, Privacy and Update & Security.
You need to click on the last option i.e. Update & Security like you can see the screenshot below.
3. Inside this option (Update & Security), you will see an another option i.e. Recovery on the left.
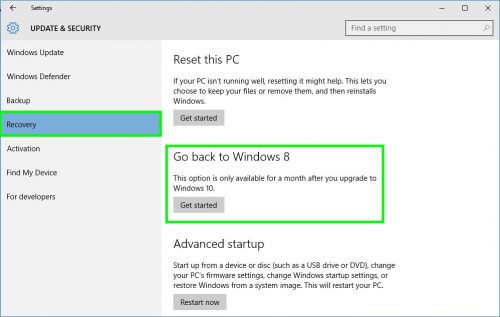
And on the right side, you will see the option that reads “Go back to Windows 8”. Click on Get Started to move ahead and start with downgrading process.
Before you start with processes, make sure that you’re logged in as an administrator because you will not see this option if you are logged into a standard or guest account. If you’re not sure by which account you are logged in, you can verify it by following the steps given below.
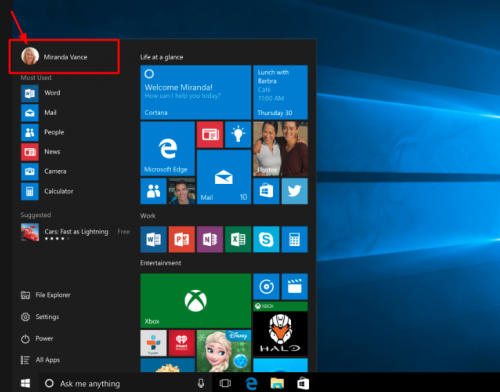
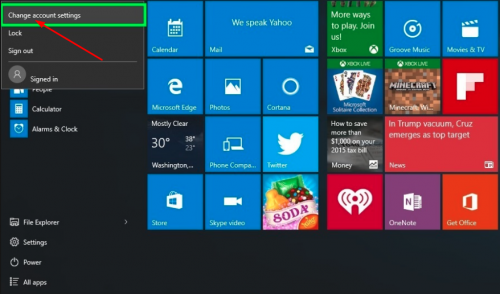
- Again open the Start menu and click on the Account field available on the top of the menu. This field will display the picture and name of the account in use currently.
- Under the “Account” field, click on the option “Change Account Settings”.
It will show the information of currently logged-in account. In case you don’t see the word Administrator below the name of the account, it simply means that you haven’t logged into an Administrator account. Now try logging into administrators account and then try again.
Now you are ready to downgrade Windows 10.
Start the Downgrading Process
1. As we had mentioned above, Go to Recovery tab available in the Update & Security section of Windows 10.
2. Under “Go back to Windows 8” click on the “Get Started” button.
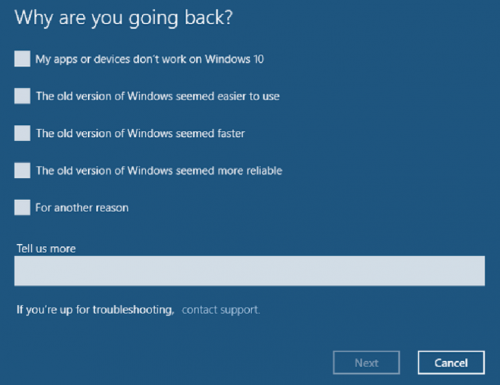
3. Now you will see a dialogue box asking you reasons for downgrading Windows10. You will see various reasons already listed their, you need to check the box available in front of these reasons. Since it is a mandatory step to proceed further with the process, select any one reason and click on the Next option.
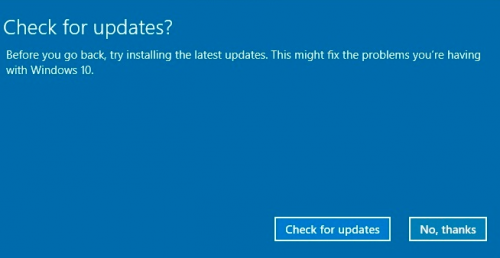
4. Now you will see uninstalled updates. You will find options to install the latest updates. Since you want to downgrade, select No thanks.
5. Next, you will see the following dialogue box. You have to click on the Next option and proceed.

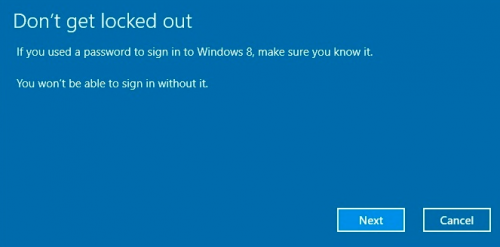
6. Again you will see a dialogue box advising you to remember the password for your account so that you don’t get locked out. Click on “Next” to Continue.
7. Now you have come to the final message i.e. “Thanks for trying Windows 10”. Here you have to click on “Go back to Windows 8 or 7”. Let your computer restart and begin with the downgrading process. It may take a couple of hours you will be able to use your older Windows version.
Conclusion
We hope our “How to”guide will help you go back to the previous version of Windows successfully. Still, if you have any doubt or you encounter any issue when downgrading, you may raise your query in the comments below. We would be happy to assist you.
