Most lighting edits in digital photography are done by adjusting the brightness (overall light/dark across all pixels in the image) and the contrast (simultaneously making the whites whiter and blacks blacker). Read my article on using the Brightness and Contrast tools in Windows 10 here. If you want finer control over your images lighting, read on.
Highlights and Shadows allow you to target and tweak the light and dark tonal areas of your image. How you use these tools will depend on the image and personal taste. Increasing the highlights could make the light areas of your photo really stand out, but usually comes at the cost of detail in these light areas. Play around with the tools until you strike a balance between detail and pop.
1.Open the picture you want to edit with Photos. Photos is the default app for viewing photos in Windows 10, so your picture will open in Photos when you double-click on it in File Explorer. Alternatively, open the Photos app from the Start menu, and scroll through your collection or albums to find your picture. I usually prefer the first method because Photos does not organize your pictures into folders, which means you have to scroll through all the images in your collection or find it in the Photos generated albums to get to the one you want.
2.Click the Edit icon on the top menu bar. It looks like a pencil.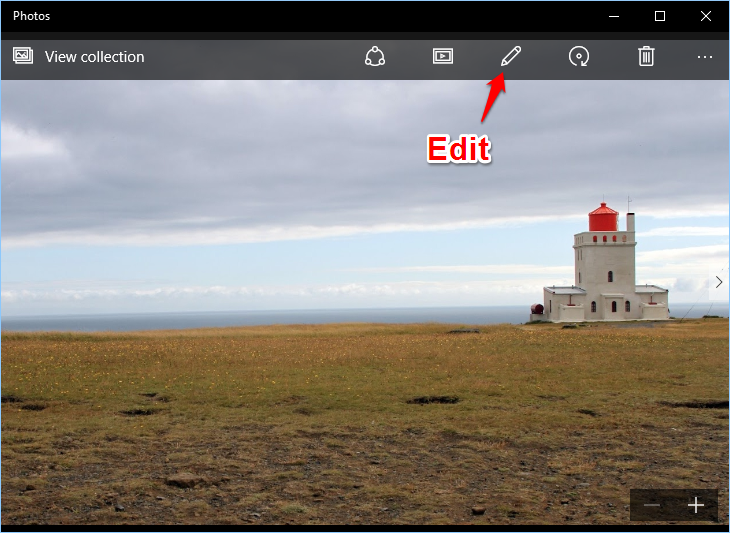
3.Select Light on the left side. The first two tools, brightness and contrast, are demonstrated in this article. The third one is Highlights. This tool will target the white areas of your image and make them stand out more or darken to show more detail. Clicking the brightness icon will give you a black circle with a white indicator knob sticking out to the right. Click and drag the white knob around clockwise to increase the highlights and counterclockwise to decrease the highlights. The image below shows how the cloud texture became more apparent when the highlights were decreased. 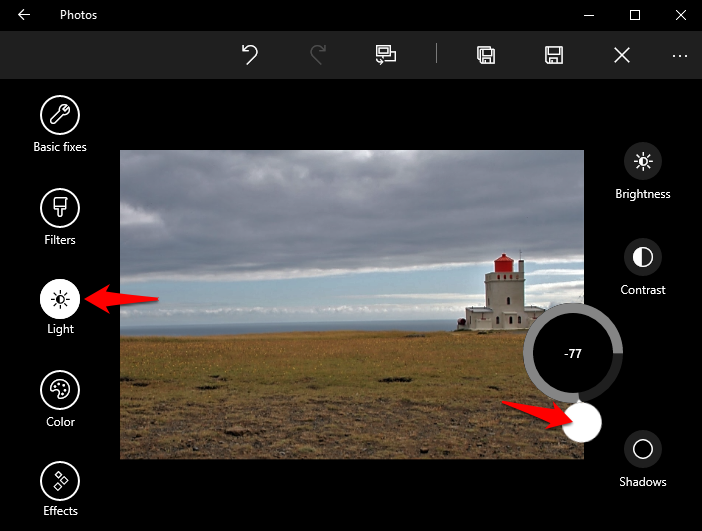
4.Now, let us edit the shadows. The tool is operated the same way as the highlights. Rotating the knob clockwise will reduce shadows, while rotating counterclockwise will make your dark areas more pronounced. 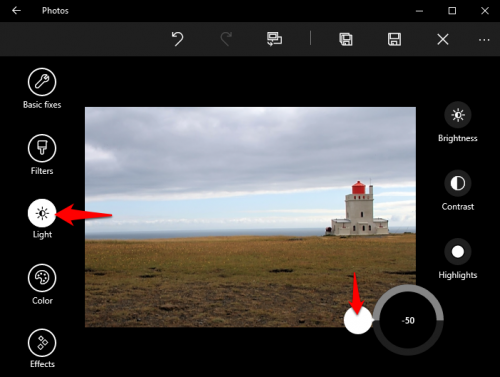
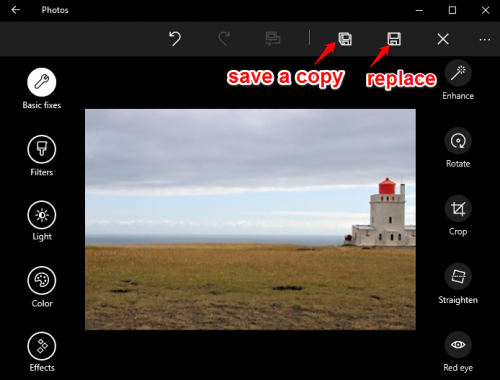
5.Once you are done with your image, you have two options to save your edited image. You can replace the original image by clicking the save icon (the floppy disk) to the left of the “x.” The icon to the left of that (the floppy disk with a shadow) will leave your original file alone and save your edited image as a new file.