
Those of you familiar with Windows 7 and 8 have probably witnessed the organizational wonder that is windows snapping. For those of you new to the concept, you will be pleased to discover that Windows allows you to grab an open application or window and “snap” it to a predefined area. Previously, you could snap windows to take up half of your screen so that you could see two windows side by side. Windows 10 further breaks your screen into four quadrants to which you can snap your windows. Once you pick up on this simple trick, you will wonder how you survived without it.
1. To use the Snap feature, choose either the mouse or keyboard method described below:
Mouse Method- Grab some blank space on the top bar of a window, and drag it to an edge or corner. Where you drag it will determine how it snaps. Pause for a second before you release the mouse, and it will show you a transparent rectangle preview of where it is going to snap to. Here is the breakdown:
Top edge- full screen
Left/right edge- one half of the screen
Corner- one fourth of the screen
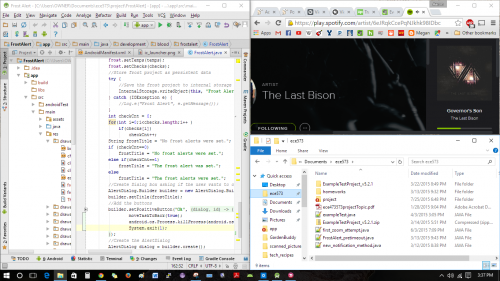
Dragging a window to the bottom edge of the screen does not trigger any type of snap. Below is a picture of Android Studio taking up the left half of the screen. Chrome and windows explorer are both taking up a fourth on the right.
Keyboard Method- This accomplishes the same thing using the windows (WIN) and arrow keys on your keyboard. The WIN key has a symbol that looks like a window and is located between “Fn” and “Alt” on the bottom of your keyboard. When the window you are using is active, choose one of the following keyboard combinations:
WIN+left or WIN+right will snap to half screen
When you are in half screen mode, WIN+up or WIN+down will bump it up/down to a quarter screen.
When your window is in a top quadrant, pressing WIN+up will bring you back to full screen.
When your window is in a bottom quadrant, pressing WIN+down will minimize your window.
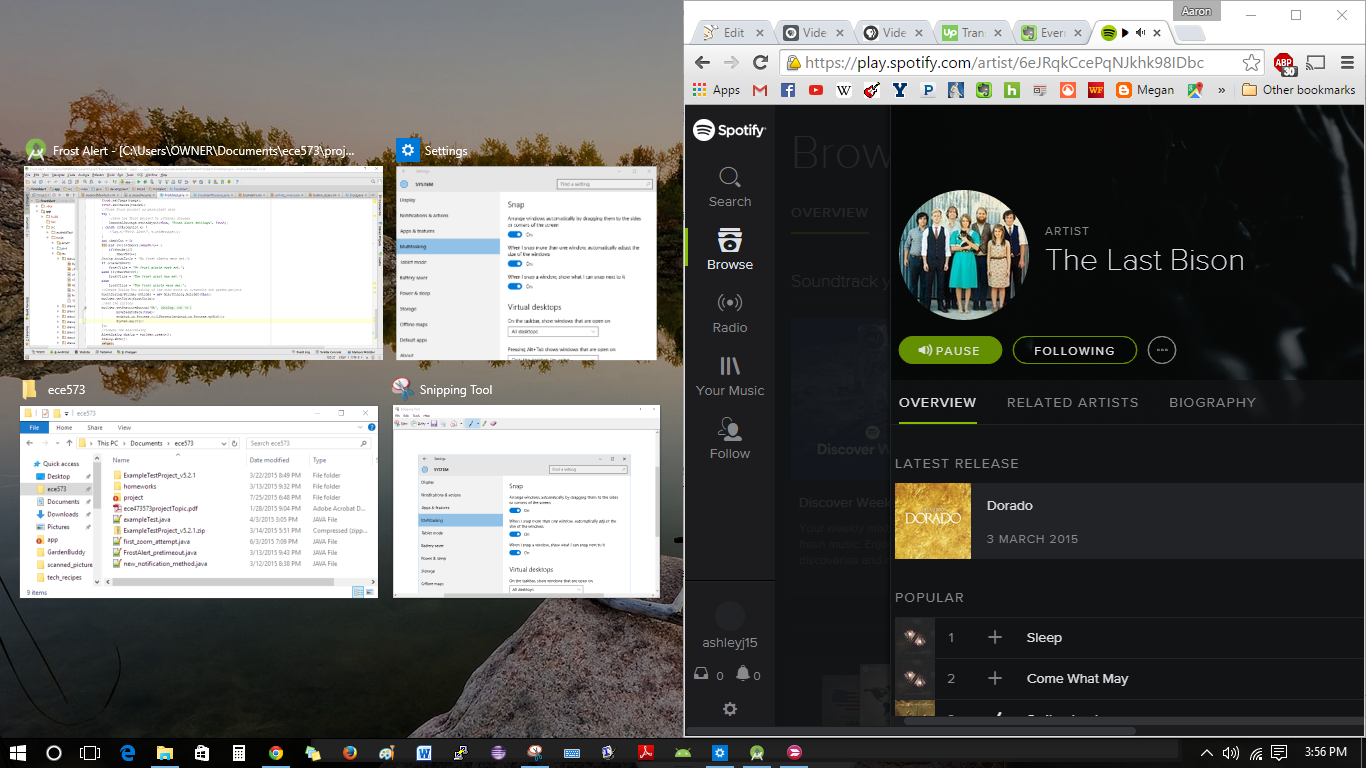
2.When you snap your window, Windows will show you all the other windows you have open that could be used to fill the remaining space.
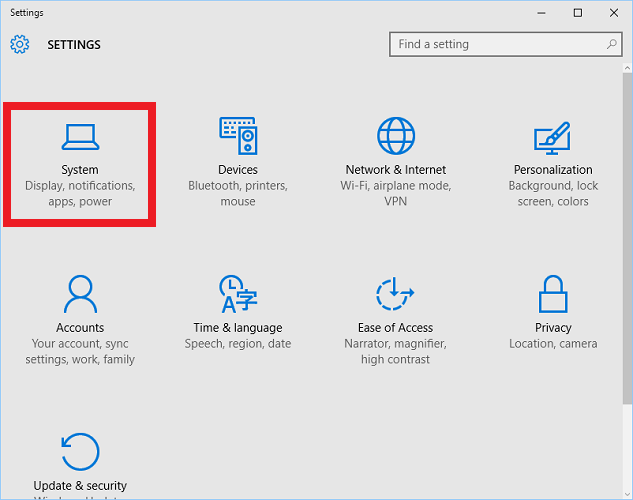
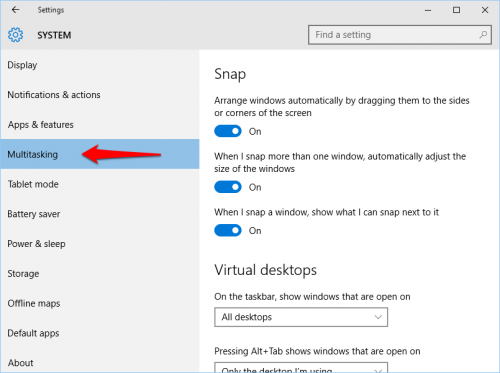
3. Troubleshooting- If any of the features described above are not working, check to make sure they are all enabled in your Settings. Go to Start>Settings>System, and then select Multitasking from the left panel. Make sure that all the Snap settings are turned on as shown below.

