
When you manage many libraries in Windows, it is a good idea to customize the icon for each to avoid confusion. In previous version of Windows, it was not possible to adjust the icon of the Library. However, Windows 8 users are allowed to change the icon easily without using the use of any additional software.
Changing the default icon of custom libraries in Window will not only make it easier to manage the libraries but also make them stand out from the boring default icon.
Please note that this feature is written based on Windows 8 Consumer Preview. The steps may vary in the final release of Windows 8.
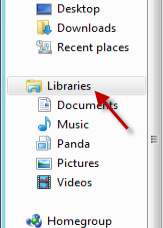
1. Launch the Windows Explorer and access the Library section from the hierarchy on the left side.
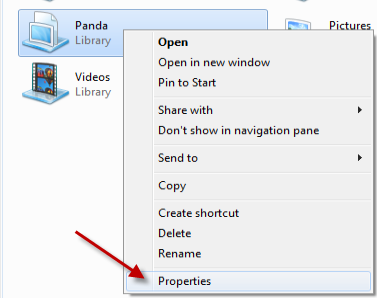
2. Find the Library that you want to change the icon on the right side and then right-click on it, choose Properties.
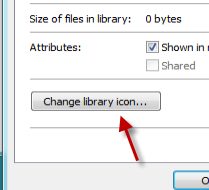
3. When the Properties window appears, click the Change library icon button at the bottom to proceed.
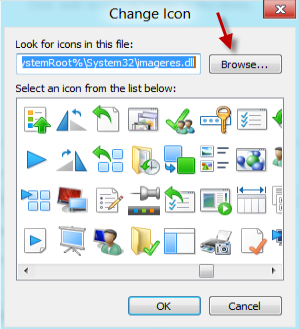
4. The Change Icon window pops up on the screen. Pick the the dll file and click Browse to choose your own icon from a file.
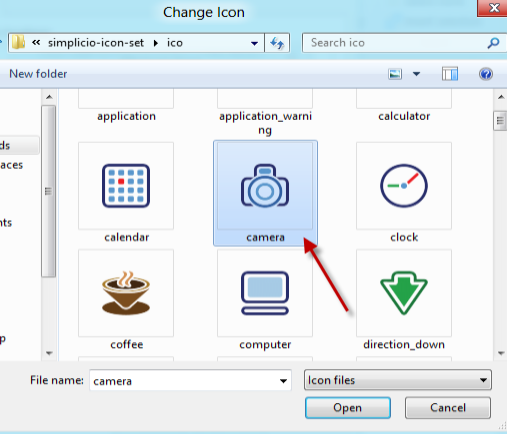
5. In the Explorer window, point to your icon file and click Open. The file must be in .ico format.

