
This Tech-Recipe is a continuation of our previous article How to Optimize Gmail for Efficiency. We have a few more things to discuss with you about Gmail. Today in this tutorial we will discuss 4 more settings of Gmail Web App. These settings will help you improve the performance and efficiency of Gmail.
In this tutorial on How to Optimize Gmail for Efficiency (Part II), you will find out about the following 4 amazing settings that will save a lot of your time.
Below is a detailed description of Gmail settings.
1. Create Contacts for Auto-complete
The entire Gmail community should be thankful to the person who came up with the idea of autocomplete contacts. It is hard to type Email ids. Especially typing Email ids of people you send and receive frequently. What it does is it saves Gmail ids to contacts once we type a new one. So whenever we type an initial of id, it brings back the rest of the id from contacts. You can turn on this feature in the settings. Just follow the following steps
- Go to Gmail web app
- Go to “Settings”.

- Click on the “General” tab.
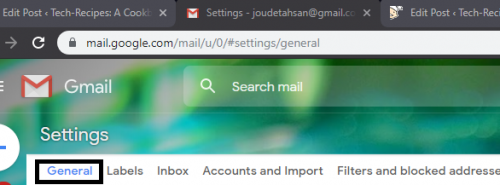
- Scroll down to a setting called “Create contacts for autocomplete”

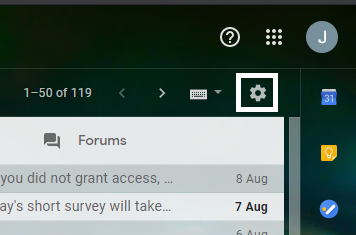
2. Categorize Gmail Inbox
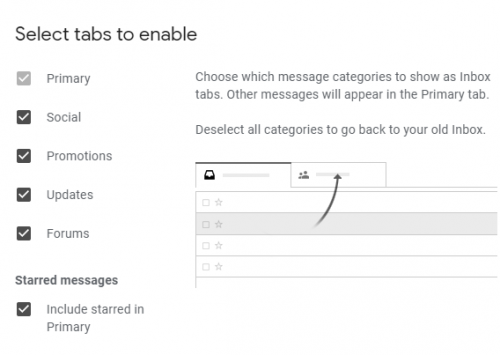
Your Gmail account receives various sorts of emails every day. Some emails are important to you some are not. Some are totally spam and useless others are promotional. If all these emails appeared combined in your Gmail Inbox, it would be a complete mess. Gmail provides an option where you can categorize your Inbox into 5 different tabs. When your account will receive an email it will automatically send it to it’d respective category
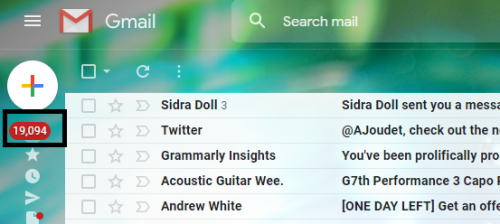
Take a look at my account when there’s just one tab
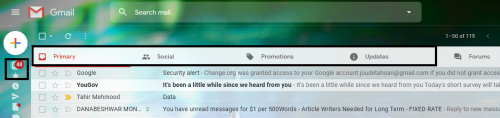
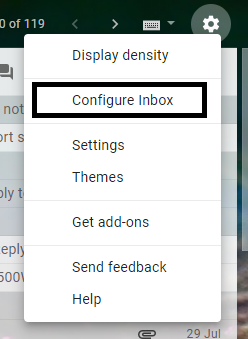
After I turn on other tabs, take a look now
Follow these steps to turn this feature on:
- Click on settings.
- Hit “Configure Inbox”
- Click on each tab to get your inbox categorized.
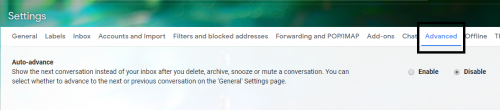
3. Auto-Advance
Auto-advance lets you move directly to the next email after deleting or archiving the one you’re reading. No more do you have to select each email to read or whatever. Auto-Advance will automatically take you to the email next to the one you read. It’s the digital equivalent of flipping through a stack of mail and trashing read or unwanted items as you go, like a normal person.
- All you have to do is to go to the “Settings”
- Click on “Advanced ” tab
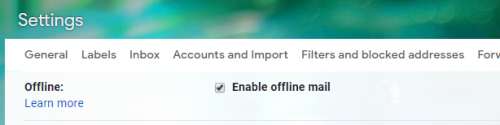
4. Offline Email
Internet connectivity is a very common issue. There are a lot of times when we don’t have internet availability and we are awaiting an email. Gmail offers this amazing feature using which you can read emails even with no internet. Emails will be saved for you so you can see them offline.
Here’s how you can enable this setting.
- Click on “Settings”
- Hit the “Offline” tab
- Click on “Enable offline mail”

