Adding the appearance of rain to a photograph can really change the artistic feeling of the image. This tutorial demonstrates the steps required in Photoshop to create a rain effect.
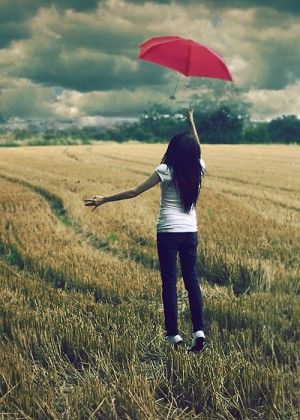
The photo I am using here is the beautiful Red Umbrella by `larafairie. Using this amazing work, we are going to change the feeling by adding the appearance of rain.
Original
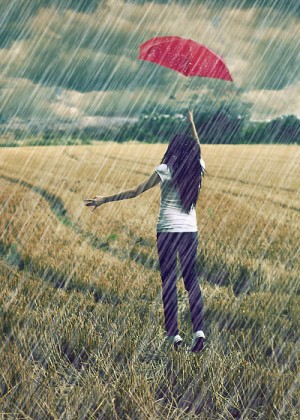
The End Result
Let’s get started:
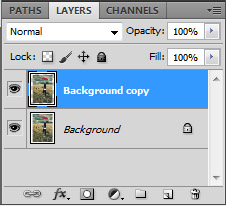
STEP 1: Duplicate the Background layer
STEP 2 : Add some extra canvas space
The purpose of adding extra canvas space is to create effect when we add ‘Motion Blur‘ in the following steps. Before we do that lets reset our foreground color to background by pressing D. This will set black as our foreground color and white as background.
![]()
Now, we need to add extra canvas space by Crop tool. Select the whole image by crop tool. With the crop tool selected hold ALT and stretch the selected area outside image. Then crop the image. Don’t worry about adding too much space because we’ll be cropping it away later anyway. For now, it’s better to add too much than not enough.
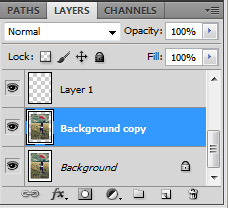
STEP 3: Add new blank layer on top
Fill the new layer with black by simply Paint bucket or by shortcut ALT+Backspace.

STEP4 : Add noise to the layer
Select Filter>> Noise >> Add noise
Select Monochromatic
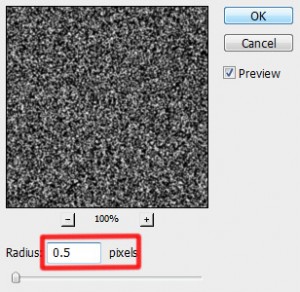
STEP 5: Apply Gaussian blur to the layer
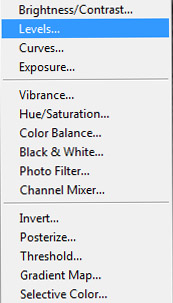
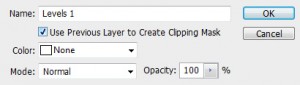
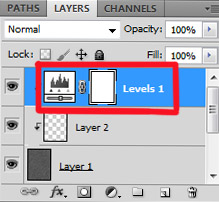
STEP 6: Add new Adjustment layer
Layer >> New Adjustment layer >> Levels
Select use Previous Layer to Create Clipping Mask option.
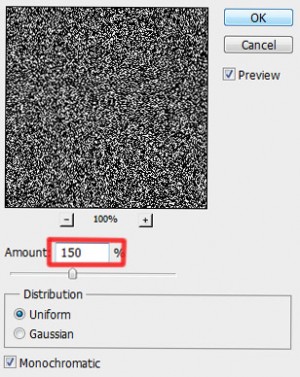
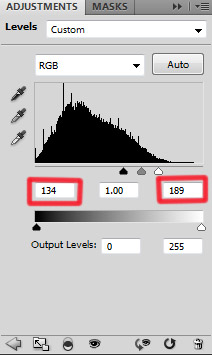
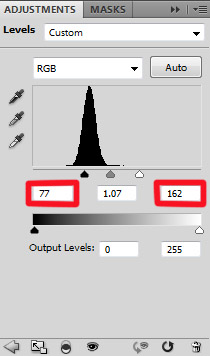
Step 7: Reduce The Amount Of Noise And Increase Its Contrast
Use the following setting
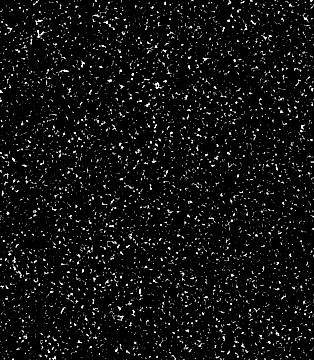
The output image will look like this
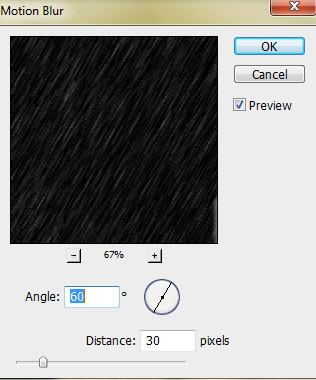
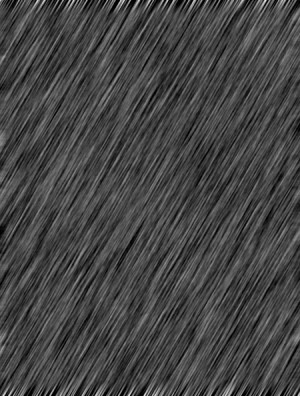
STEP 8: Apply the Motion Blur to the noise
with Noise layer selected Go to Filter >> Blur >> Motion Blur
With the following settings
STEP 9 : Readjust the Slider in layer as needed
Depending on how far you dragged your black and white sliders in the Levels dialog box earlier, your noise may have now disappeared completely in your image after applying the Motion Blur filter. To bring it back, simply re-adjust the sliders by double-clicking directly on the thumbnail for the Levels adjustment layer in the Layers palette:
This will open the Levels dialog box. Adjust the slider so as to get maximum contrast. For my image the levels are as follows:
You image will look like this
STEP 10: Crop away extra space
In this step we will crop the extra canvas space that we added to the image. for cropping simply select the layer by holding Ctrl. Your selected image will look like this
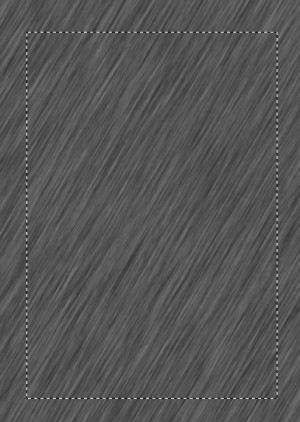
For cutting extra space around selected area Go to Image >> Crop. Extra space is now removed.
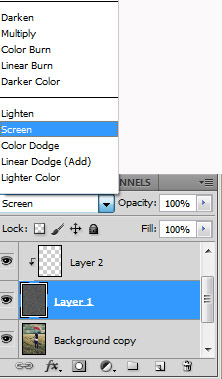
STEP 11: Change Blend mode to the Screen. Additionally, you can adjust the fill and opacity of this layer to change how strong or subtle you desire the rain affect to be.
And that’s all! Your photograph with the rain effect is ready!
