
In our day to day activities on a PC, we sometimes get in a situation where we would need to make a screenshot of what we are seeing on our screens either to send it to other people, or just save it for us.
Every version of Windows from 7 to 10, including 8 and 8.1, has a nifty little tool called snipping tool. the names says it all – you can use it to snip. Using it is very easy and here I will show you how to use it on Windows 10, but the procedure is very similar on older versions of Windows.
How to make screenshots on Windows
Tap the windows button on your keyboard, usually located on the bottom left corner of your keyboard. Alternatively, you can click on the windows logo in the lower left corner of the taskbar.
1.Type in “Snipping tool” 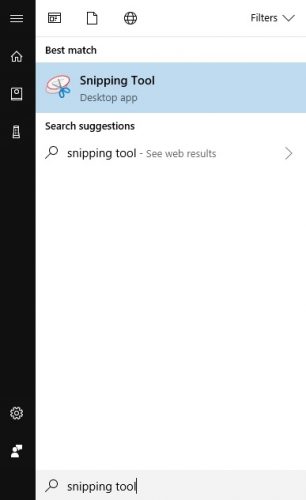
2.Open the application
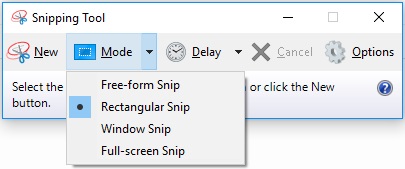
3.Once you open the application you have a variety of options to choose from. Under the Mode menu you can choose between: Free-form Snip: this option allows you to make a screenshot in every shape that you want and you control the area with the cursor, Rectangular Snip: this is mostly used in situations where you want to snip only a portion of that you are seeing on your screen in a rectangular or square shape, Window Snip: with this option you don’t have to highlight anything. This option will enable you to make a screenshot of only the active window, Full-screen Snip: this is an option that will enable you to make a screenshot of the entire screen, all visible segments.
4.Also, you have an option to set a delay when taking a screenshot. The delay can be minimum 1 second and maximum 5 seconds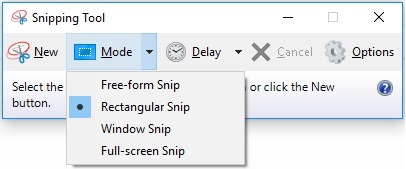
5.Once you select the type of screenshot under the mode section as well as the delay, all you would need to do is click on “New” and you can make your screenshot, depending on the mode that you have selected.
6.When the previous step is completed, you will see a few more options appear on the snipping tool window
7.Right next to the Delay menu is the save option where you can save your newly created snapshot in the preferred file format as well as the preferred file name. Next is the copy button which will enable you to copy the screenshot that you just made and store it in clipboard. After that is the sending option which will enable you to send the screenshot either as an image in an email or as an attachment. In a separate section are the editing tools. The first option is the pen tool, where you can choose between a preset red, blue and black pen with a medium thickness and a chisel tip pen. if you do not want to use any of the preset options you can always customize the pen using the “Customize” option. Next to the pen is the highlighter which enables you to highlight text or an image, similar to the highlighter marker that you might have on your desk. Finally, the eraser will help you remove any unwanted edits that you just made to the screenshot.
8.The final step in making a screenshot would be to save it. In order to do that you need to click on the save icon, the one that looks like a floppy disk and select the destination, file name and file type that you want.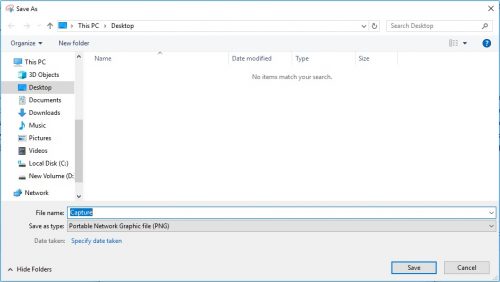
Frequently asked questions and answers
Q: Will the snipping tool windows be visible when I make a screenshot?
A: No, the snipping tool window will disappear as soon as you start making your screenshot
Q: Will the mouse cursor be visible on the screenshot that I make?
A: No, the cursor is not visible on any screenshot that you make.
Q: Can I make a screenshot while watching a video.
A: Yes, you can. In order to tho this you would need to watch the video and pause it at the exact moment when you want to make the screenshot.

