You can spend hours fiddling with color and lighting settings, or you can use the built-in Enhance and Filter tools in Windows 10 to tweak your photos with a few mouse clicks. You have less control over the final image when you let Photos do the fine-tuning for you, but it sure is a quick and easy fix. I have found that the enhance tool does a good job of producing an image with deeper colors, and I like the option for quickly making a picture black and white. Read on to discover how to use these features.
1.Open the picture you want to edit with Photos. Photos is the default app for viewing photos in Windows 10, so your picture will open in Photos when you double-click on it in File Explorer. Alternatively, open the Photos app from the Start menu, and scroll through your collection or albums to find your picture. I usually prefer the first method because Photos does not organize your pictures into folders, which means you have to scroll through all the images in your collection to get to the one you want.
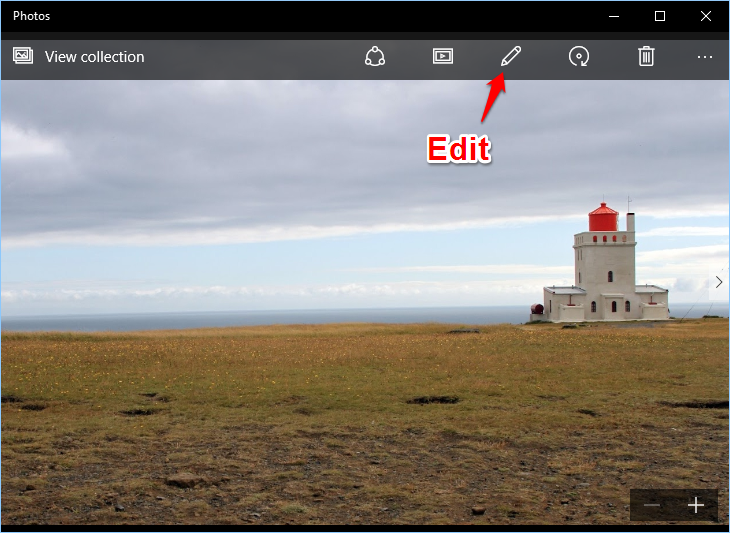
2.Click the Edit icon on the top menu bar. It looks like a pencil.
3.Make sure Basic Fixes is highlighted on the left side. Click the Enhance wand on the left side of the window. Windows will make some changes to contrast, shadows, brightness, and saturation. This frequently results in a more aesthetically pleasing photo. If you do not like the changes, just click the wand again, and it will revert back to the original. 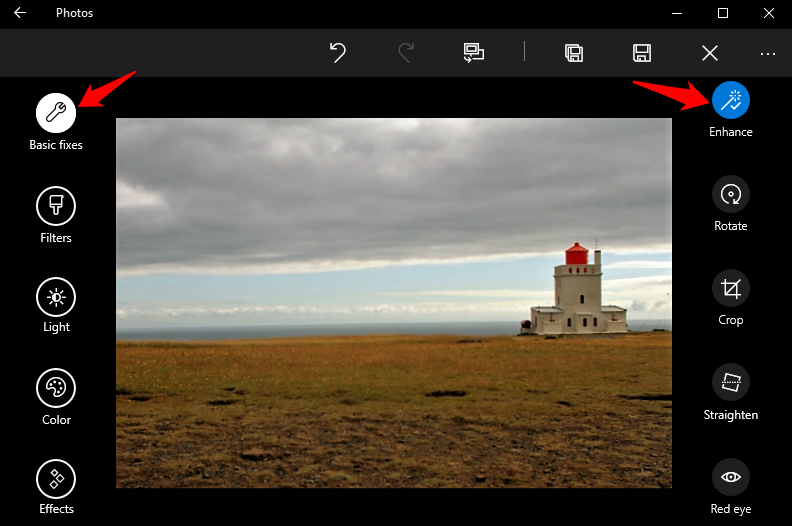
4.Click on Filters on the left side. There are six filters for you to choose from on the right side of the page, including an option for black & white and one with a vignette effect. For whatever reason, Photos does not let you scroll through the filters. If you cannot see all six, make the Photos window full screen. 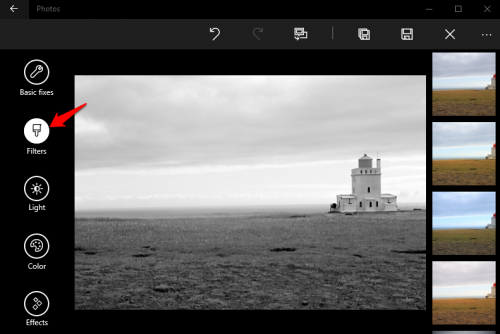
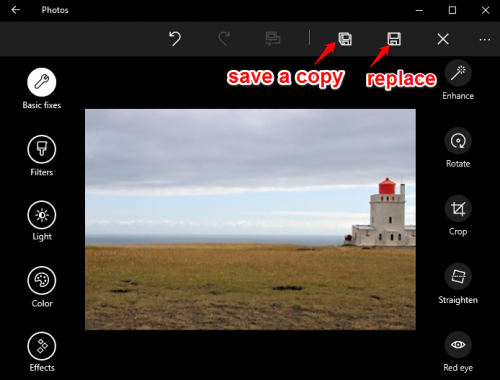
5.Once you are done, you have two options to save your edited image. You can replace the original image by clicking the save icon (the floppy disk) to the left of the “x.” The icon to the left of that (the floppy disk with a shadow) will leave your original file alone and save your edited image as a new file.