Creating a custom MMC can provide a convenient method for managing Windows Servers and the services they provide. Having one “dashboard” from which to manage Active Directory, Group Policy, DNS, DHCP, WSUS, WDS, and other services provides speed, simplicity, and a bit of self-documentation for whatever you have running on your server.
1. Select the Windows key or Start Menu, type mmc.exe, and hit enter. Start > Run works as well for pre-2008 servers.
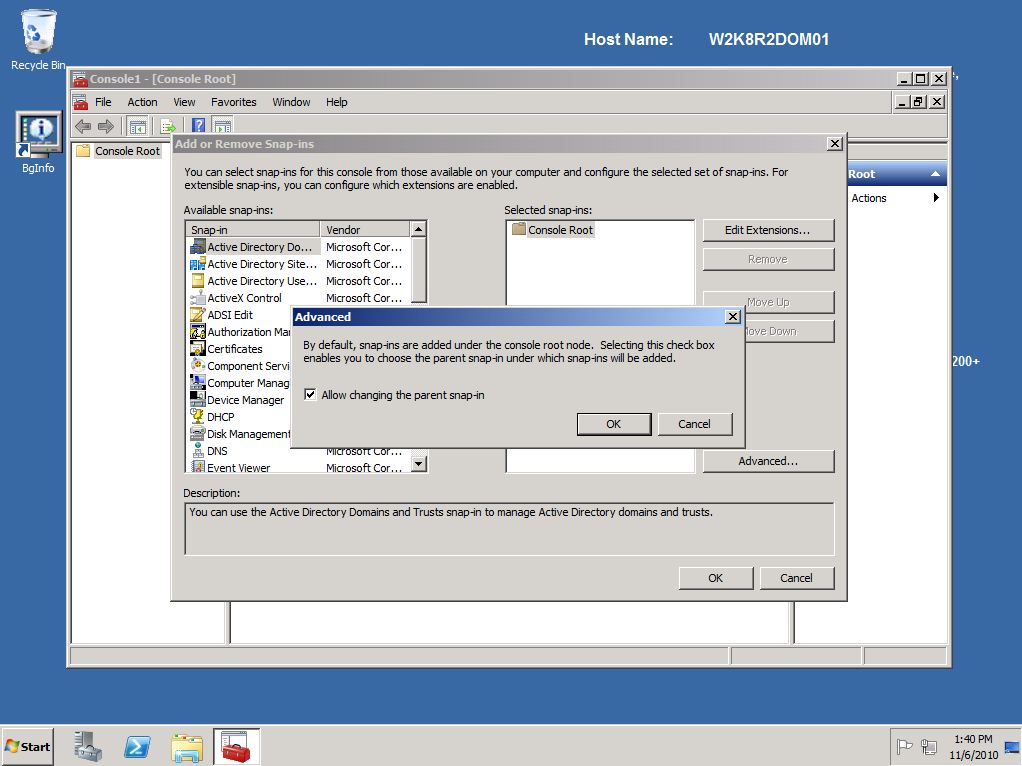
2. Select File > Add/Remove Snap-in…
3. Select Advanced…, then check the option to “Allow changing the parent snap-in. This feature allows you to further organize your snap-ins within a single console window.
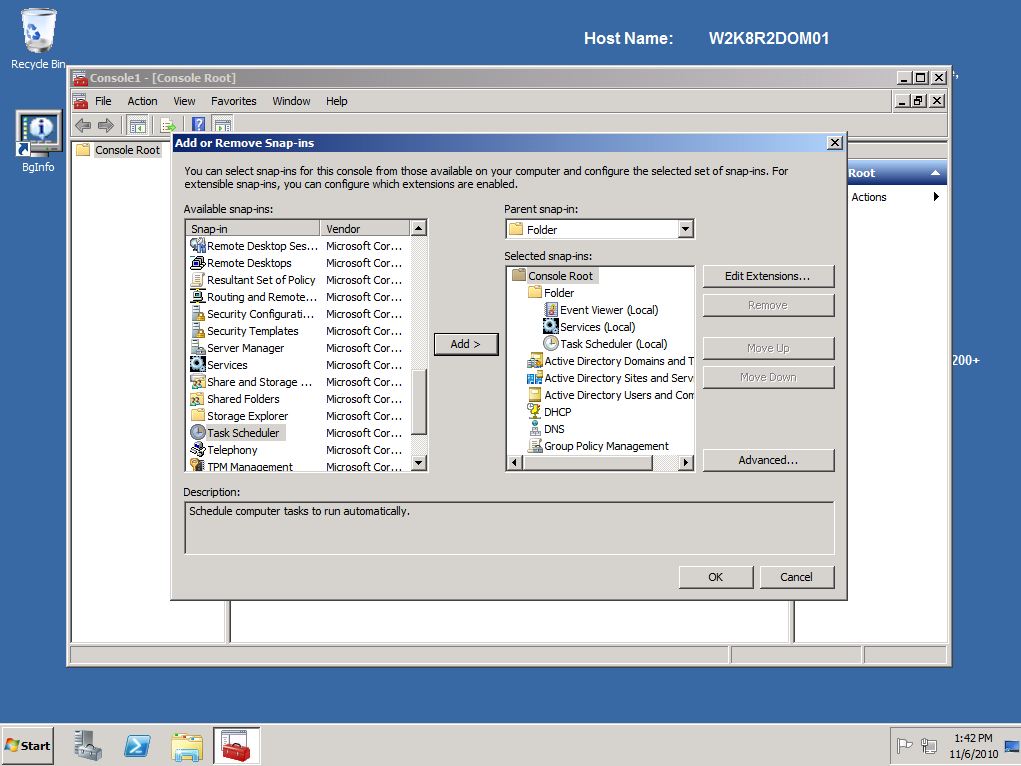
4. Scroll down the available snap-ins, choose “Folder”, and select “Add”.
5. Choose from the available snap-ins those which apply to the services that your server provides. In this example I am choosing Active Directory related items.
6. Now change the “Parent snap-in” drop-down menu to choose “Folder”, which you added in step 4.
7. Scroll through the available snap-ins and add those which apply more specifically to local server management tasks. In this example I am choosing Event Viewer, Services, and Task Scheduler.
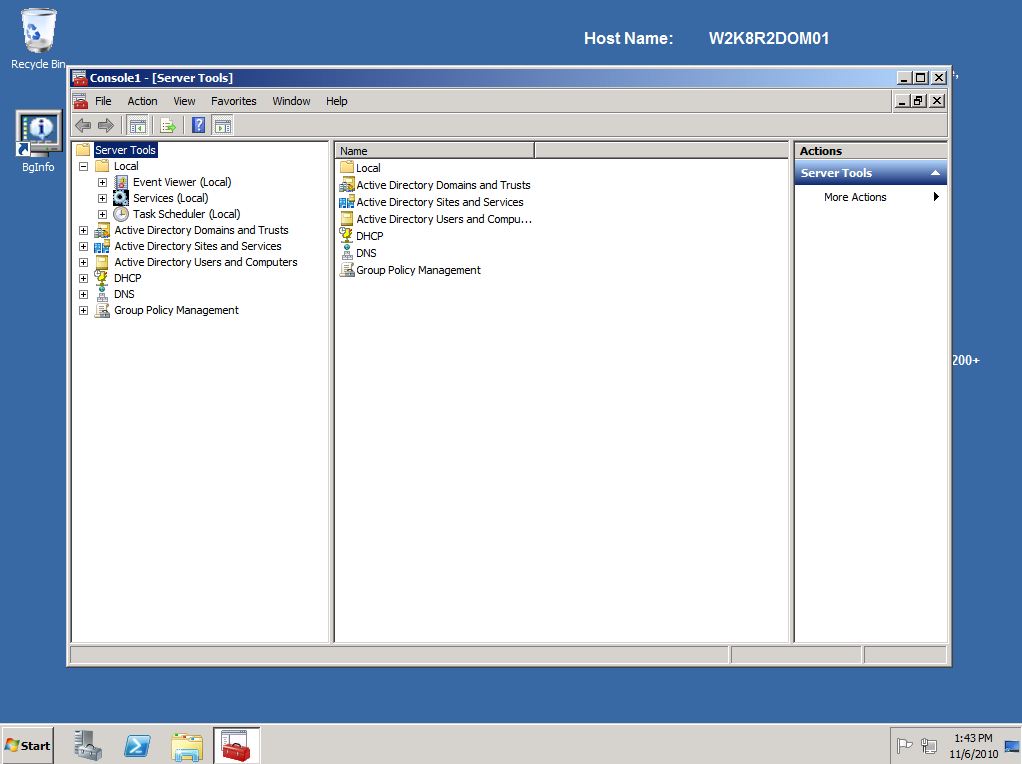
8. Select OK to accept your additions and see your console.
9. I like to rename “Console Root” and any “Folder” to something more appropriate. Right-click each in turn, choose Rename, and enter whatever you like. I chose “Server Tools”, and “Local” in this example.
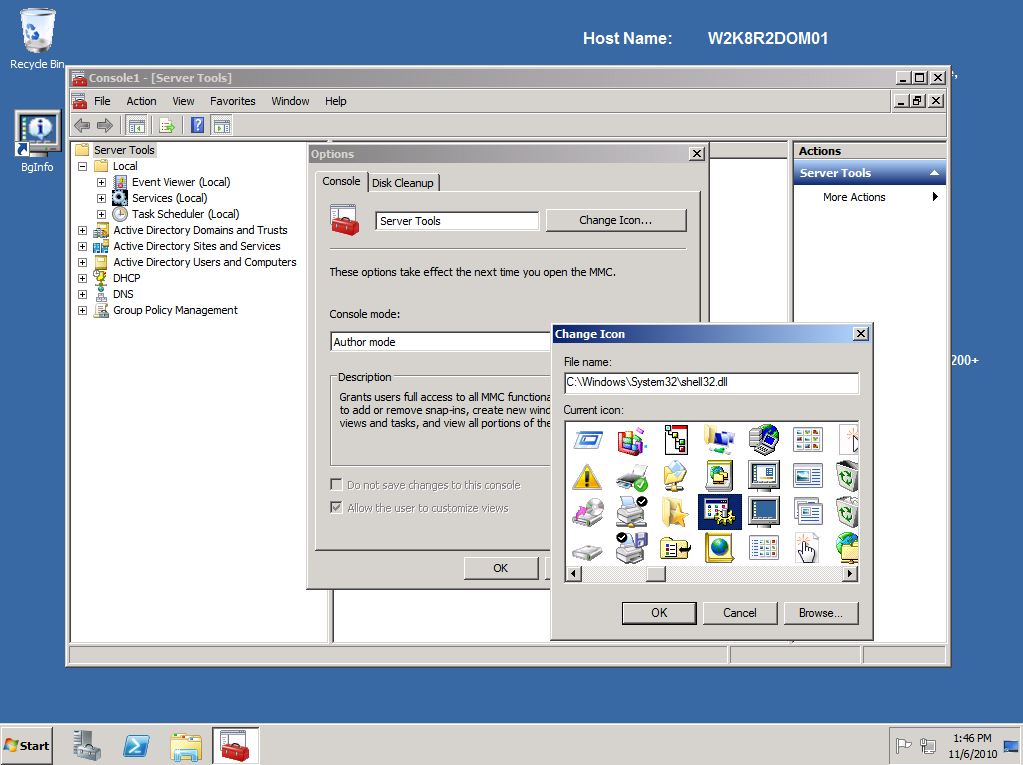
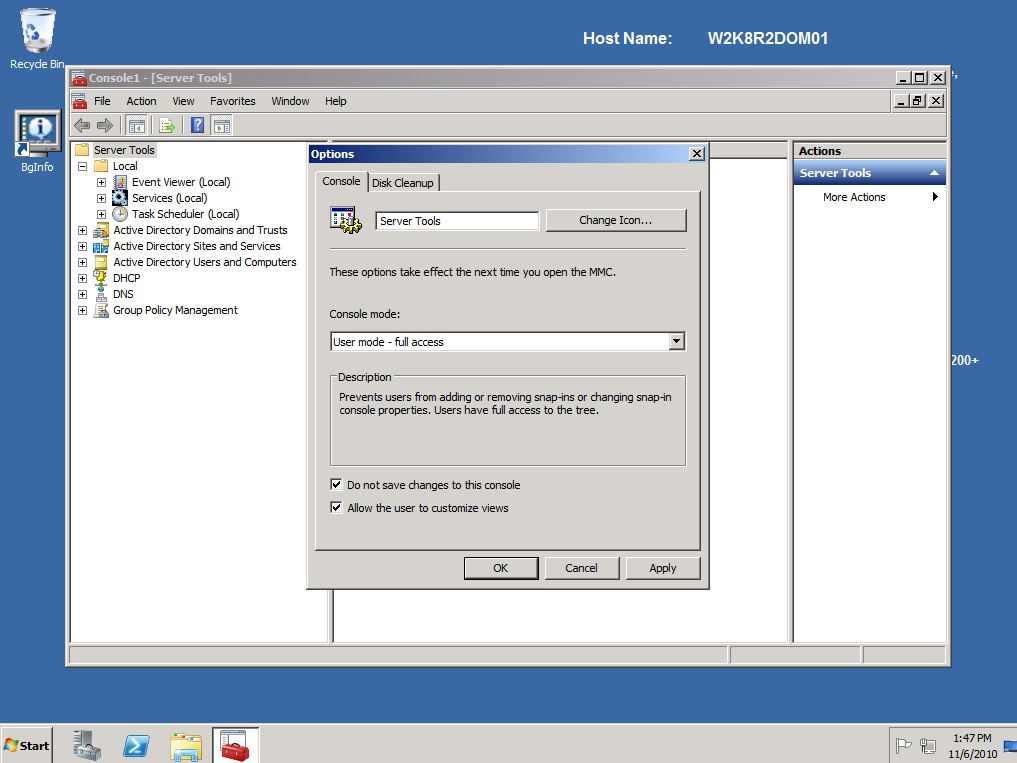
10. Select File > Options…
11. Rename “Console1” to something more appropriate, and change the Icon if you wish. In this example I used C:\Windows\System32\shell32.dll to find an icon that I liked.
12. While still in Options, under “Console mode:”, choose “User mode – full access” and check the box “Do not save changes to this console”. This option prevents prompting to save changes to the console every time you close it. Select OK to close Options.
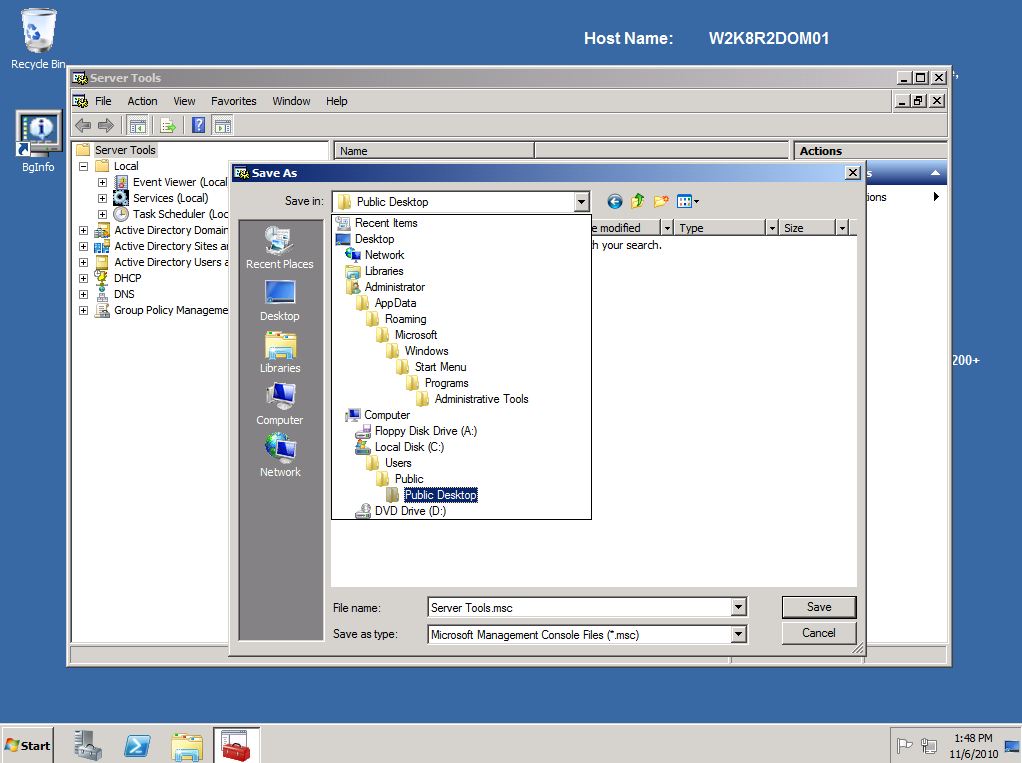
13. Select File > Save As…
14. Save your console with an appropriate name wherever you want. The default location will make it show up in Administrative Tools. For this example I named it “Server Tools.msc”, and saved it on the Public Desktop so that anyone logging on to the server can use it.
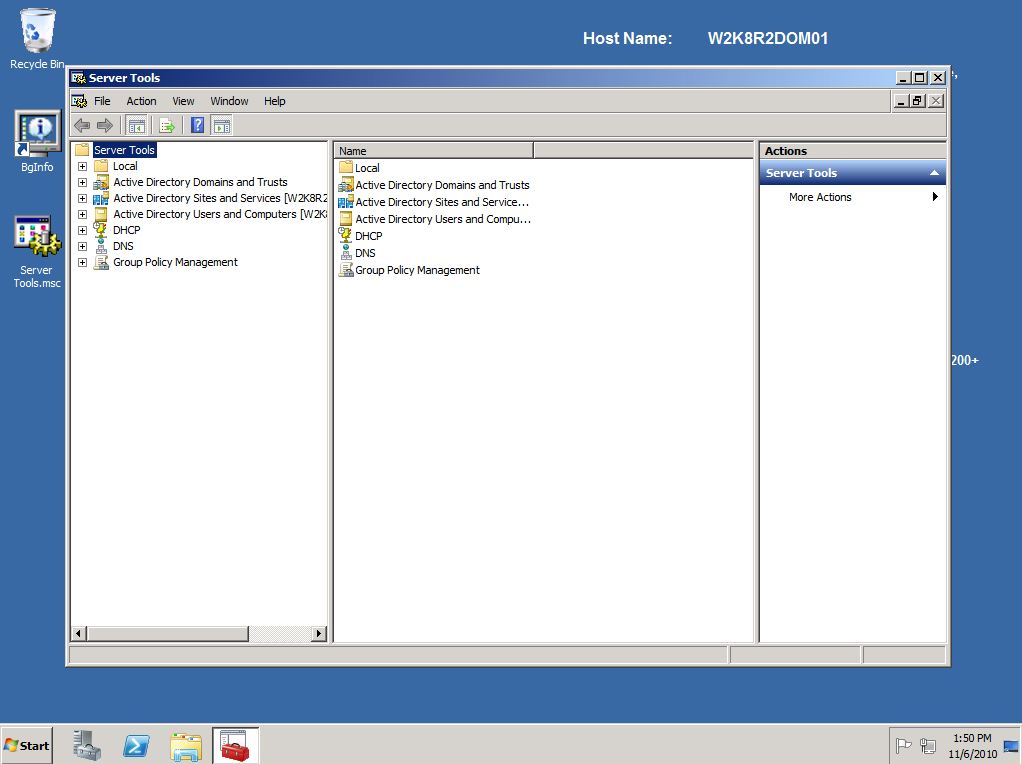
15. Close your custom MMC, and re-open it to see your handy work.
16. If you wish to make changes to your console in the future, right-click it wherever you saved it and choose “Author”.
17. Note that it is very easy to run your console as “Administrator” using alternate credentials by right-clicking it and choosing “Run as administrator” (Or simply “Run as…” on 2003 / XP).
18. Note also that the steps, features, and settings within mmc.exe differ slightly from 2003 & XP to 2008 / Vista / 2008 R2 / 7, but the essential components translate quite easily. If you’re running a client OS (XP/Vista/7) from which you are managing server services, you will need to install the appropriate administrative tools package for your platform(s).
Click the following screenshots to see these steps in action: