
Data security and privacy are one of Apple’s top priority. To keep your iPhone secure and private, you have an option to delete the data on your iPhone whenever someone forcefully tries to use the device without your permissions. This article will teach you how to set iPhone to erase all data after 10 failed passcode attempts.
Again and again, Apple has proven that they are not releasing any loose end when it comes to users’ data privacy. Even after FBI’s request and pressure from different organizations, Apple refused to hack the iPhone of the San Bernardino shooter on the reason of protecting the basic security and privacy interests of hundreds of millions of individuals around the globe. Apple has set controls and securities when accessing the device and adds layers of protection when critical settings and configurations are changed. To add icing to the security cake, Apple offers an option that allows users to set an iPhone to erase all data after 10 failed passcode attempts.
How to Automatically Wipe Your iPhone Data After 10 Failed Passcode Attempts
To keep your data private and safe from ill-intent people, set your iPhone to erase all your data after too many failed passcode attempts. Follow the procedures below to enable data deletion after 10 failed passcode attempts:
1.Go to your phone’s Home screen and touch on the phone’s Settings.
2.From Settings, scroll down to the Touch ID & Passcode settings and tap on it.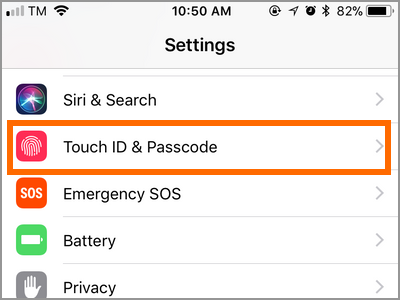
3.Enter your Passcode. Apple wants to ensure that someone going to a critical setting indeed has the proper authorization and the only way to be sure that a user is authorized is through the passcode. Apple won’t even allow the fingerprint as such can be easily used if the user is sleeping.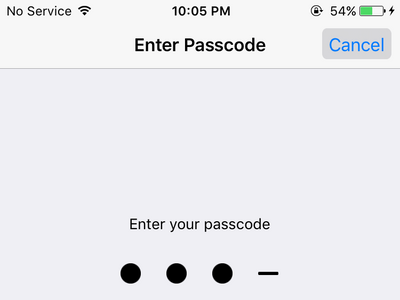
4.Once you are on the Touch ID & Passcode, scroll down to the bottom-most part of the menu.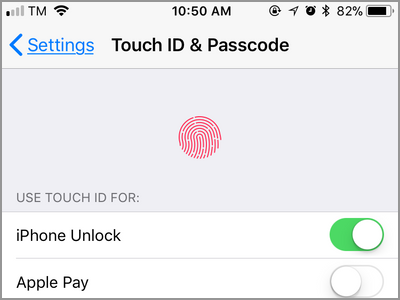
5.Tap on the switch for Erase Data. A green switch means that the feature is turned ON while a grey switch means that the feature is turned OFF.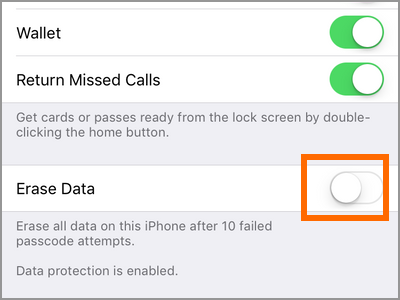
6.Confirm the selection by tapping on Enable. 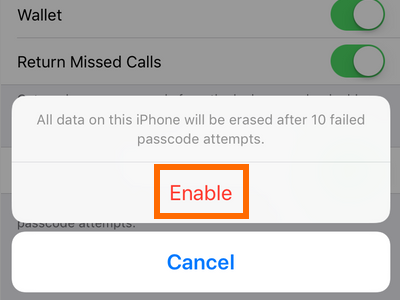
7.The action will now enable the feature on iPhone to erase all data after 10 failed passcode attempts. iPhone will tell you the number of failed passcode attempts everytime you enter the wrong passcode consecutively. 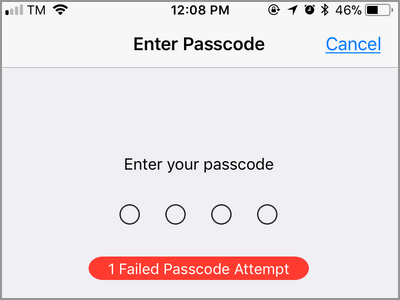
Frequently Asked Questions
Q: I have accidentally entered 10 passcode attempts on my iPhone. Now iPhone has erased all the data on my iPhone. Can I set the feature to 20 failed passcode attempts or more to be sure that I do not erase my data by mistake?
A: Ten failed passcode attempts is one too many. Noone enters a passcode erroneously for 10 consecutive times – unless that person does not know the passcode and merely guesses it just to gain access to the phone. Allowing the failed attempts to reach more than 10 is unnecessary and poses more risks than benefits. If you are in a situation where your iPhone is pressed without permissions, like having a child playing with a locked phone, then it is best that you disable the auto-delete data feature.
Q: I tried to access my phone, but somehow my iPhone does not recognize my fingerprint nor the lock codes. Now, I am on my 8th attempt. I am sure that I entered the passcode correctly. What should I do?
A: Do not continue with the unlocking of the iPhone. Regardless if you are unsure or sure of your passcode, it is best that you bring your device to an Apple Service Center and ask for help. Having your data deleted can be a headache. Plus, there’s no assurance that all of your data are recovered.
You just learned how to set iPhone to erase all data after 10 failed passcode attempts. If you have questions about any of the steps above, let us know in the comments sections.
If you are concerned about your iPhone’s security and privacy, then these related articles can help you make your iPhone more secure and private:
How to Enable Two-Factor Authentication on iPhone
iPhone: Change the Auto-Lock Delay
How to Enable Guided Access on iPhone
How to Set an Alphanumeric Passcode on iPhone
How to Back Up Your iPhone to iCloud
How to Disable the Camera on iPhone
Great information shared.. really enjoyed reading this post thank you author for sharing this post .. appreciated
This is really interesting, You’re a very skilled blogger. I’ve joined your feed and look forward to seeking more of your magnificent post. Also, I’ve shared your site in my social networks!
naturally like your web site however you need to take a look at the spelling on several of your posts. A number of them are rife with spelling problems and I find it very bothersome to tell the truth on the other hand I will surely come again again.
I very delighted to find this internet site on bing, just what I was searching for as well saved to fav