
Every now and then certain programs, settings or tweaks that you do to your Windows computer can cause a problem. These problems can range from certain programs crashing, to hardware not working properly due to a bad driver or even system crashes. Windows has one feature that may help you fix the problem fast and easy. It’s called System Restore.
With the release of Windows ME in 2000, Microsoft included the System Restore option as a way to get your computer up and running in good shape without having to reinstall the entire operating system. Even though some people say that it’s much better to do a full back-up and restore, which is correct, this option is much faster and simpler. The downside to using the System Restore option is that is does not guarantee that is will fix your problem.
The main characteristic of System Restore is that it only monitors changes made to the system files and registry. This means that if you do a System Restore it will not affect your personal files, only the changes before and after something was installed or changed (settings, registries, etc), but it will not change the files that you created or edited using certain applications (word, paint, photoshop etc).
Enable system restore
By default, System Restore is disabled in Windows 10, so before you can use it you will need to enable it.
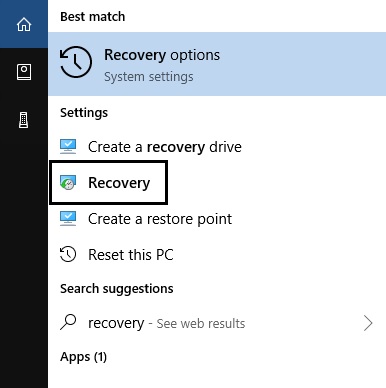
1.Click on the Windows icon on the left on the taskbar or kit the Windows key on your keyboard
2.Type in “Recovery” and click on the Recovery icon. Note: make sure you click on the Recovery with the blue icon
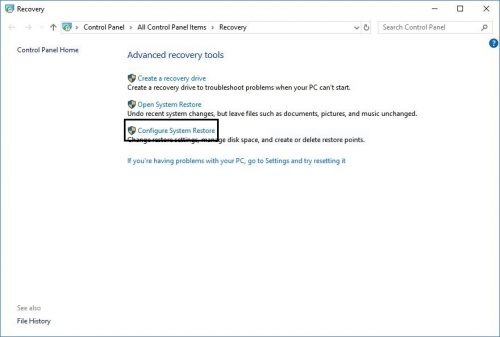
3.Click on “Configure System Restore”
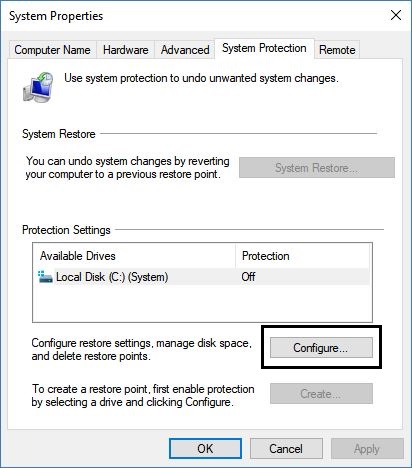
4.Under “Available Drives” make sure that you have selected the one where your Windows is installed
5.Click on “Configure”
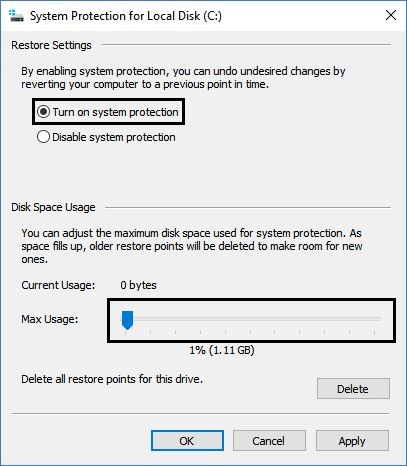
6.In the first section “Restore Settings” make sure that the option “Turn on system protection” is enabled
7.In the second section “Disk space usage” use the slider to select the percentage of your drive that you want to be reserved for the system restore points. Note: as you are creating more and more restore points, Windows will automatically delete the oldest to preserve space.
8.Click “Apply” and close all windows
Now that the System Restore option is enabled you can go ahead and create the restore point. Note: Windows will create a restore point for each installed application, driver update and Windows update. This means that if you are planning on tweaking the registries it is recommended to do a system restore point.
Create a system restore point
1.Click on the Windows icon on the left on the taskbar or kit the Windows key on your keyboard
2.Type in “Recovery” and click on the Recovery icon. Note: make sure you click on the Recovery with the blue icon
3.Click on “Configure System Restore”
4.As you can see, previously the button “Create” was grayed out. That was because the system restore was disabled. Click on that button.
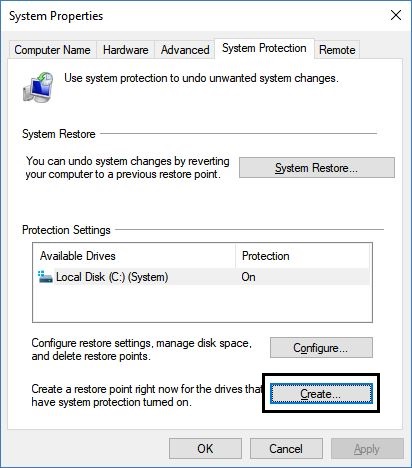
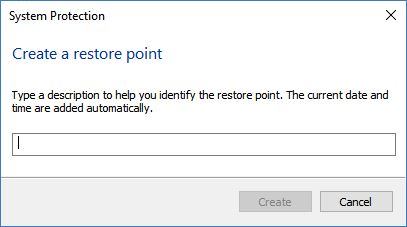
5.A new window will open where you would need to give the system restore point a name and click on “Create”
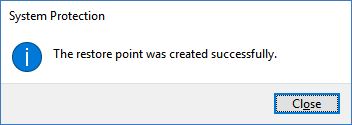
6.Once the process is done click on “Close” and close all other Windows.
Restoring your computer
1.Click on the Windows icon on the left on the taskbar or kit the Windows key on your keyboard
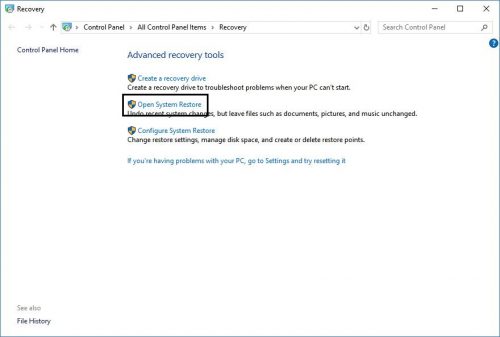
2.Type in “Recovery” and click on the Recovery icon. Note: make sure you click on the Recovery with the blue icon
3.Click on “Open system restore”
4.Click “Next”
5.Select the system restore point to which you would like to restore your computer
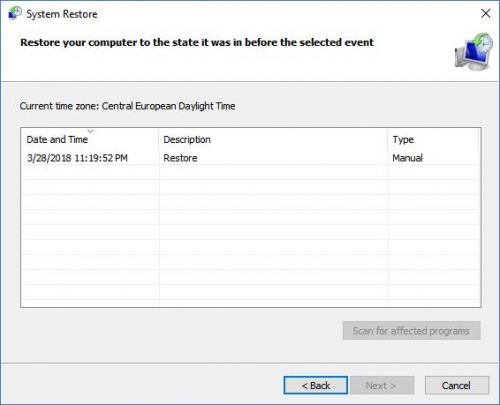
6.Click “Next”
7.The final window will display the information of the restore point. If it’s the restore point that you want to use click “Finish”
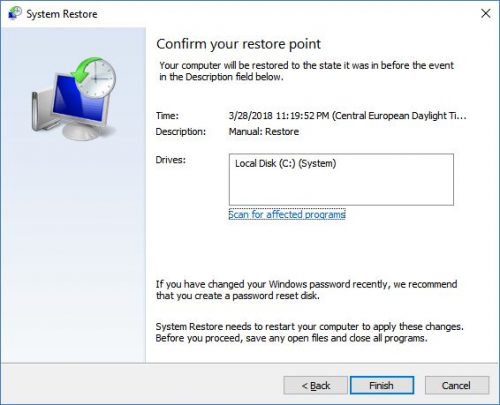
Your computer will need to restart and the boot might be slightly longer than usual. Once Windows boots up you will get a window detailing if the restore process was completed successfully
Frequently Asked Questions and Answers
Q: I can’t log into Windows, how to I do restore?
A: In this case first you will need to try through the advanced boot options to boot into safe mode and do the restore. If that doesn’t work, you can do it directly through the advanced boot menu.
Q: Can this harm my computer?
A: No, but it may that the problem occurred before you created a restore point, so doing a restore will not fix your problem.