
In the era of laptops manufacturers, who are aiming to make laptops as thin and as light as possible, are forced to make certain sacrifices on certain models. In most cases, one of the heaviest components in each laptop is the battery. Even with the newer hardware using less power a small battery means that you might not get enough juice to last through the day.
By default, when you install Windows you get two power plans: Balanced and High Performance. The balanced power plan uses less power, but you will not get the most of the hardware. The High Performance is the exact opposite – it uses a lot more power but you will get the most out of the hardware.
If you are one of those people that want to get the longest battery life possible, Windows 10 offers a nifty little slider that will enable you to adjust the power consumption with ease. Even though this is good for most people, you might find that it just doesn’t cut it.
The best way to get the most out of your battery, you will need to create a custom power plan and use that.
How to create a custom power plan on Windows 10
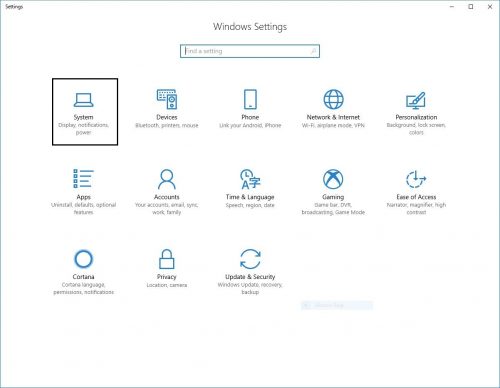
1.Hit the windows button on your keyboard or click on the Windows icon on the left of the taskbar and open settings.

2.Go to “System”
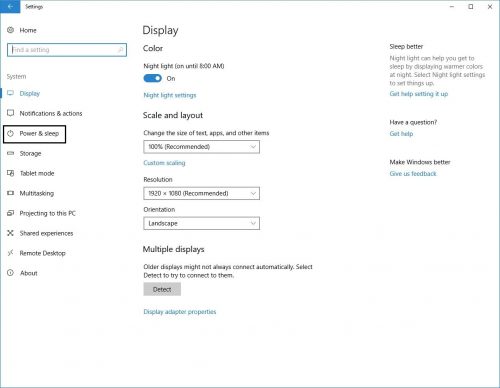
3.On the left side go to “Power & Sleep”
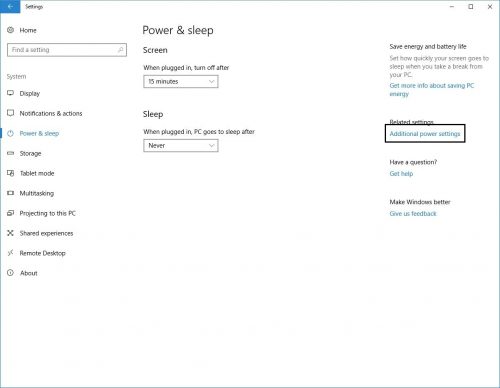
4.On the right go to “Additional Power Settings”
5.A new window will open. There from the left navigational menu click on “Create a New Plan”
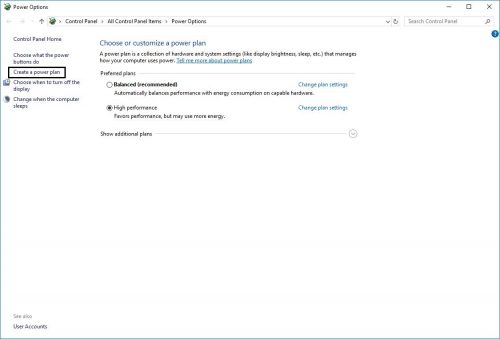
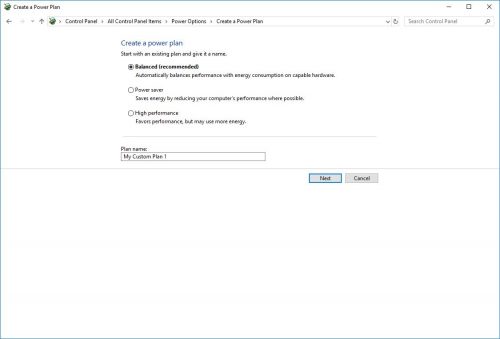
6.The next section will be for setting up the new power plan. If you are looking for a plan that will consume less power, select “Power Saver”. Below that you can give your new power plan a name. Once you are done with setting up click on “Next”
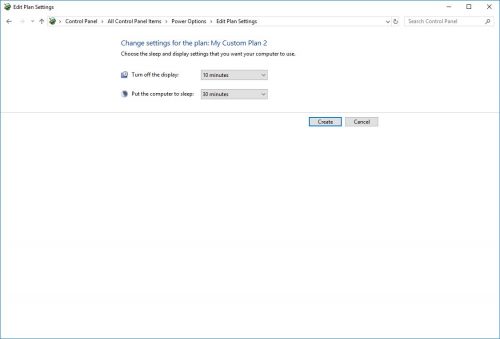
7.On the next section you can choose how long before your screen turns off and how long before your computer goes to sleep. You can either set a certain amount of time, or you can set it to never.
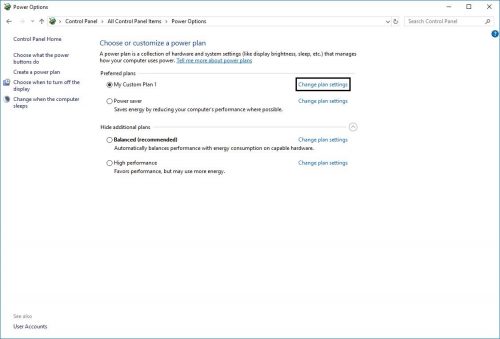
8.Every time you create a new power plan Windows activates it by default. In order to make changes to it you will need to click on “Change Plan Settings”
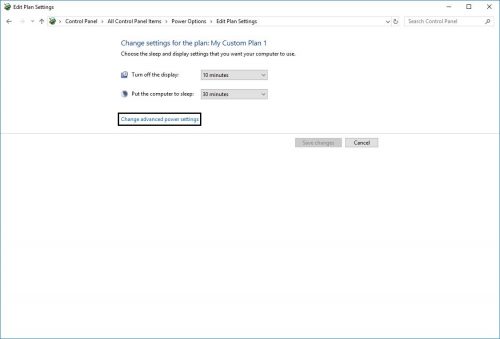
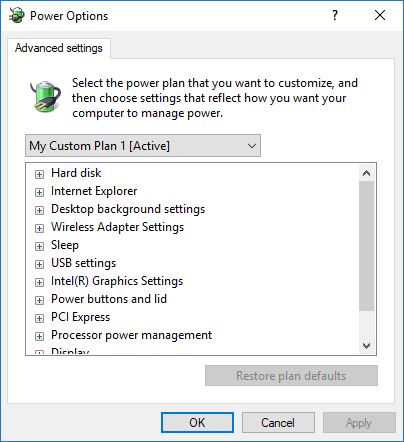
9.You will see a window similar to the one from step &, but there is one difference. Now you can change the advanced settings of the power plan. Click on “Change advanced power settings”
10.A new window will open where you can customize in great detail how your laptop is using its power. You have the ability to change:
- How long before your hard drive turns off
- JavaScript timer frequency
- Enable or disable desktop background slideshow
- Power saving mode of the wireless adapter
- Sleep settings such as: how long before your laptop goes to sleep, hybrid sleep, how long before your laptop goes into hibernation and enable or disable wake timers
- Selective suspending of your USB ports
- Power plan for the integrated graphics card. Note: if you are using a laptop that also has a dedicated graphics card, making it power efficient is something that needs to be done in the software provided by the manufacturer.
- Choose what will happen when you push the power or sleep button, as well as what will happen when you close the lid.
- Link state power management of the PCI express
- CPU settings. Here you can change the maximum and minimum CPU state, as well as the system cooling policy
- How long before your display turns off as well as adaptive brightness
- The final option is for media, such as what will your laptop do when you share media. Also you can choose the video playback quality and power settings for when you are playing videos.
Fine tuning these will take some time, so try tweaking the settings until you get it right. Once you are done with the changes just click “Apply” and your settings will be saved and you will be able to use your power plan.
Frequently Asked Questions and Answers
Q: I want to use the preset plans. How do I delete my custom power plan?
A: Make sure that the plan that you want to delete is not active. Click on Change plan settings and you will see “Delete this plan”. Windows will ask you if you are sure that you want to remove the power plan. If you are sure, click “OK” and the plan will be removed.
Q: I want to use a different plan for when I’m using my laptop on battery and on AC. How do I do that?
A: Go to the Microsoft Store and download an application called “PowerPlanSwitcher”. Once you install the app, a new icon should appear in the tray section. Right-click on it and you will be able to select the schema or power plan that you would like to use when you are on AC or off.