")
When setting up Windows 8 on your PC, did you put in a name that is boring and unoriginal? Did your computer come preinstalled with a name that is meaningless. This tech-recipe will show you how to rename your PC.
Many people regret the name they assign to their computers when first rushing through the installation. Even more so, the randomly assigned names that come on some purchased systems are painful.
Changing the computer name from within Windows 8 can be accomplished through the following steps.
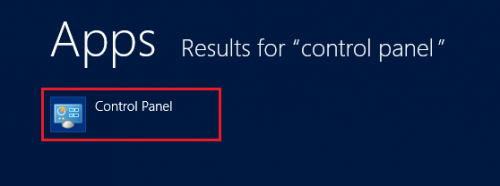
1.From the Start screen search for the Control Panel and select it.
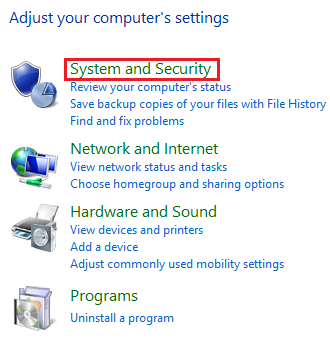
2.Select the System and Security option.
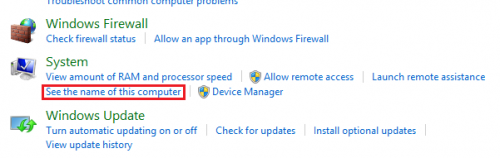
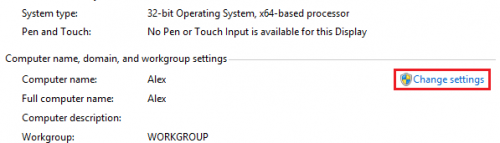
3.Under System select See the name of this computer.
4.Click on Change settings under Computer name, domain, and workgroup settings. Please note that this step requires administrative rights.
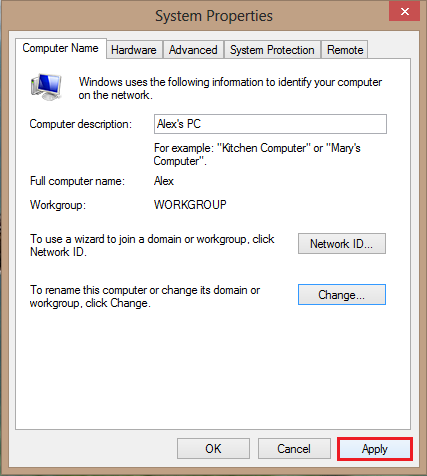
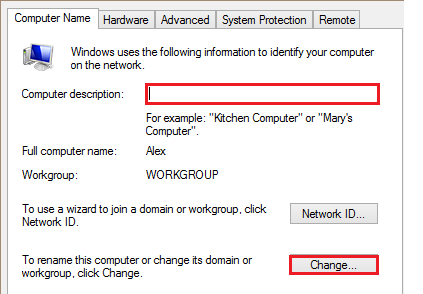
5.You will be given the chance to write a computer description. After you enter this information, click on Change… next to the rename this computer text.
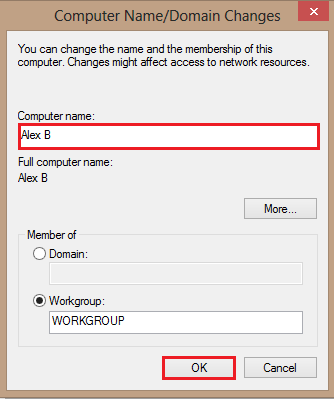
6.Hopefully you can come up with a more creative name than I did. Once you have named your PC, click on OK.
7.Under System Properties click Apply, then OK.