
By default, Windows does not have any utility that can record your computer’s screen. Windows 10 came close to the idea with Game DVR. However, the feature can only record app videos. Outside of an app, Game DVR will not function. Tech-Recipes has a detailed tutorial on recording app videos on Windows 10 using Game DVR in case you want to learn more about the feature. If you want to capture your computer’s screen, you need to use a program or an app, and these are typically not for free. This tutorial will show you how to record your Windows screen using a powerful, yet free program. The program is a popular one. In fact, you may have it installed on your computer now.
This tutorial uses the VLC Media Player to record your Windows screen. VLC Media Player is a free, open-source media player. Aside from playing multimedia files, the program is capable of performing other great functions as well. In fact, we have a few tutorials that use VLC media player to perform tasks not readily available on most multimedia players.
Capture Your Computer’s Screen Using VLC Media Player
Follow the steps below to capture and start recording your desktop screen using VLC Media Player:
1.Get VLC Media Player from VideoLan’s official download site for VLC. It is important that you only download from the official site to ensure that you get the latest, clean version. After downloading and installing, open VLC Media Player.![]()
2.With VLC Media Player opened, click on the Media Menu.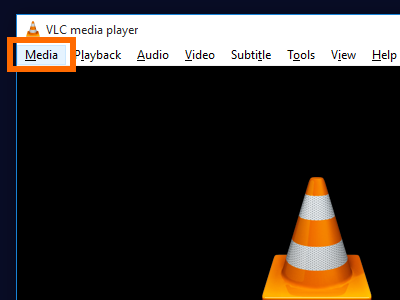
3.From the Media Menu, click on the Convert / Save option.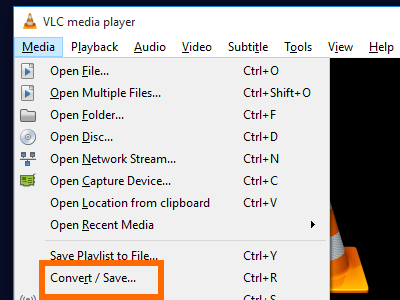
4.Click on the Capture Device tab.
5.Under Capture Mode, choose Desktop.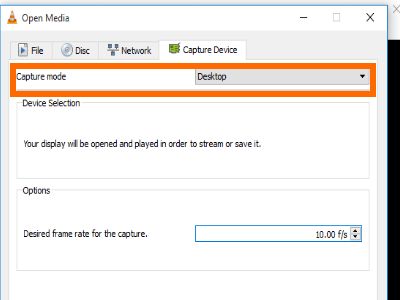
6.Select your desired frame rate.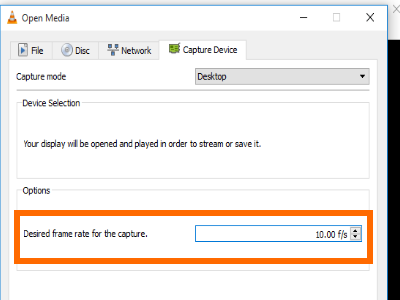
7.Choose the location where the recorded video will be saved by clicking on the Browse button.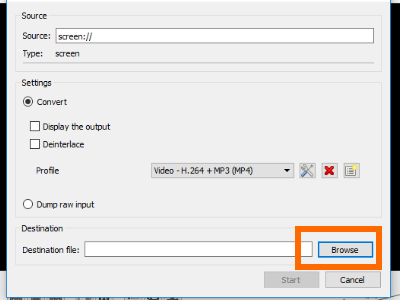
8.Enter your preferred file name for the recording, and click Save.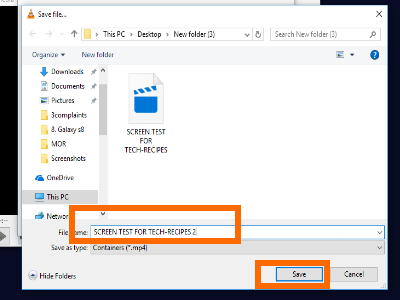
9.Click the Start button to start recording the screen.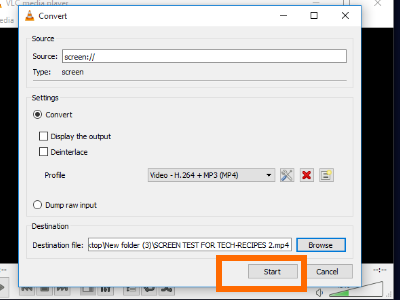
10.VLC will start recording what is on your screen.
11.Click the Stop button on the VLC to stop the recording.
12.You are done. The recorded file will be saved on the folder chosen in Step 7.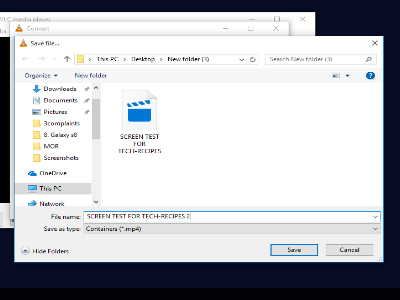
You just learned how to record your Windows screen using the VLC Media Player. If you encounter any issues while completing any of the steps above, let us know in the comments section.