")
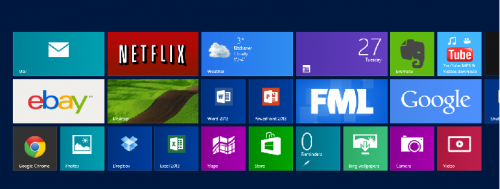
Windows 8 automatically adjusts the number of tile rows depending on your screen resolution. By using this registry hack, you can have anywhere from 2 to 5 rows. You can be in complete control over the amount of tile rows displayed.
Before we get started, I want to emphasize that if you are not an advanced user, you should not be messing around with the registry. The Windows registry is a very powerful thing, and if you do not know what you are doing it is quite possible to end up with a non-functioning system.
1.Make sure that you are on your start screen. When you are, type out regedit and then tap on the icon.

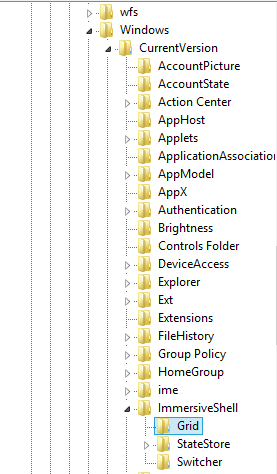
2.You should notice the registry window come up. In the registry navigate to these folders:
HKEY_CURRENT_USER / Software / Microsoft / Windows / CurrentVersion / ImmersiveShell / Grid
3.In the Grid folder create a new DWORD.
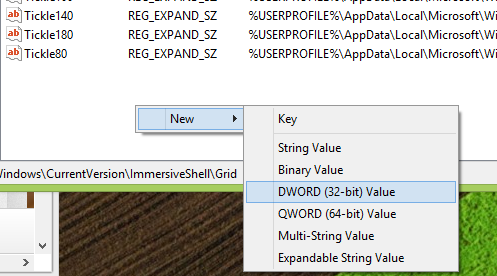
4.Name the newly added DWORD Layout_MaximumRowCount. It is crucial that you do not make any spelling errors.
![]()
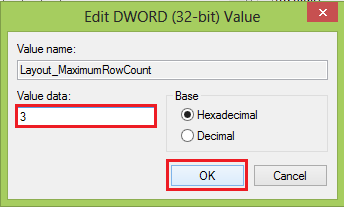
5.Now double click the DWORD, and enter a data value between 2 and 5. This number represents the number of rows you want to have on your start screen. For this example I changed it to 3. Click OK.
For the changes to take effect, close the registry editor and log out of your account. After you have logged back in you should notice the new number of rows.