This guide will explain how to restore a rooted/custom rom Nexus One back to its original Google image. This guide will work with most Android devices.
This will remove root, restore back to a factory recovery image and also remove all custom tweaks to the OS. This can be handy if you decide to sell or return your phone. Be sure to back up all data prior to doing this since anything on the phone will be removed.
So if your running a custom recovery image like Clockwork or Anon’s it will be removed and returned to the stock recovery image.
Preliminary Steps:
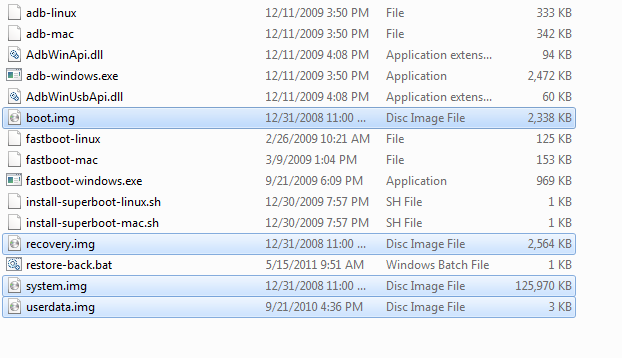
1. Download my quick adb/fastboot package here. Extract this to your C: (this zip will create a folder on C:\Android\superboot-kit\ and extract files to this folder).
This zip file contains adb-windows.exe, fastboot-windows.exe, several related DLL files and a restore-back.bat file. We will end up putting all of our img files here and then running the .bat file to do our restore.
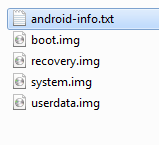
2. Download the stock rom you want to restore back to. Modaco.com has several official builds up to 2.2.1 (FRG83) over here.
In my example, I am recovering back to FRG83 since that is the newest full factory rom package thats available on the web.
3. Put your Nexus One into Recovery mode/Fastboot and install the USB drivers.
- – On your Nexus One, power it down.
- – Once off, hold the trackball in and then power on the phone while still holding the trackball. It will then boot to the Android Fastboot / Recovery menu.
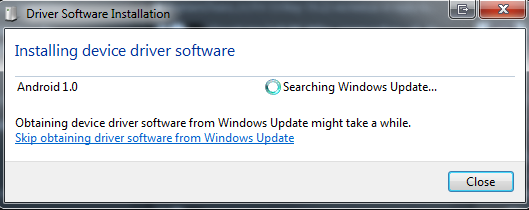
- – Plug your Nexus One into the USB cable to your PC. Windows may not be able to find the USB Driver, have it check Windows Updates for the driver and it should find an HTC Bootloader driver and install it.
- – Leave the Nexus One connected and in Fastboot / Recovery mode.
Restore device to factory rom:
Now that we are prepped, we can restore our device back and in turn remove root and the custom recovery image we have.
4. Copy all of the .img files we extracted from the factory rom into our C:\Android\superboot-kit folder. There will be four files: boot.img, recovery.img, system.img, userdata.img.
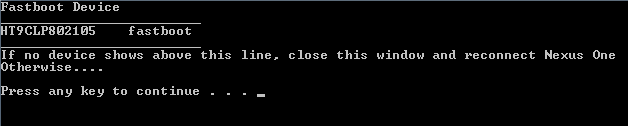
5. Finally, in the C:\Android\superboot-kit folder, right-click on the restore-back.bat file and choose to Run As Administrator.
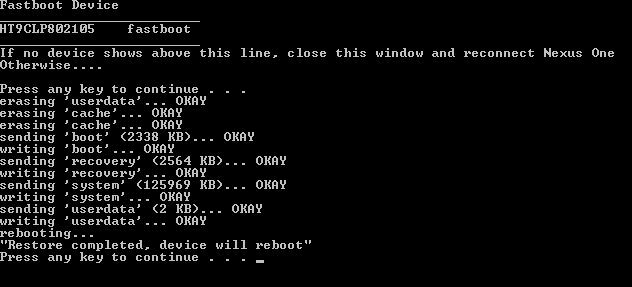
A command window will popup and first will check to see if your device is showing up in Fastboot. If you see your device, hit any key for it to continue; if you don’t see your device make sure the HTC Bootloader driver installed. You may need to point the driver update to the files. Here is a link to the USB Bootloader driver for Google Developer phones, Nexus One and Nexus S phones, get here.
The batch file will then restore the boot, recovery, system and userdata partitions back to the factory rom and also wipe the dalvik cache and lastly will reboot your device.
6. Your phone should be back to the Android setup screens and be restored back. This does not re-lock your bootloader, this still cannot easily be done at the moment. I’d also recommend doing a checkin for updates by typing this on your phone dialer: *#*#2432546#*#* (ie *#*#checkin#*#*); this forces your phone to check to see if there are updates from Google. I went from 2.2.1 right up to 2.3.4 upon check in. 🙂
Additional Notes:
Here are the exact commands the batch file runs:
- fastboot-windows.exe -w
- fastboot-windows.exe erase cache
- fastboot-windows.exe flash boot boot.img
- fastboot-windows.exe flash recovery recovery.img
- fastboot-windows.exe flash system system.img
- fastboot-windows.exe flash userdata userdata.img
- fastboot-windows.exe reboot
– Here is a link to the OEM USB Driver page from Google. Pick your phone maker and use such driver (non Google Dev phones).
– Here is a link to the Google USB Driver page. Compatible with official Google Dev Phones, Nexus One, and Nexus S.
– The latest Nexus One roms available at Modaco are rather older ones, Froyo 2.2.1 so you will need to run through the system updates once your phone is on Wifi or mobile data. You can force an update checkin by typing on the dialer keypad: *#*#2432546#*#*
– You can remove root and/or a custom recovery image by just flashing the appropriate recovery.img to your version of Android. This can be a bit trickier since you have to find the EXACT recovery.img for the version of Android your on. ie the recovery.img from 2.2.1 will not work on a 2.3.4 rom and vice versa. Thus why I opt to reflash an older 2.2.1 rom that is all factory back and then just update to latest official build. 🙂
– This guide and batch file should work with almost any Android phone given you have the proper USB Driver installed and unlocked boot loader and .img files.

