
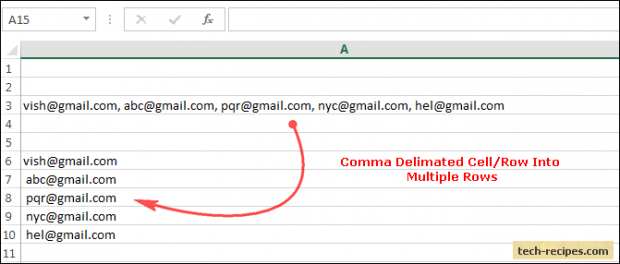
With Excel, you can split one cell into multiple rows or a comma delimited cell into multiple rows. This tutorial explains how.
If your job requires you to manipulate or organize large amounts of data, you probably spend lots of time working with Microsoft Excel for a variety of purposes. Excel is the gold-standard spreadsheet for manipulating data data and generating graphs.
You also need to deal with formatting and splitting data within Excel using formulas and filters.
Video Tutorial
Step-by-step directions
The process of converting one delimited row into multiple rows is divided into two stages.
1. Convert a delimited row string into multiple columns.
2. Transpose multiple columns into multiple rows.
Let us assume that you have the following data in a cell as one row, which is separated by a comma (,). This means the comma is a delimiter in this string.
[email protected], [email protected], [email protected], [email protected], [email protected]
Stage 1 – Convert a Delimited Row String into Multiple Columns
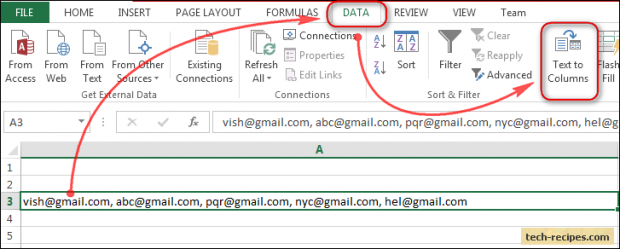
1. Select the delimited row that you want to convert into multiple rows.
2. From the top ribbon on the Data tab in the Data tool group, click Text to Columns.
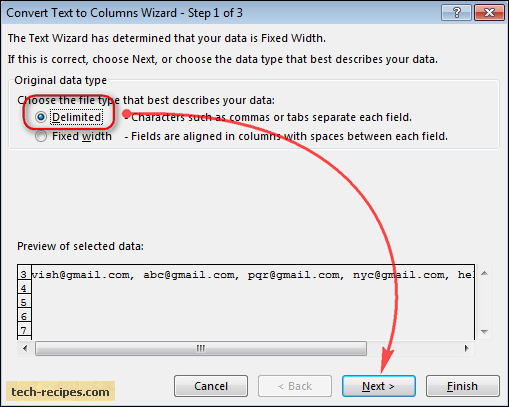
3. In Step 1 of the Convert Text to Columns Wizard, select Delimited, and then click Next.
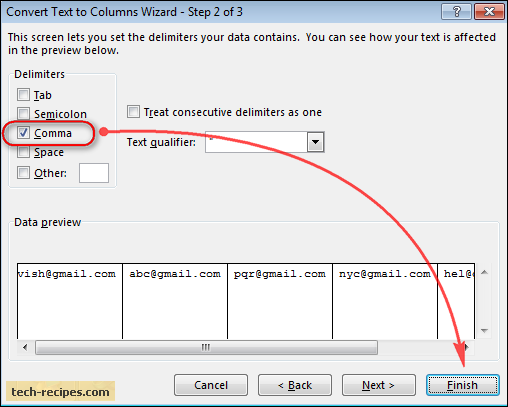
4. In Step 2, select the Comma checkbox, and clear all other checkboxes. In the Data preview, you can see the email addresses separated into multiple columns. Then click Finish.
Now, you can see the delimited row is separated into six different columns from A to F. We have completed the first stage, converting a delimited string into multiple columns. Now, we will complete Stage 2: Transpose.

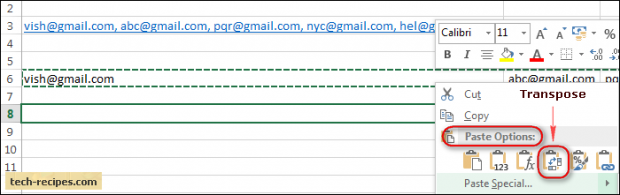
Stage 2 – Transpose Multiple Columns into Multiple Rows
1. Select the range of columns, in this case columns A to F.
2. Press CTRL + C, or click Copy on the Home tab.
3. Select the cell where you want your first row to be. Right on that cell, from Paste Options, select the fourth option which is Transpose.
The video tutorial will take you through the same steps.

