")
Are you having a hard time changing nameservers on GoDaddy? Your domain nameservers control important settings linked to your domain, e.g., directing visitors’ browsers to the actual server where your website is located.
As such, this means that you’ll have to update them when implementing a performance/security service or when changing a web host. Considering its technical nature, this process can seem overwhelming for the uninitiated.
Luckily, this guide is here to take you through everything you need to know about changing nameservers on GoDaddy. Read on to learn more about GoDaddy update nameservers and how to change DNS on GoDaddy.
What is a Nameserver?
When it comes to changing nameservers on GoDaddy, you must start by learning the basics, which in this case means learning the definition of a ‘name server.’ A nameserver refers to a server that’s designed to interpret a domain name into a set of IP addresses.
The nameserver handles client queries, like a tablet or a computer, related to the location of a given domain name and its corresponding services on a DNS server. Any server containing DNS settings can be considered a nameserver.
However, in most cases, this term is used in reference to the web server used by a hosting provider where it manages and maintains the domain names in use by their clients.
What is the Process for Changing Nameservers in GoDaddy?
Step 1
Log in to your GoDaddy Domain Portfolio. The first thing you’ll have to do when changing nameservers on GoDaddy is to login into your account.
Step 2
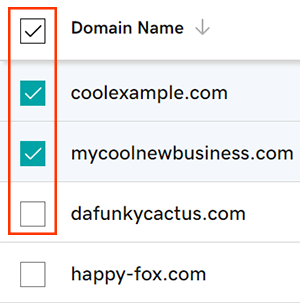
Mark the checkboxes located next to the domains you want to update. Alternatively, you can select the checkbox next to your domain name before clicking on Select All.
Step 3
The third step on how to change nameservers on GoDaddy requires you to select Forward from your action menu.
Step 4
Choose between https:// and HTTP://. The two are only specific to your destination URL, as the domain you’re forwarding won’t be SSL enabled.
Step 5
Submit the destination URL that you want your domain to forward to. Please note that this is where GoDaddy will send your visitors once you edit DNS GoDaddy settings. When it comes to setting GoDaddy nameservers, there are several rules you must observe:
- The first and last characters have to be a number or a letter
- Underscores (_) are not allowed
- Periods (.) are supported
- You can’t use consecutive periods (…)
- GoDaddy only allows you to use up to a maximum of 1,000 characters
Step 6
To help you add nameservers GoDaddy, you must choose between the following forwarding types:
- Permanent (301)
- Temporary (302)
- Forward with masking
Option 1
Web owners who have chosen either of the first two options above can select Continue to proceed with this process.
Option 2
Those who have chosen Forward with Masking should select Next and then proceed to provide details for either the Title, Description, or Keywords fields before hitting Save.
One extra step
Web owners whose domains have domain protection must verify their identities before they can proceed any further.
Where Can You Find Your Nameservers?
During the process of changing nameservers on GoDaddy, you’ll need to know where to find them. The advantage offered by the GoDaddy set custom nameservers process is that it enables you to change DNS GoDaddy instead of changing it with the domain registrar.
To find your GoDaddy nameservers, you’ll need to:
- Login to your Domain Portfolio on GoDaddy
- Select … Domain Edit Options, which is located next to the domain name. Follow this up by selecting Edit DNS. Depending on your screen size, you may have to scroll further down to see this last option.
- From here, you should see all your nameservers listed at the uppermost part of your DNS page.
- While here, note the two nameservers carefully – you need both names if you’re to connect to the zone file in your GoDaddy account successfully.
- Last but not least, make sure to set your GoDaddy nameservers at your present domain registrar.
The entire process typically takes one hour to effect, but it may take up to two days to go into effect worldwide.
Why Should You Update Your Nameservers?
As you go through this guide on how to change nameservers on GoDaddy, you’re probably asking yourself, ‘why is it necessary to update my nameservers?’ Well, there are two leading reasons why a website owner or developer may want to change their name servers:
- You’re adding a web application firewall to help protect your website
- You want to switch your web hosting providers
Regardless of the reason, you’ll want to ensure that you do it right.
A few final thoughts
As seen in this guide on how to change nameservers on GoDaddy, it doesn’t take a rocket scientist to finish the process. Anyone can do it, provided they are armed with the correct information.
If you look closely, you’ll notice that we have provided detailed steps on what to do from the moment you login into your GoDaddy account. We advise you to follow these steps from top to bottom to make sure that you don’t mess up anything.
Remember to go through the information you have entered before hitting Save.


GREAT