
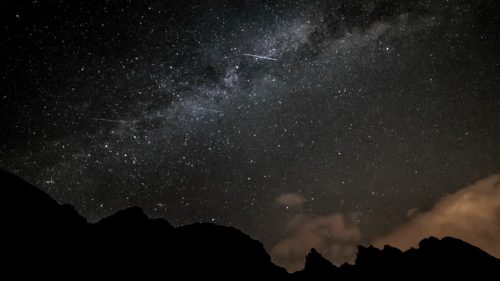
Regardless if you just bought your first DSLR camera or you are working as a professional photographer for years, taking pictures of the stars is always fun and may give stunning images. We see pictures of the stars all over the internet and many people think that taking them is very difficult. Not that it’s a piece of cake, there is some work involved, but it doesn’t mean that it’s nuclear physics.
In order to be able to take a good picture of the stars you will need a DSLR or mirrorless camera. Having a full frame camera, such as Canon EOS 5D Mark IV or Nikon D850, will certainly be an advantage, but using an amateur camera, such as Nikon D3400 or Canon EOS 800D, would suffice. Please note, these are not the only models of DSLR cameras on the market, so if you haven’t bought one do a research before buying one.
If you ever shot a picture in the dark you are aware of how the image might look. This means that in order to be able to get the right picture you will need some additional equipment and to adjust the settings on the camera so that you are able to get the desired result.
Equipment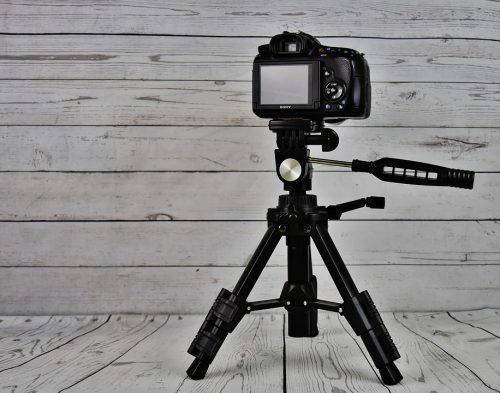
First and foremost, you need a DSLR camera with a lens. As mentioned, you don’t necessarily need the most expensive equipment on the market. You would be able to get a picture of the stars using an entry level camera with a kit lens, most likely 18-55 mm, but the higher up you go on the “price” the better the shots you will get. One thing that you will definitely need is a tripod. This is essential because you will need to have your camera standing still pointed at the stars if you intend on having a clear image.
Location and timing
The location also plays a huge role in getting the perfect picture. If you intend on shooting astrophotography you must be taking the picture somewhere where there is no light around you, it needs to be pitch black. The best place is somewhere far from the city, like a desert, or clearing in the forest, or somewhere off the highway. In short, you need to be in the middle of nowhere where there are no light sources except the stars.
Before you decide to go out to shoot the stars you need to have two tings in mind: weather and moon. You will need to have clear skies if you want to see the stars. We mentioned that you also need to avoid light pollution, so make sure that you avoid doing astrophotography during a full moon.
Camera settings
Here comes the tricky part. There are a few settings that you need to keep in mind when taking pictures of the stars: ISO, shutter speed, aperture and focus. Before we start detailing the settings you must use the live view feature, the one where you can view on the display.
Even though you may have heard or read that setting a higher ISO will cause your picture to be noisy. This is true, but for astrophotography you will definitely need to set the ISO higher in order to get more light into the picture. For the first try, you can start with 3200 and see if it works for you.
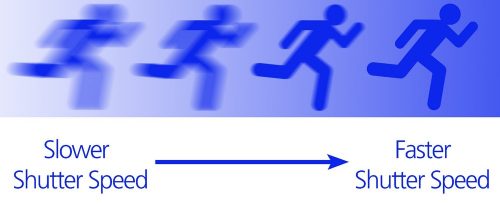
Unlike most of the pictures that you take while holding the camera in your hands with shutter speeds well bellow the 1 second mark, here you will need to go way up. There is a rule for getting a rough estimate of how to set this setting. It’s called the 500 rule. It’s basically dividing 500 with the focal length of your lens to get the shutter speed. If you are using a full frame (professional) camera with a 24mm lens, you will need to divide 500 with 24 which is around 20 seconds. The numbers change if you are using a camera with a cropped sensor (entry level cameras) where you must multiply the focal length of the lens with the crop factor (you will need to do a research for the camera model that you have) and then divide 500 with the multiplied numbers. Bear in mind, if you set a faster shutter speed you will get a darker picture and if you set a slower shutter speed you will get star trails.
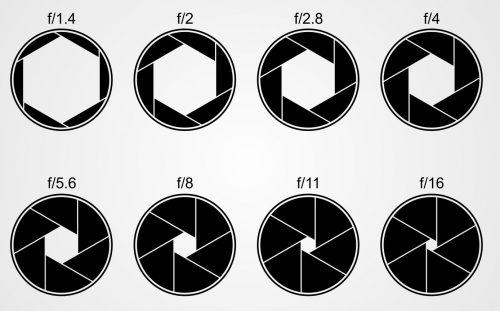
Setting the aperture is the easiest setting of them all. The basic rule is to set the aperture to as wide as possible. This means that more light will be able to fall on the sensor. It would be good if you have a lens that is at lest f/2.8, but you can do well with a kit lens that usually has f/3.5. Lenses do not produce the sharpest images when being set to the widest aperture. So if you are shooting with a lens that has a maximum aperture of f/1.8 you can turn it down to f/2.0 or f/2.8 and still be able to get a good shot.
The final setting is the focus. Using the live view helps with this one. Make sure that you are focusing manually. Using the autofocus might work, but it can fail to do so in the dark, so it is easier to focus manually.
You will definitely not be able to get the perfect shot at first, you will fail a few times. So, play around with the settings, see what settings you can adjust to get the picture that you want.
Tip: even though your camera is on a tripod, use a remote trigger or shoot with a delay. This will prevent the camera from moving when you press the button. Also, always shoot RAW, you will have much more freedom when you process your pictures in PhotoShop