
With skype’s newest update, deleting your Skype account has also changed. So, if you think you no longer have the need for Skype, or just want to get away from its overwhelming digital mess, this new and updated 2020 tech-recipe will show you the way. One thing you need to be aware of that the process to delete your skype account wasn’t as simple in the previous versions. For some odd reason, Microsoft had made it convoluted and painstaking. It’s understandable that no service provider will give you an easy way out. Still, it took deletion to an entirely different level of complicated. However, this has fortunately changed in Skype’s latest version. Instead of going to Skype.com, and going through the process of canceling your subscriptions, you can now close your account directly from Skype’s application.
Here’s how…
Deleting your Skype Account in the Newest Update
1. Open Skype.
2. Click Your Display Picture in the bottom-left corner.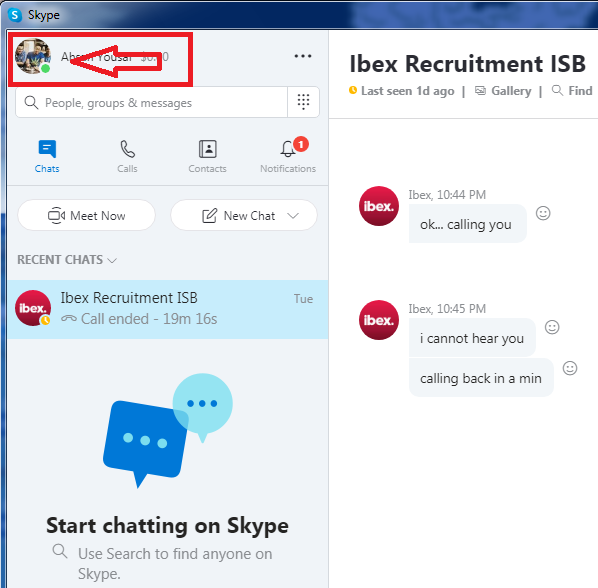
3. Scroll down and Tap Settings.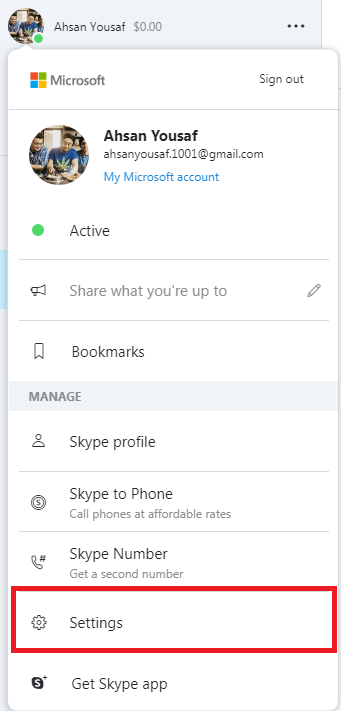
4. The Account and Profile section will automatically open. Select its last option on the right: Close down Account.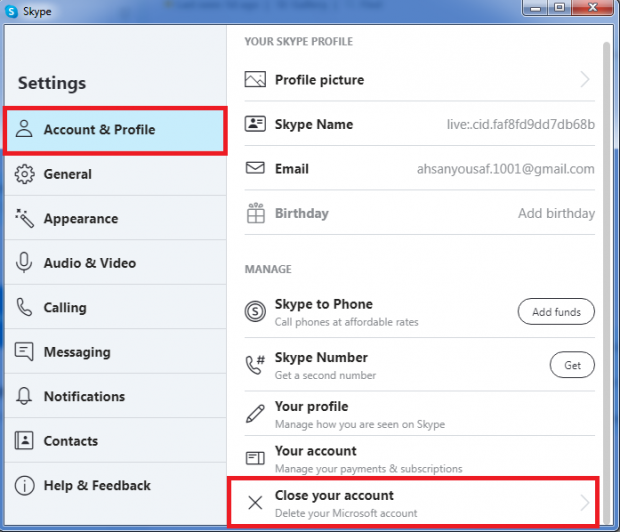
5. Type your Email Address to Sign in to your Microsoft Account. Then, click Next.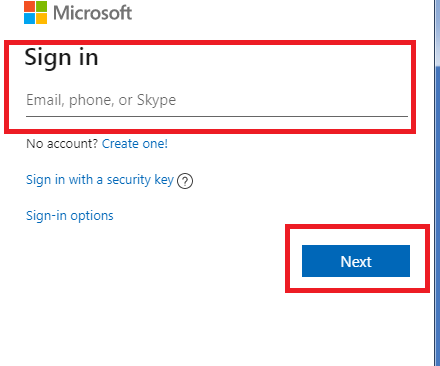
6. Type your password and click Sign in.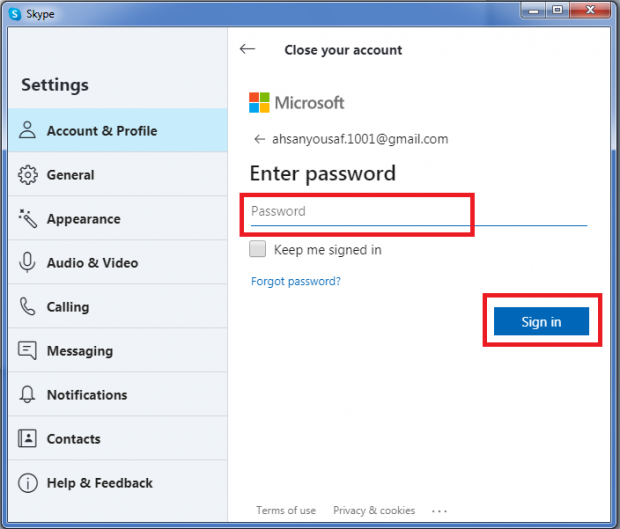
7. Tap on your Email to Verify your Identity.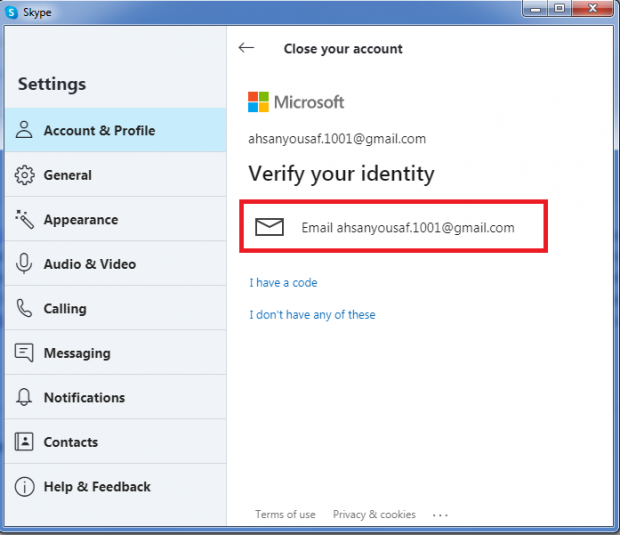
8. Go to your Email Inbox, and copy the code Skype has sent you.
9. Insert the Verification Code here, and press Verify.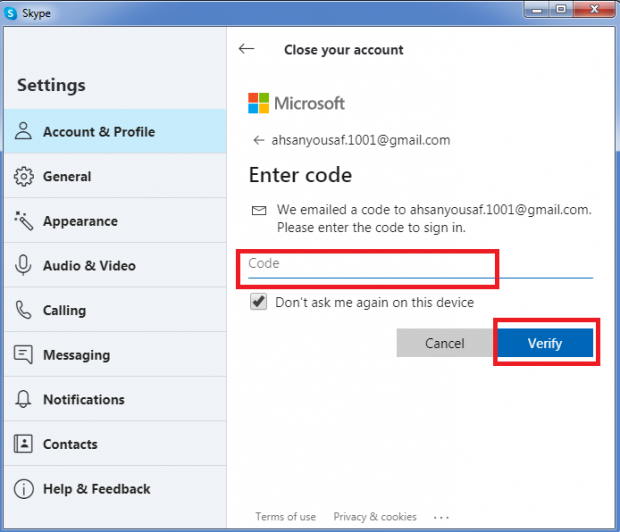
10. Click Next.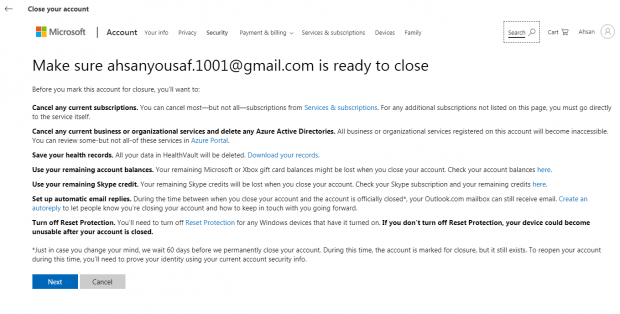
11. Click Next, again.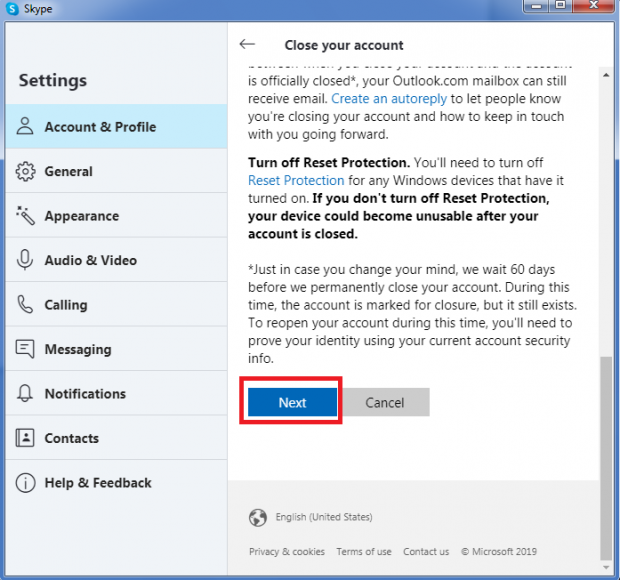
12. Tick all of these boxes.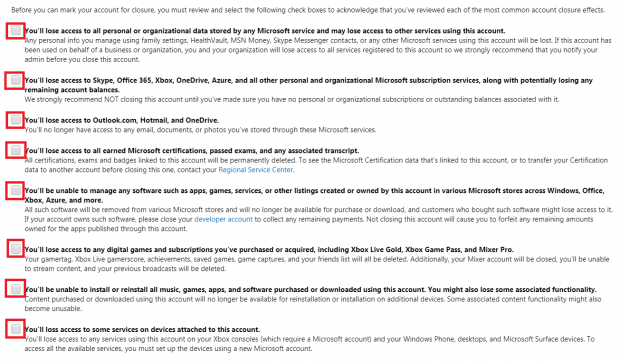
At the bottom of these boxes, select your Reason for Leaving, and finally, tap Make Account Marked for Closure.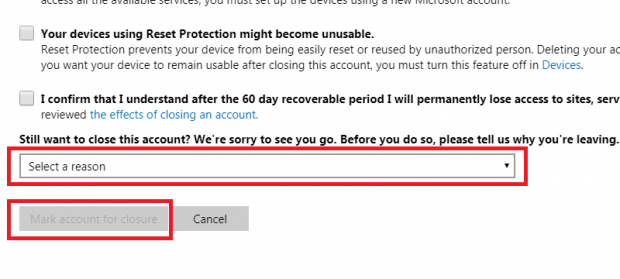
What Happens After you Schedule your Skype Account for Closure?
According to Microsoft, your Skype Account doesn’t instantly close after marking it down for closure. On the contrary, it takes quite a bit of time. 60 days or approximately 2 months to be precise.
And although this might seem like another ploy to keep you from deactivating the service permanently, it actually works in your favor. Many people don’t know that deleting your Skype account puts into motion a series of other events.
It also deactivates your Microsoft account. Your Microsoft account, in turn, is linked to a host of other services, including your Xbox Subscriptions and Outlook Email Addresses. Many users are not aware of this important fact. They proceed to delete their accounts, and in the process lose access to these services as well.
So, I think this 60-day window gives you ample time to reverse your decision if you’re not aware of the aforementioned repercussions.
How do I cancel my Skype Account Deletion
As mentioned above, you can reopen your Skype account, if more than 60 days haven’t elapsed since the time you marked it for closure.
The process to reactivate your account is pretty simple and is outlined below:
1. Go to account.microsoft.com
2. Sign in with your Credentials.
3. Receive a verification code in your Email.
4. Insert the code in the designated place.
And you’re done!
What happens if I Delete my Skype Account and have a Paid Skype Subscription?
Well, it could cost your money for a service that you no longer want, for starters.
If you have a paid subscription, you should definitely proceed to unsubscribe it first. Skype lets you do this, even during the account deletion process.
On this step (Step 10 of the Deletion process) of the deletion process, you can click on the Services and Subscriptions hyperlink, which will take you to your active subscriptions.
Canceling your Microsoft Subscriptions before Deleting your Skype Account
Here, you can cancel your subscription, following these steps.
1. Find the Subscription you wish to cancel.
2. Select Manage.
3. Depending on the nature of your subscription, select either Upgrade or Cancel or Cancel.
That’s it! The rest of the process is pretty simple. All you have to make are a couple of clicks here and there.

