From time to time, when using the Library feature in Windows 7, you may find that some of your folders are not appropriate for the current Library or they have been moved to a different location. To keep things organized, you may want to remove them from the Library.
1. Press Win key + E to bring up the Explorer.
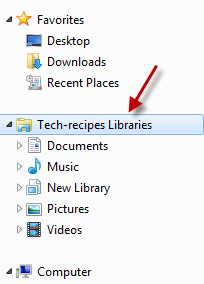
2. Go to the Libraries from the left panel.
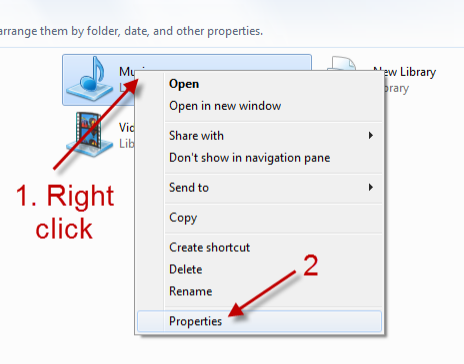
3. Right click on the library that contains the folder you want to remove -> Properties.
4. In the Library Properties window, choose the folder you want and hit Remove.
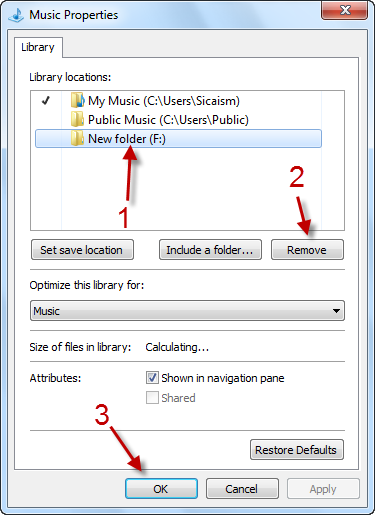
5. Hit OK to save the setting.