
Database diagrams are visual representations of underlying table structure and their relationships. Generally referred to as ER (Entity-Relationship) diagram. With database diagrams, we can easily identify the list of tables in a database and their association through the type of relationships. Moreover, it also provides the overall structure with listed tables, their keys and relationships.
Importantly, this can help us to quickly glance and study the overall database structure. We can save and share or print it for future references. In this tech-recipes post, we will learn how to create database diagrams within SQL Server management studio. Also, we generate multiple database diagrams for a single database at each instance to understand how the database structure has changed over the course of the development cycle.
Database Diagram Represents
1. Table structure and included columns.
2. Type of key – Primary Key & Foreign key
3. Relationship between tables – One to One, One to Many and Many to Many
How to Create Database Diagram In SSMS
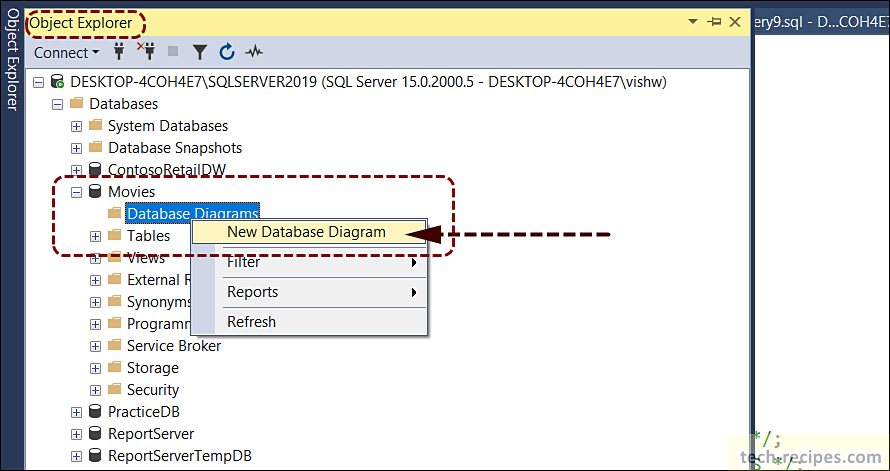
1. Navigate to Object Explorer in SQL Server Management Studio.
2.Expand the database and right-click on “Database Diagram”. Allow the pop up which checks for the permission to create a database diagram.
3.Right-click on “Database Diagram” folder and select “New Database Diagram”.
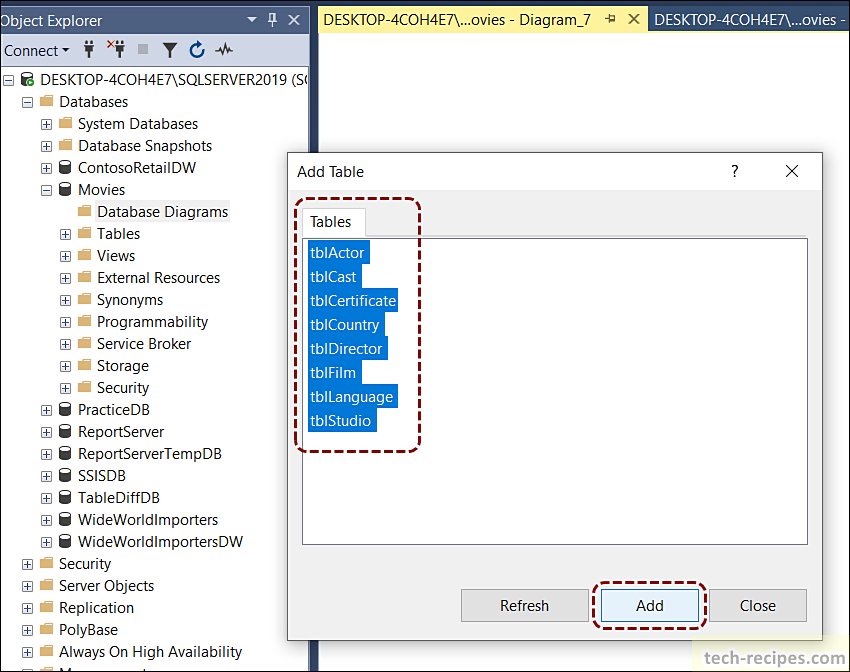
4.Select the list of tables you want to put in the database diagram, you can select important tables and click Add.
5.You can right-click on the diagram page and arrange tables/zoom, show relationship labels as per your need.
6.Go to the File menu and click Save “Diagram” and assign the name. Once a diagram is saved then it will be always available under the “Database Diagram” folder.
Database Diagram – Movies Database

Points to ponder on Movies database diagram.
1. A relationship is represented between tables using an arrow and key signs. You can right-click on the arrow go to properties and understand the primary and foreign key columns used.
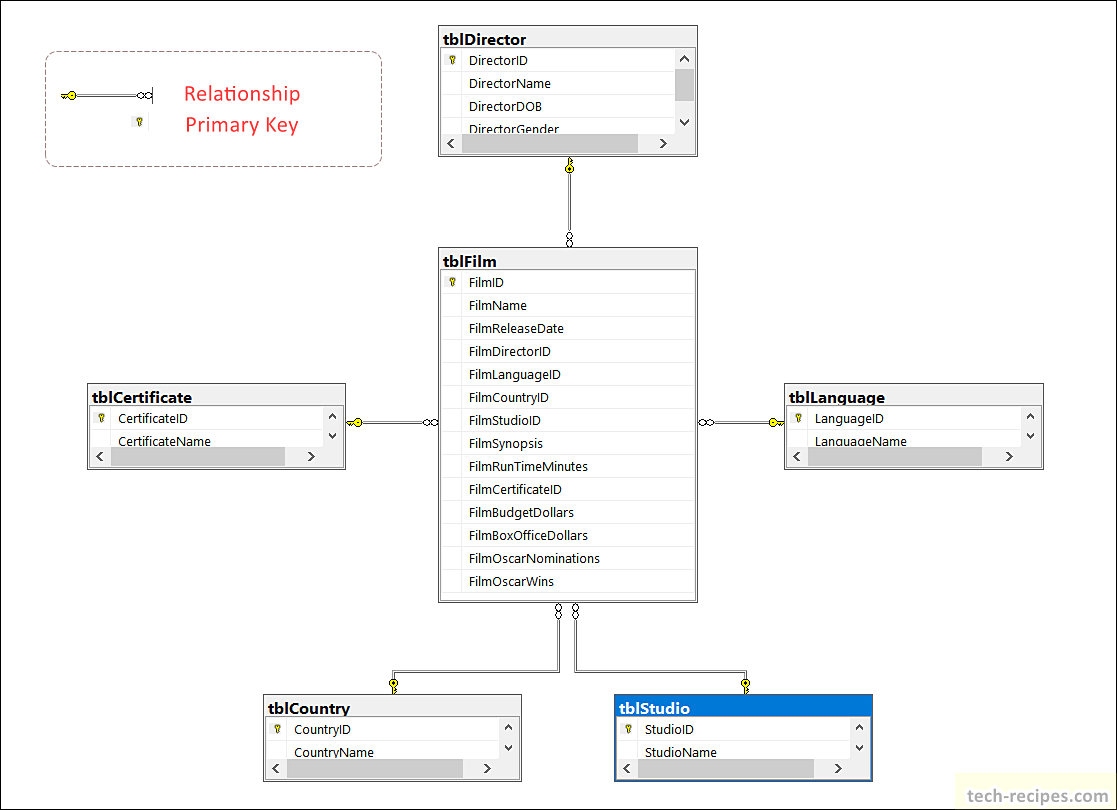
2. Primary key & Unique key is represented in the table structure with a key symbol next to the column name for quick identification.
3. In case you have many tables and the diagram is scattered, you can adjust zoom accordingly.
4. You can save the diagram from the File menu for future references.
5. Anytime if you want to add an existing table to the diagram, you can right-click on Add Table.
Summary & Read More
In nutshell, we have learned how to save database diagram in SQL Server management studio. Using a database diagram we can glance over database structure and relationship with ease. This file is shareable and can be saved for future references.
Read More and browser through more posts related to SQL Server on Tech-Recipes.
1. Introduction To DATETIME Functions In SQL Server
2. SQL Server – Error Solution – String or Binary Data would be Truncated
3. SSIS- How To Export & Import ISPAC File SSISDB – Visual Studio
4. How To Index Computed Column In SQL Server
5. How To Use Computed Column In SQL Server

