If you work directly on your hard drive frequently, this tech-recipe will help you. Placing a shortcut to each of your hard drives makes this process very easy. This tutorial demonstrates how you can pin your hard drives to taskbar so you can access them with ease.
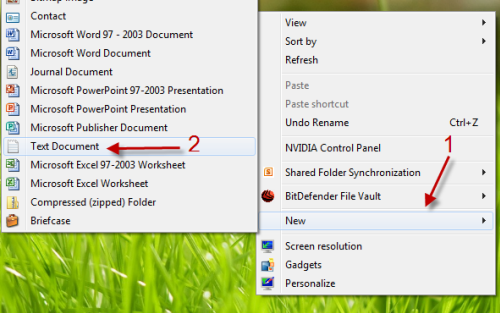
1. Right click on your desktop and choose New->Text document.
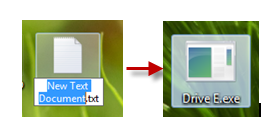
2. Rename it from New text document.txt to Drive E.exe (You can replace Drive E with your own name)
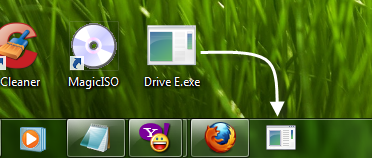
3. Drag Drive E.exe to your taskbar.
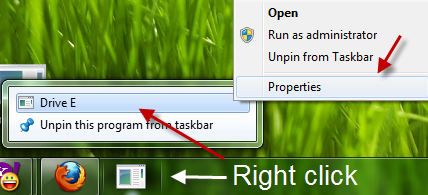
4. Right click on it, go to Drive E from the jump list, right click again and choose Properties.
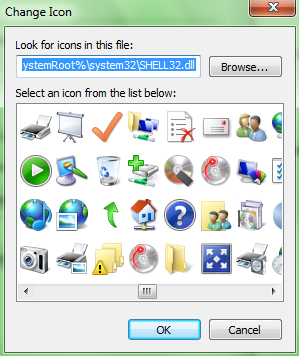
5. When the Properties window pops up, click on Change icon… Click on OK when you face the message: The file C:\Users\your user name\Desktop\Drive E.exe contains no icons. Choose an icon from the list or specify a different file.

6. Choose one of those icons from the Change icon window and then click OK. If you prefer other icons from your hard drives, simply click on Browse and point it to your icon. (.ico file)
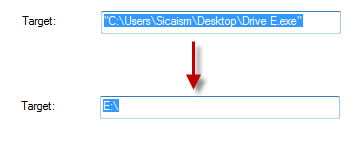
7. Now back to Properties window, change Target line from “C:\Users\Your user name\Desktop\Drive E.exe” to E:\ (replace E with your drive’s letter).
8. Click OK to save setting. After that, you can access your hard drives from taskbar. The exe file (which was created in step 2 can be deleted)

