
Earlier this week we spoke about how to create a child account. As we mentioned, creating user accounts on Windows has been available to users for a long time, but only in recent times have Microsoft began to make changes and to add features that improve your overall experience.
Making restrictions is not always a bad thing. In the case of a child user on your PC you can control and observe your child’s activity without having to be present in the same room with it.
Creating a child account is an easy and straight forward process. Here is the link to the tutorial for how to create a child account. Once the account is created you can start setting up the limitations to the child’s use.
How to manage a child account on Windows 10
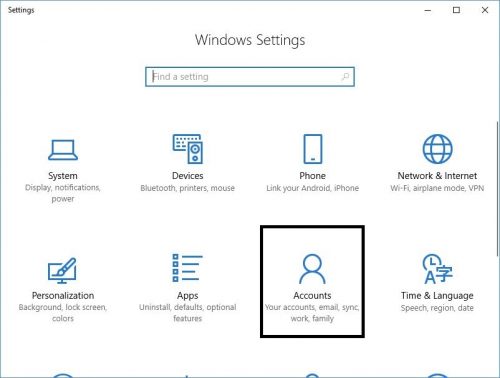
1.Open settings. You can do this by hitting the Windows key on the lower left part of the keyboard or click on the Windows icon on the far left on the taskbar and click on the gear icon.

2.Navigate to “Accounts”
3.On the left of the navigation pane, click on “Family & other people”. This is the part of the settings where you can manage the accounts, such as add new accounts, remove accounts, change roles etc.
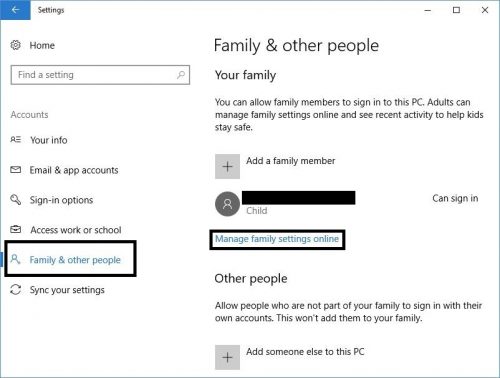
4.On the right side or the main side of the window under the accounts you will need to click on “Manage family settings online”. Your browser will come to focus, as these settings can only be done in the browser. Note: you might be required to log in to your Microsoft account. This is the main account on your PC, the administrator account.
As mentioned previously, there are several sections and segments to limiting an account and we will go through the details of each of them and how you can set them up.
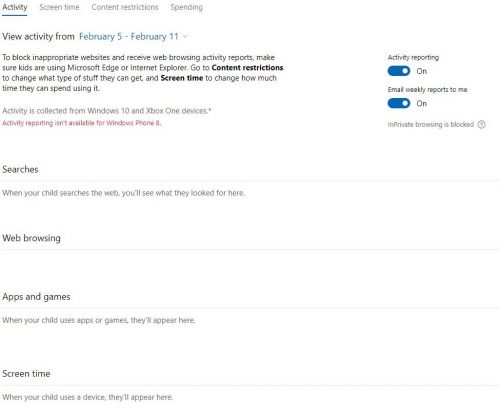
1.In the activity pane you will be able to review every kind of activity that the child account has done in the past. This includes searches, web browsing, apps and games and screen time. On top, by default the activity tracking and weekly reports options are turned on. Activity tracking means that everything that the child account has dome will be tracked and will show up in this pane. Note, since the account on this PC is a dummy account created for the purpose of this tutorial, everything is blank. The second option is exactly what it says, weekly reports will be sent to your email so that you do not have to log in every week to check what your child has been doing on the PC.
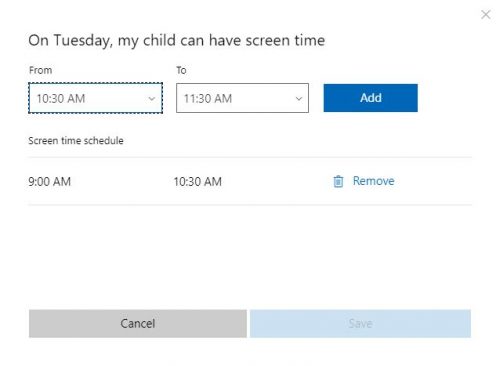
2.Screen time will basically enable you to manage how much time your child spends on the PC or xbox. Both have separate settings. First select the number of “Hours Allowed” for each day.
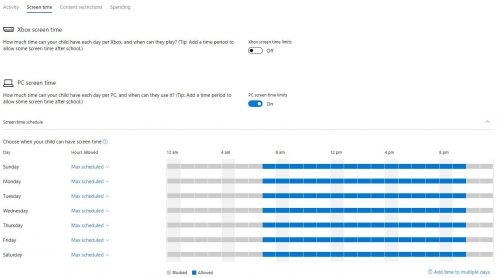
Next in the chart click on the day and select the time frame in which your child will be allowed to be on the PC or xbox and make sure that you remove the previously set time frame. Or, you can leave the “Hours Allowed” to “Max Scheduled” so that you know when an how long your child will be on the PC or xbox and at what time.
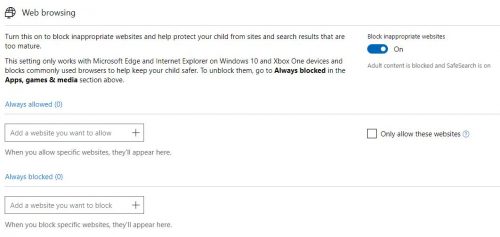
3.The content restriction is divided into 3 separate sections: Purchasing restrictions, Apps, games & media restrictions and web browsing restrictions.
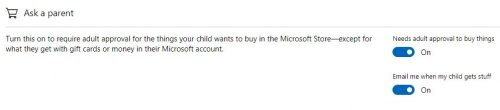
The purchasing restrictions consists mainly of two options: Putting the purchase on hold until an adult, in this case the administrator approves it and the second option is to get an email notification every time your child purchases something.
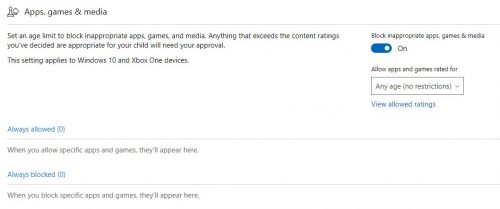
The apps, games and media restriction section enable you either to restrict the content rated for certain age and view the blocked or allowed content.
The web browsing restrictions enable you to add sites that you want to be blocked and allowed. If there are a few websites that you do not want your child to have access to, you can add them in the always blocked section. If you want your child to have access to only a few websites, you add them to Always Allowed and tick the setting on the right that says “Only allow these sites”. What this option does is that it allows your child to have access only to the specified sites. So, whenever you want to add a site to the allowed or blocked list, just type in or paste in the URL and click on the big plus sign.
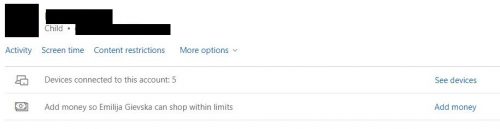
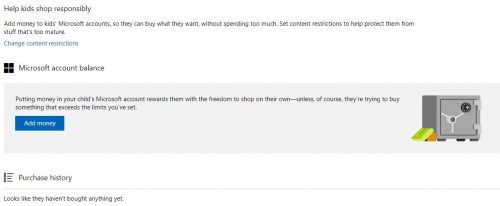
4.Spending is the final option that you will need to set. If you are not sure of the spending habits of your child you can add a certain amount of cash that you child will have access to. Click on “Add Money” and continue with the process. This process includes entering the amount as well as your credit/debit card information. On the bottom of this section you will be able to see the purchasing history for this account.
In order to fully utilize the ability to make restrictions you will need to have the latest Windows updates on your PC and xbox.
Frequently Asked Questions and Answers
Q: Can I set different rules for my kids?
A: Yes, you need to complete the steps for each child account separately.
Q: Can I modify the settings?
A: Yes, you can modify the restrictions settings at any time.
Q: if I want to completely remove restrictions, will I need to remove the account and add it again?
A: No, all you will need to is turn of all the settings for that account and there will be no restrictions.

