")
One way to personalize your computer is to create a desktop slideshow on Windows 10 that is full of meaningful images. These can be pictures of loved ones, favorite vacations or events, images from a favorite TV show, or just high-quality nature pictures. You can use photos you took yourself or download them from the internet. There are several websites dedicated to providing high-definition pictures that can be used to make eye-catching desktop backgrounds. Here’s how to use your favorite photos to create a slideshow for your desktop on Windows 10.
1.First, you need to make a folder that contains all the images you want to include in your desktop slideshow. If you are using pictures that you already have on your computer, copy-paste them into the new folder. You can name this folder anything you would like and store it anywhere you want. Just make sure you can find it again later.
2.Minimize everything so that you can right-click on your desktop, and then select Personalize at the bottom of the options list that appears.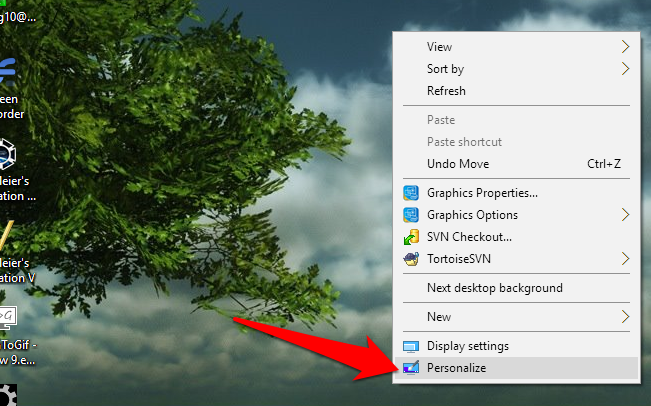
3.Select Slideshow from the background dropdown menu under the preview.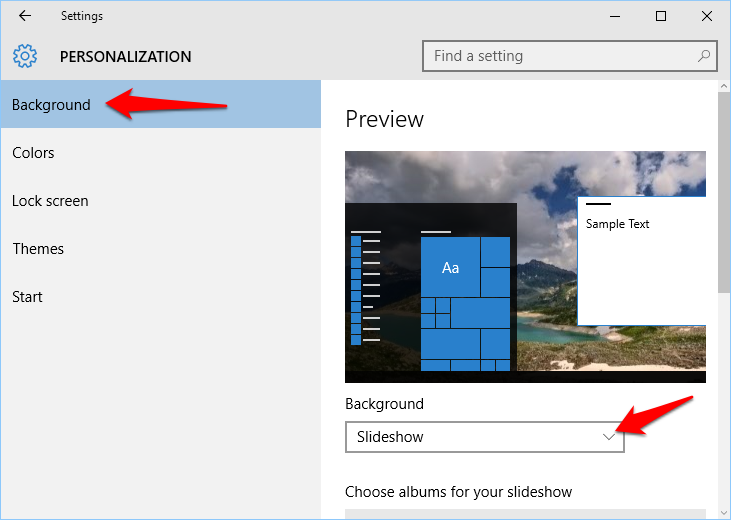
4.Now you need to pick the folder that you set up. Click the Browse button to launch a file explorer window. Navigate to your folder, select it, and then click Choose this folder. 
5.Back in the settings window, choose how often you want your desktop image to change. You can always manually go to your next background by right-clicking on your desktop and clicking next image. There is also an option to shuffle through the order of the background images or have them show in the same order every time. 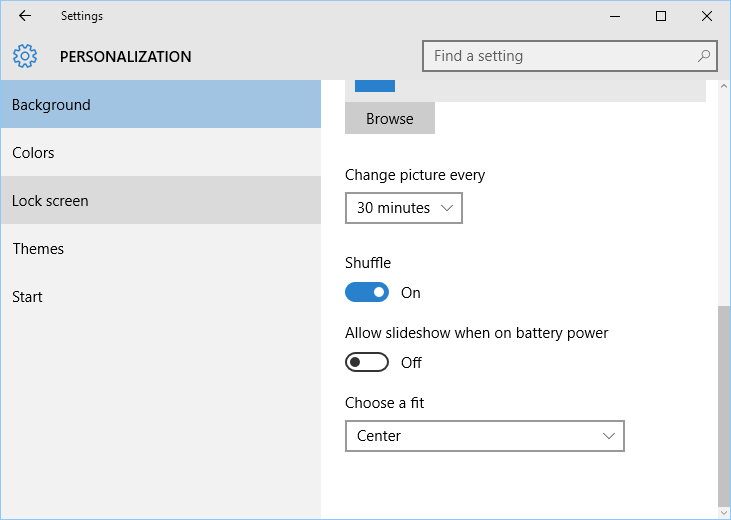
6.The last item of business is to choose a fit. This determines how your images will be altered (most commonly stretched or cropped in some way) to fit your computer screen. Take a look through the options in the dropdown menu to see how they look in the preview screen at the top of the settings window, or on your actual desktop, make sure that the fit you chose does not stretch or distort your image.
All changes are applied right away, so there is no need to save your changes.


Greetings from Colorado! I’m bored to death aat
work so I decided to browse your website on my iphone during lunch break.
I love the information you present here and can’t wait to take a look when I
get home. I’m shocked at how fast your blog loaded oon my phone ..
I’m not even using WIFI, just 3G .. Anyhow, wonderful blog!