
Owning a digital camera can allow anyone to take great photos. However, one of the cons of using a digital camera is that we can easily forget how many clicks we have made on a single photo shoot. Using the following techniques in Lightroom, we can pick out and share only our best photographs.
You do not need Photoshop or any other third-party program to select files, resize, compress, and ultimately send the photographs as attachments in an email message. All of this can be accomplished without leaving Lightroom. Although many photo organizing tools exist on the market, they are generally inferior to Lightroom’s simplified photo management. I am using Lightroom version 5, but you can use just about any version of Lightroom to complete the steps in this tutorial.
I recently went to the Carolinas Balloon Festival in Statesville and had great fun shooting lots of photos. Mixed in with the balloon photos were some interesting shots of a performing Scottish band. Ultimately, I needed to separate the band and balloon images. The quickest way to do this is by flagging what I like and rejecting what I do not like. This allows me to eventually delete the unwanted photos in order to save some space on my hard drive.
Assuming you already have your Lightroom opened and are on the Library Module, your screen should look like the one below.
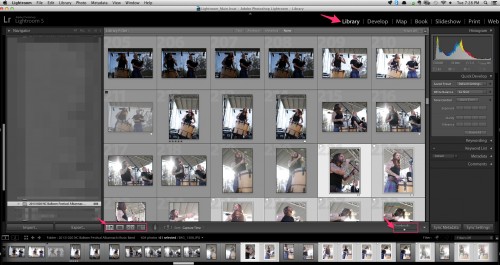
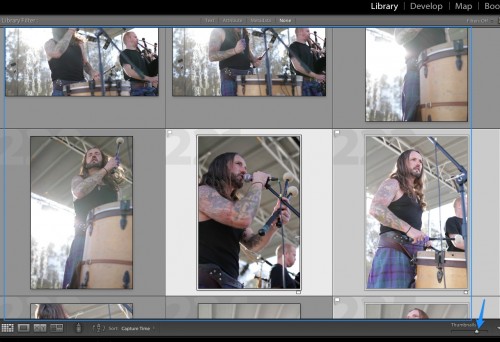
With my workflow I would like to review photos in the largest size possible to make sure I do not accidentally reject a good photo due to a small thumbnail view. You can increase the size of the photos you want to review in two ways. One involves increasing the current view by adjusting the thumbnail slider (highlighted in blue). This lets you view more than one picture.
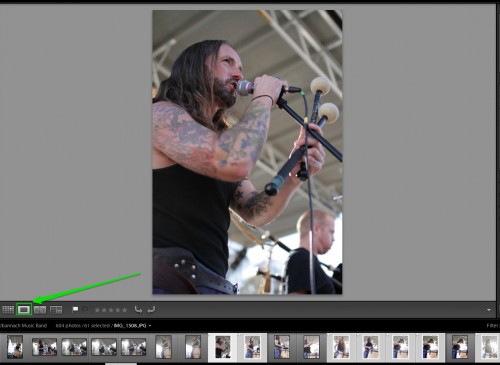
The second one-click option allows you to have a full window view simply by clicking the full screen button which is highlighted in green below.
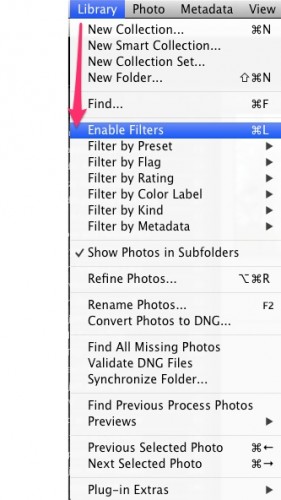
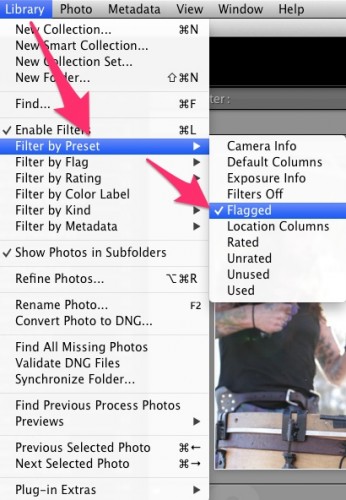
Make sure no filters are applied by going to the Library menu and checking that Enable Filters does not have a tick icon. Based on what you have chosen, now it is time to choose which pictures to save and which to reject.
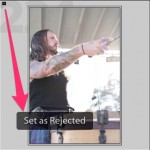
To select the pictures all you will need to use is two keys on your keyboard. Use your right or left arrows to navigate to one picture at a time, and press P to flag it as “Pick” and X to mark it as “Rejected.” You can leave pictures without marking any flags. I would do that to keep some photos for archiving but without sharing with others.
When you press P or X, you should see Set as Pick or Set as Rejected as seen below.

Once you have completed setting up the flags, it is time to filter the ones for sharing with your client or family.
To do that, go to Library > Filter by Preset > Flagged. This will show all flagged photos.
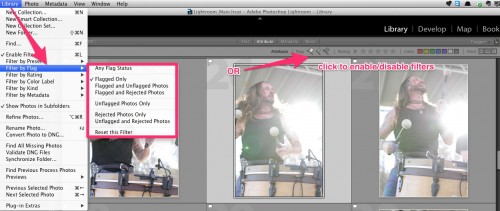
Once you have completed this step, you can filter with several options by just clicking once on the toolbar, or you can go to Library > Filter by Flag > and choose what you prefer to see.
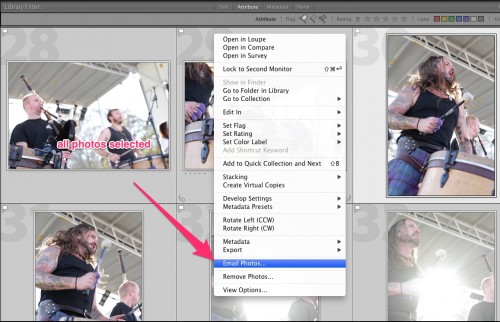
Now that you are done with your selection, you can simply share this in an email message by exporting it in a format/size that you prefer.
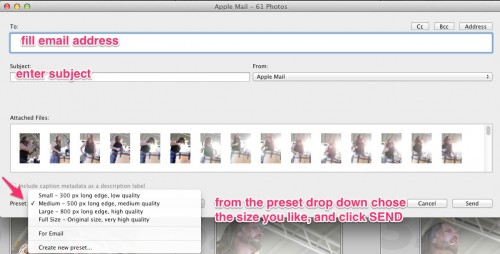
To do that, just press Cmd+A (Mac), Ctrl+A (Windows), or Edit Menu>Select All to select all the photos that are filtered as Pick. Then right-click on the view and chose Email Photos. Your screen should appear as the one below.
It will open up a dialog box where you can fill in the email address and subject. Using the preset drop-down, select the size that you prefer, and just click Send.
By incorporating this workflow, you should simplify the process of sharing your beautiful images.

