
While practically anybody who has ever played a game on a PC in the last few years will be familiar with Steam, not many people are aware that there is a great deal of customization available for it. There is built-in support for skinning the interface. Here is how to get the most out of your game portal by changing it to reflect your own preferences.
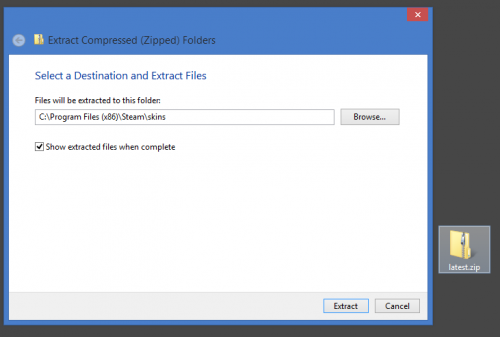
1.Find yourself a Steam skin, and extract it to the appropriate Steam subfolder. There are loads of them out there. You can also make your own using the directions you will find in that same subfolder, but that is a much more involved process than we can go into here.
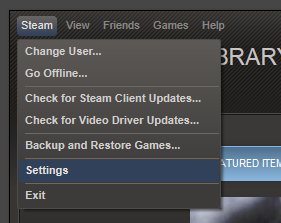
2.Open your Steam client, and load the Settings menu.
3.Select the Interface tab from the list at the top of the screen.

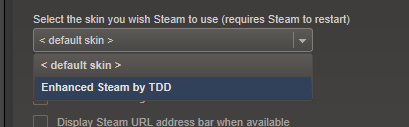
4.Look for the skin you extracted previously in the drop-down menu provided.
5.Restart Steam when prompted, and enjoy the changes!
It is a simple process that can make a huge difference. There are already dozens of skins available in various places around the net, and more are going up all the time. Make sure that the one you choose is compatible with the most recent versions of Steam if you want to take full advantage of the new features. Enjoy experimenting!

