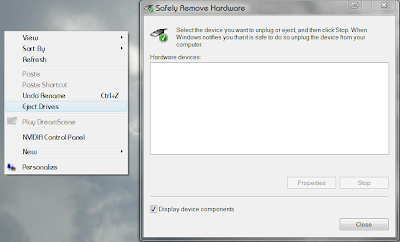
This recipe will explain how to easily add a “Eject Drive” or “Safely Remove Hardware” menu option to your right-click menu in Vista.
Very handy if you work with USB Drives a lot on a daily basis since this will let you just right-click on your desktop (instead of finding the icon in your taskbar) and then be able to open the “Safely Remove Hardware” screen to eject the drive properly (and yes, i have corrupted a few USB drives by not safely removing them).
This recipe will require a User account w/admin rights.
DISCLAIMER! BACKUP Your registry prior to making any registry changes! Registry changes can be fatal to your operating system if you do not know what your doing. You’ve been warned 🙂
1. Open up Registry Editor by hold the Win Key + R to bring up the Run window and then type: regedit
2. This will open the Registry Editor program, browse to this location by expanding the folders in regedit:
HKEY_CLASSES_ROOT\Directory\Background\shell\
3. Right-click on the shell folder and choose New > Key and name it as you want it to show in your right click / context menu (in my example i am using Eject Drives)
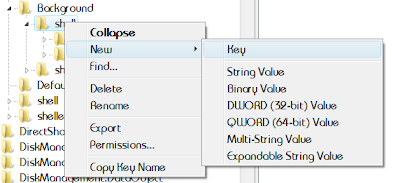
4. Now right-click on the new Key we just created (ie in my example, Eject Drives) and again choose New > Key. We will name this key to be command
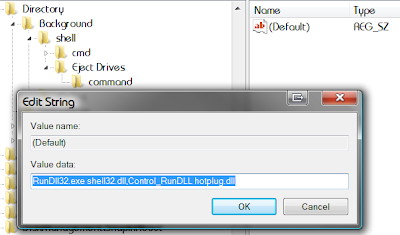
5. Finally, we will want to click on the new command key we just created. On the right pane you will see Name (Default) and Type REG_SZ. Double-click on this String and for the Value change it to:
RunDll32.exe shell32.dll,Control_RunDLL hotplug.dll
and click OK.
6. Hopefully once you right click on your desktop you will see the new Eject Drives option and once you click on it, it should open your “Safely Remove Hardware” screen.
This recipe can be applied to any application you want to add to your right-click Context menu. 🙂
You would just need to put the full path of the application you want to launch in Step 5.

