
OneNote 2013 introduced the clipping tool which can help you quickly capture the screen, send content to OneNote, or write a note. Although this seems to be a useful feature, it automatically starts with the application and takes up space in your taskbar. Many users will want to disable this feature and to launch the tool only when necessary.
Software designers will eventually learn that users do not like extraneous features loading upon startup. From title screens to “helpful” tools, the majority of power users want these startup features disabled. OneNote’s clipping tool is one such feature. Sure many users will use the clipping tool frequently enough to autoload it; however, if you are not one of them, preventing the clipping tool from loading is easy enough.
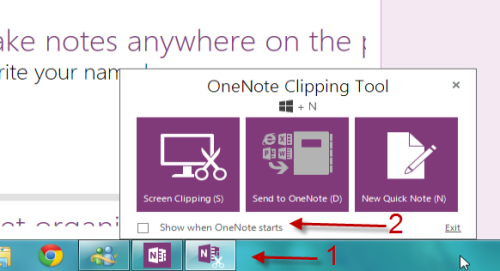
1. Launch OneNote 2013. This action will also launch the OneNote Clipping Tool, and you can find it at the taskbar.
2. Click the OneNote Clipping Tool icon at the taskbar, and uncheck the Show when OneNote starts option. This will prevent the tool from starting up with the main OneNote application. At this stage, you can also close the tool by clicking Exit or the X button.
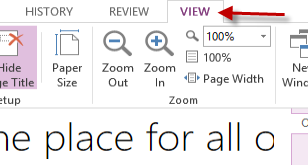
3. Later, if you want to add the tool back to the program’s startup, simply go to the View tab in the main application.
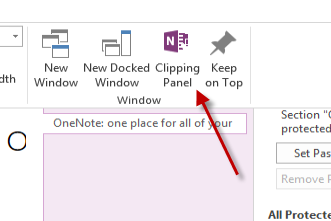
4. Click on the Clipping Panel button. This will fire up the clipping tool, and you can find it at the taskbar as usual.
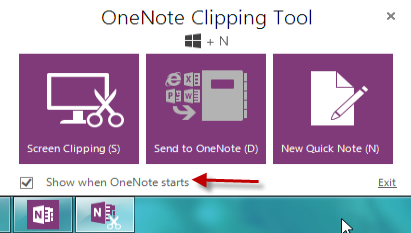
5. Click the Tool icon, and then check the Show when OneNote starts option again. The next time you start OneNote, you can access the Clipping Tool right away.

