When working with documents in Illustrator, the orientation of the artboard may need to be adjusted to fit the objects more precisely.
In this tutorial, I will cover the ways to change the orientation of the artboard when creating a new one and when working on an existing one. I will also explain changing the object orientation for printing purposes.
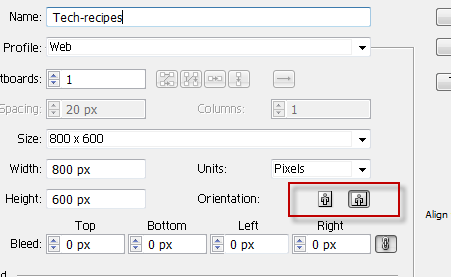
1. When creating a new document, you can change the orientation by clicking the portrait or landscape icon.
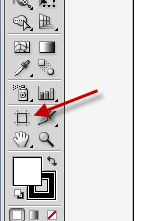
2. If you want to change the orientation of an existing document, click the Artboard tool on the left side. You can quickly access this tool by pressing Shift + O.
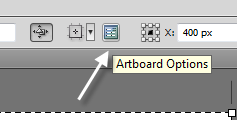
3. Now, you will notice the orientation icons at the top. Click the mode that you want, and the orientation of the document will be changed.

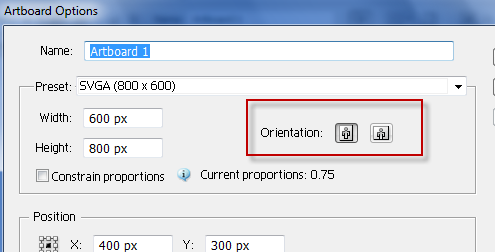
4. Alternatively, you can click the Artboard Options button and change the orientation mode from there.
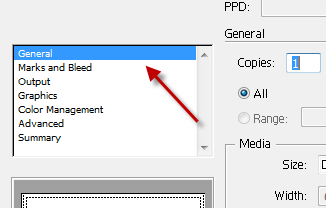
5. If you want to change the orientation of the objects for printing purposes, go to File -> Print.
6. When the Print window pops up, make sure that you are in the General section.
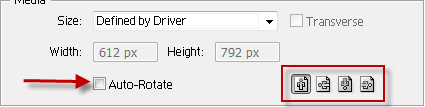
7. Check the Auto-Rotate option, and choose the orientation from the set. Available options are as follows: Portrait Up, Portrait Down, Landscape Left, Landscape Right.
8. When you have finished configuring, click Print or Done at the bottom.

