If you have added an account to the Windows Live Family Safety control list, and then later change your mind or the account is no longer in use, you can follow this guide to remove it from the list. Doing this will not only make the list less cluttered but also help you manage other accounts more effective.
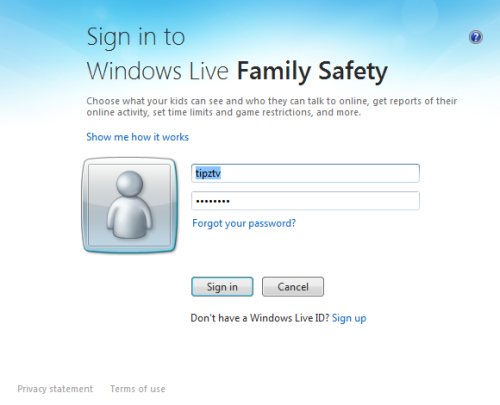
1. Launch Windows Live Family Safety.
2. Provide the account information if the program asks.
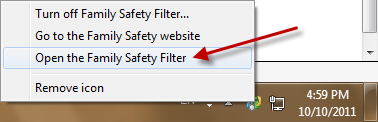
3. Open the Family Safety Filter. If you can not find it, right click on the WLFS icon, and choose Open the Family Safety Filter.
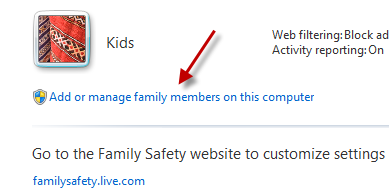
4. When the Filter window opens, click on the Add or manage family members on this computer link.
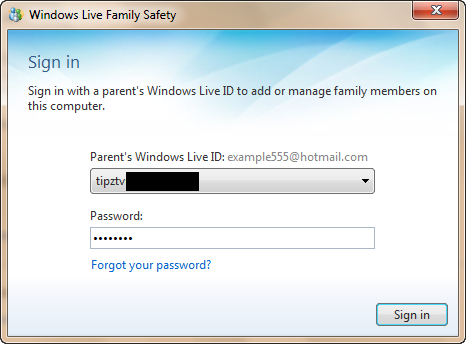
5. Provide the parent account information in the field, and hit Sign in.
6. In this step, you can add or remove a member from the list. Unchecking the box next to the account will leave the account in-monitored, while checking the box will add the account to the monitor list.

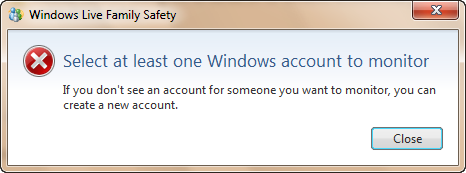
7. Hit Next -> Save. Note: If the account you want to remove from the list is the only one that is being monitored, you will see an error like this: Select at least one Windows account to monitor. If you don’t see an account for someone you want to monitor, you can create a new account.
In this case, please follow these steps: 1. Click on the Windows Orb -> Control Panel.
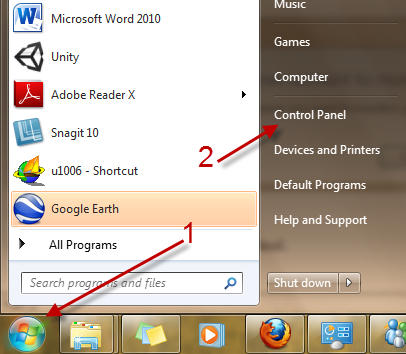
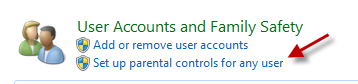
2. In the Control Panel window, go to Set up parental controls for any user.
3. Scroll down to the bottom of the page, select (None) from the list of the provider and you are good to go.

