This tech-recipe is aimed more for those who work in a corporate IT environment. I will explain how to setup a batch file to install and deploy the Novell Client for Windows 7 and create a Novell Client Properties file. This recipe will be useful for Novell Client deployments and/or setting updates. This technique should work for Vista, Windows 7, and Windows Server 2008.
The Novell Client is required to connect to Netware and OES servers and file systems. Thankfully, Novell understands that most of us have to deploy their Novell Client to a large number of workstations and in turn has created several tools and command line options to make this deployment much easier.
We will basically be creating a Novell Properties file and then calling the setup.exe with the file as a flag. I plan to outline how to create the Novell Properties file and also give a few ways you can deploy the client and the settings using several different techniques. Lets get to it!
Required Software/Settings:
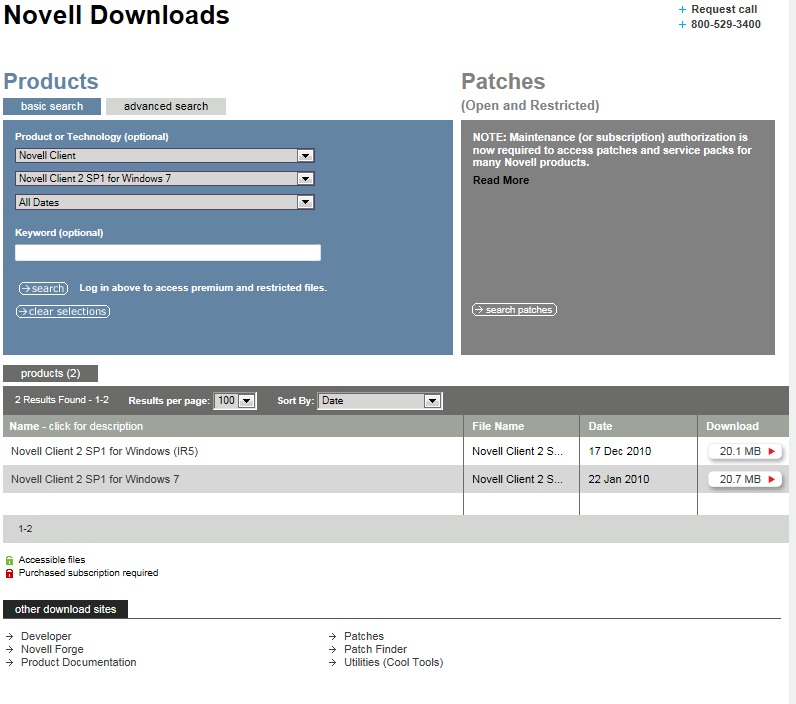
- – Novell Client 2 SP1 (you will need a Novell account to download, located here) installer
- – Novell Client installed on machine making property file (any version of Novell Client)
Guide:
1. Download the Novell Client 2 SP1 for your appropriate OS (Vista, Windows 7 or Server 2008 / 2008 R2)
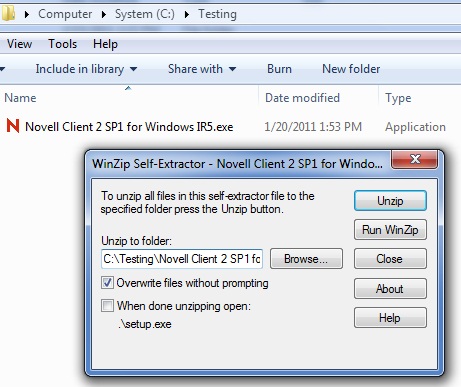
2. Run the .exe to extract the files. Be sure to uncheck the “Run setup.exe after extracting”. I also changed the location to where it extracts the files to C:\Testing\Novell Client 2 SP1 Windows (IR5).
3. Once extracted, go to the C:\Testing\Novell Client 2 SP1 Windows (IR5). In here, go to the admin folder. There should be 2 .exe files here; nicman.exe and nicman64.exe
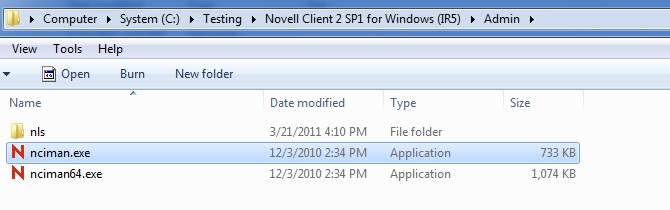
These utilities allow us to create the customized Novell Property files that contain our client settings (ie preferred server, login options, disable/enable features in the client, etc).
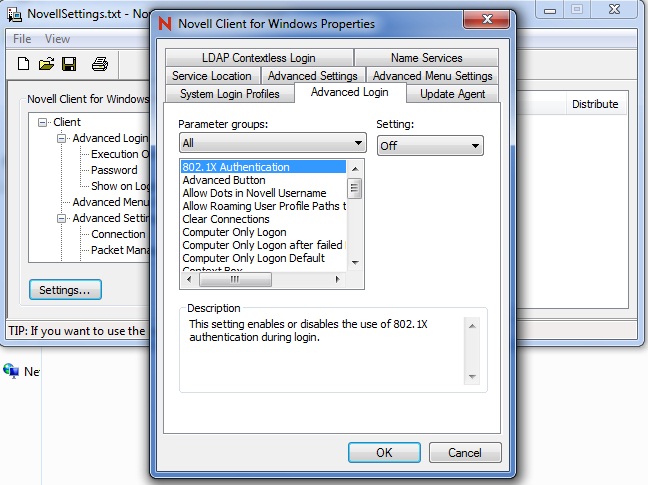
4. Run nicman.exe (for 32bit windows) or nicman64.exe (for 64bit windows). You can then setup the Novell Client settings per your company / network setup. Once you have made all of the changes, go to File > Save and then save file as a text (.txt) file.
5. There are two ways you can deploy the Novell Client and settings. Either via a command line and batch file or you can install using the setup.exe (however we will need to modify the Install.ini file with this method, notes at the end on this). We will focus on the command line / batch file method.
6. Command Line and Batch File Deployment
i. Create the Novell properties text file in the same folder as the setup.exe (ie in our example, C:\Testing\Novell Client 2 SP1 Windows (IR5)\mainoffice.txt)
ii. Create a notepad text file in the same folder as setup.exe and the above file, call it install.txt and then rename it to install.bat.
iii. Right-click on the install.bat and choose Edit. The file will open in Notepad
iv. Add this one line command to the file and then hit Save. (replace the mainoffice.txt w/the file name of your properties file)
setup.exe /NCPF:mainoffice.txt
v. Now copy the contents of the install folder (ie C:\Testing\Novell Client 2 SP1 Windows (IR5)) to a test machine and try running the install.bat to see if it will install your Novell Client w/the settings we provided earlier!
NOTES/TIPS:
– You can further automate the install of the client by modifying the Install.ini file thats in the same folder as the setup.exe and properties file we created (ie C:\Testing\Novell Client 2 SP1 Windows (IR5)\Install.ini ). Items include language, components, versions, etc. Note that if you specify the Properties file in the Install.ini, it will override the one you may call with the command line; setup.exe /NCPF:xxxxx
– Deployment will require the user account running .bat file to have Administrator rights.
– When imaging or creating an image, you can install the Novell client in the image and then later copy the Novell Properties file to the deployed machine and again run setup.exe w/the appropriate properties file. This will just update the settings, very handy if you have multiple networks / subnets and multiple property files.
– You can call the batch file in a Windows Unattended file by using an Run Once / SynchronousCommand command. Here is an example of the command you would add in your unattend.xml file (Again, replace the mainoffice.txt w/the name of your properties file):
<SynchronousCommand wcm:action="add">

<CommandLine>"C:\Testing\Novell Client 2 SP1 for Windows (IR5)\setup.exe" /ncpf:mainoffice.txt</CommandLine>

<Order>1</Order>

</SynchronousCommand>

